Revival of an Old Friend – Part 7 Steering
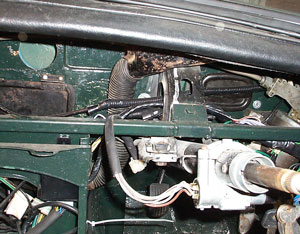
On the face of things there should have been no need for any changes within the steering as it was already converted to the long pinion shaft V8 rack and shorter upper column. However the change of the driver’s side bulkhead panels also provided the later style, three bolt type, lower steering column mounting, which in turn would allow/demand the use of a later (rubber bumper) standard upper safety collapsible style column. Whilst there was no doubt in my mind of the competence of the professional shortening, strengthening and re-splining process applied to the modified column, travelling at over 140mph along the main Bruntingthorpe Test track runway allows a remarkably large period of time for the mind to drift into the ‘what if’ scenarios!! The greater comfort factor with a tested and approved steering column was simply more attractive.
Early solid column MGB body fitted with the later rubber bumper collapsible column
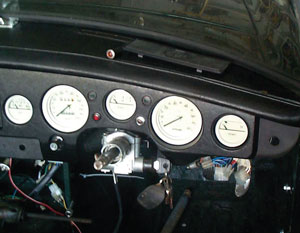
Post September 1976 dash and customised clocks fitted, note clearance around the steering column
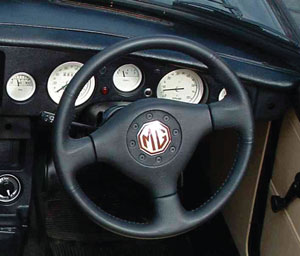
RV8 steering wheel offers a thick leather rim great for moving heavier non power steered MGB, and looks right.
For this reason that freebie late MGB bodyshell (part 2) donated further panels with the internal scuttle brace, together with the integral part of the upper steering column mount being transplanted. The remaining non-transferable body mounting positions were measured so new captive nuts could be accurately fitted into my 1968 shell, not all of which were easy to fit, but in view of the safety aspects connected with steering, it was followed through completely and comprehensively.
The choice of the late collapsible design of the steering column immediately meant that the original 1968 chrome bumper cars dash is physically unsuitable because the gap between the 4” diameter speedo and tacho is too small for the collapsible column. This is why all V8s and all later cars moved to the smaller 80mm dials with a wider space for the column. This dictated the need for me to change the dash to at least the chrome bumper V8 style, but as I quite like the post 1976 style, if not the materials, I went for this. Having made this decision it is odd how things pan out, as I hadn’t even started to look out for a late dash when a last minute visit to a Spring Bank Holiday car boot sale in 1995, saw me trip over a late MGB dash complete with all gauges, switches, in fact everything for £50. With bartering that came down to £40, and whilst awkward to carry in the crowds, it was a prize that justified the effort.
Fitting the steering on the later cars may be theoretically straight forward, but alignment is critical to correct steering operation. As the column mountings are fixed to the body, there are no adjustments so you have to ensure they are in the correct place. Measurement is the primary route to getting this right, but the bottom line is that you need to be able to confirm the steering column and the steering rack pinion shaft align as perfectly as they can and there is a special tool to assist in that assessment.
This is nothing more than a pair of cones that fit over the ends of the steering column and the pinion shaft and the idea is that correct alignment comes when the pointed ends of each cone are point-to-point touching. I made up some crude but effective cone from card and sticky tape to check this alignment. Of course the rack has to be fitted into its correct position and this can be a slight problem if you do not have the front crossmember fitted, however, dropping this back into place for this check is a simple enough job, as long as the crossmember is not away being powder coated, but hey, what is another couple of weeks delay in a project like this?
The cross member was also being changed as I stayed with the original chrome bumper one when first going to V8, now though I moved to a rubber bumper one to give more engine clearance. This is because the original conversion type engine mountings welded to the chassis, were being changed to the factory V8/Rubber Bumper type that would lower the engine. This illustrates how one change has a domino effect on many other things although here the original V8 steering rack only needed minor shimming to get accurate alignment.
Brakes
When I originally converted to V8 I also changed the brakes to match the standard MG V8 spec with the thicker V8 discs, V8 calipers and pads, with a bigger surface area. As mentioned in the introductory episode my change from wire wheels to alloys created such a massive, and frankly frightening, drop in brake performance, I decided that to reinstate the previous superb braking would require a pretty substantial upgrade of the spec and not just a pad change. For this reason I decided to create a vented front disc set up with different calipers to suit.
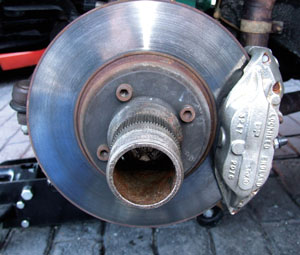
To cope with around 250bhp Peugeot 505 Turbo vented front discs and Princess 4 pot calipers are used.
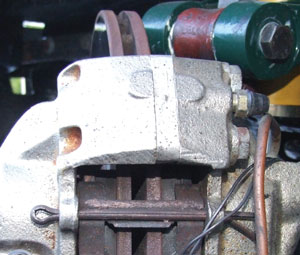
A side view of the discs, caliper and pads. The latter are Ambassador ones which come with wear sensors that await connection to a dash-warning lamp
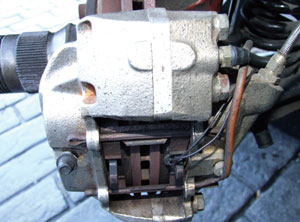
This image shows how the twin circuit caliper is piped up with just a single feed line, bridging the primary side bleed nipple and the secondary circuit inlet feed.
The chosen parts I used were rebuilt and spaced Austin Princess/Ambassador four piston (4 pots) calipers, gripping Peugeot 505 Turbo discs, both of which fit inside my 14” diameter wheels, and fed from a late (1978 to 1980) MGB dual circuit master cylinder.
The Peugeot discs have dimensions very close to the MGB, with venting, but the centre bolt spacing is different to the MGB. Having this accurately re-drilled did not present any difficulty and has been very effective in use. The new discs quite simply fit in exactly the same way as the original discs. (This choice of disc being at the suggestion of very keen Swiss MG enthusiasts who interestingly used them with Renault Fuego calipers to improve their MG brakes.)
Not wishing to become involved with over complicated descriptions on caliper choice, the decision was based on finding a caliper that had a total piston surface area close to that of the original MG caliper, this would ensure that the pedal travel would be as close to the normal MG feel as possible. The basic comparison shows the surface area for all four pistons of the Princess caliper (each @ 38mm diameter) compares closely to the total surface area of the original MG calipers two pistons (each @ 54mm diameter).
In the original Austin role these calipers fit over a half inch wide solid disc so could have been simply bolted in place of the original V8 calipers to provide a bigger pad surface area (approx 15% bigger) together with a larger clamping area that would have provided an improvement. However, to fit over the 20mm wide vented discs requires the caliper halves to be spaced. This is not such a Heath Robinson approach as may first be seen, as this is exactly what is done with calipers in production applications for wider discs. Interestingly this configuration preceded the launch of RV8, yet the calipers on the RV8 are essentially the same as the Princess, but spaced in the same way. I must also add that the calipers are the same for both Austin models, it is just the pads that are different as the Ambassador has wear sensors and the Princess doesn’t.
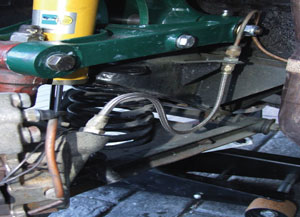
A steel braided brake hose provides additional safety from damage, but also a firmer pedal
The Princess caliper has the same mounting hole centres as the original MGB caliper, but they are larger (metric) diameter! The solution being a shouldered bolt, and such an off the shelf item exists from the very late Triumph GT6 or TR6 models. The original MGB backplate dust covers are not refitted, which provides clearance and also greater brake cooling, a common practice for today’s cars.
One final caliper problem remained in that the threads used in these calipers are metric and the MG system is imperial. Obviously a number of options stare you in the face here but I chose to keep the cars main fluid pipes standard and off the shelf items and provide the conversion by obtaining stainless steel braided hoses that had a metric end to screw into the caliper and an imperial end to accept the brake pipe union.
One other issue with the Princess/Ambassador relates to the hydraulic feeds as there are two per caliper. I modified my calipers to a single feed by using the AP Racing approach of external pipes diverting fluid from the bleed aperture of the one circuit to the inlet of the second, still leaving two bleed points. The Austin’s had a quite advanced split braking system that always ensured that in the event of either brake circuits failing the worst possibility would see braking maintained at the front, where the greatest braking effort is done, more so on a front wheel drive car. This specific fluid split system is known as an H I split braking system. Despite these obvious system benefits that I could have incorporated along with the updating to a dual circuit system, I decided to just concentrate on updating to just the new (to my car) front to rear dual circuit braking system that mimics the RV8 and very late MGB.
Fitting a late dual circuit master cylinder and integral direct acting servo is not a bolt in job for pre 1978 MGBs as the aperture in the cars bulkhead is a different shape with different fixings. Not an overly difficult job to convert an older B to accept the later pedal box assembly and cylinders etc, but with the early planning for this move catered from by the changing of the inner bulkhead panels as covered in part 2, the fitting of the assembly was indeed a bolt in one.
In use the brakes have their reserve back again and whilst I haven’t tried to find a limit I know that there is more than enough stopping power even though there is more performance than before because of the exhaust and the injection system changes which I will cover next.
Roger Parker