Revival RV8 Style exhausts
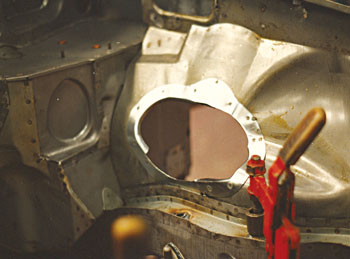
Whilst I had played around with various holes through the inner wings of the car during the 1970s it was not until the RV8 arrived that holes through the inner wings became widely acceptable. Even before RV8, previous experience with inner wing holes for cold air feed for a Weber carb showed how much benefit came from the lower temperature air so it struck me that the holes for the exhausts could provide a clear opportunity to remove considerable engine bay heat, always a desirable thing with any V8 engined MGB.
This was reinforced by the knowledge that when the car is being driven it is usual to find the air pressure inside the engine bay is higher than that found under the front wings. Thus a positive airflow from engine bay to underwing area would occur when the car was moving beyond urban speeds removing more underbonnet heat. Then there is the additional bonus of moving the right hand exhaust downpipe away from the steering and starter motor, noting that heat into the starter has always been a problem that reduces efficiency and shortens starter life on V8s. There are other longer-term additional ‘potential’ benefits in that the exhaust heat and the flow of hot air from the engine bay will help to dry the underwing area far quicker than is seen normally possibly reducing corrosion.
However, there are potential pitfalls, and one is using RV8 style exhausts with the now quite common plastic under wing shields means that you have to modify these shields or risk the exhaust heat melting them. Then the run of brake pipes has to be carefully considered, but the RV8 gives credibility to these mods.
Left side of new RV8 engine bay showing the exhaust hole in inner wing

Left side of new RV8 engine bay showing relative position of exhaust hole and engine mountings which provided the base dimensional data for using on the 1968 MGB body
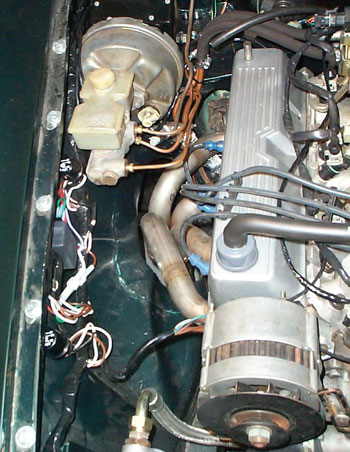
Right side of the almost complete engine bay showing the exhaust through the inner wing and the late brake master cylinder and servo
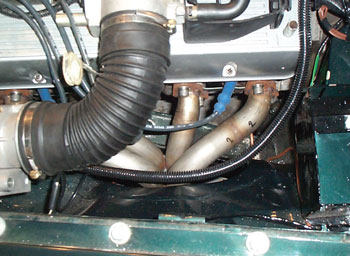
Left side of the engine bay from overhead giving a better image of the exhaust through the inner wing
Small but significant points
Mentioning the under wing shields raises yet another long-term observation which I must mention. Between 1973, when I bought the car, and 1980 when I did the major body rebuild, I had to replace the headlamp steel backing bowls once, and the indicator/side lamp back plate rusted out and needed to be replaced no fewer than three times, not that unusual or unexpected for the period. When I put the car back on the road in 1981 following the major rebuild, I had fitted more new lighting parts.
I did paint the steel headlamp bowls in Hammerite to provide much better long term protection than the basic brown undercoat. I also fitted the then relatively new under wing plastic mud shields. These were following the lead taken by many vehicle manufacturers to add more effective weather shielding under their wheel arches, especially at the front, which had a significant effect in reducing the then appallingly short life span of cars’ body work from premature rusting.
It is more than interesting to note that today in 2007 I still have the same light units fitted to the car as went on in 1980, and whilst a long period was spent off the road, there was still over twice the time on the road than the period when I went through three sets of lights. What is more there is no corrosion on any of the steel in these light units nor damage to the Hammerite painted surfaces, so it’s reasonable to expect perhaps another twenty plus years of trouble free service.
Another point to note is that the shields also prevented any dirt or water from being blasted past the side mud shields and into the wing void next to the footwells. In addition the top of the inner wing reinforcements remained completely clean and rust free, showing how effective the under wing shields are at preventing the conditions that promotes premature rusting. My car needed no repairs and the only observation was that the Waxoyl coating had become covered in dust.
However, not everything was as good, as I found I’d made a slight mistake in 1980 when welding the nearside rear wheelarch. I inadvertently left a pinhole in the driver’s side rear wheel arch, which over the years had allowed water that was thrown up from the tyre to be blasted through this minute hole, barely visible to the eye, to collect between the rear of the sill and the front lower section of the rear wing. I became aware of this only when characteristic small paint blisters appeared on the sill, which when popped released water, and when cleaned back developed into small holes. Cleaning off the paint in that area revealed several small black patches with centre pinholes in the lower wing, most of which had not yet developed to visible external blisters. Nevertheless, these small pinholes got worse the deeper you delved. This is of course where the sill and rear wing panels are close together so what was pin holing the outer wing also did the same to the adjoining sill section.
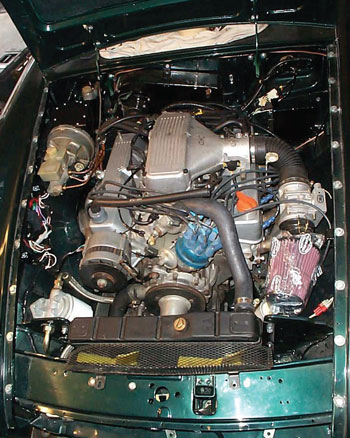
Engine bay almost fully filled
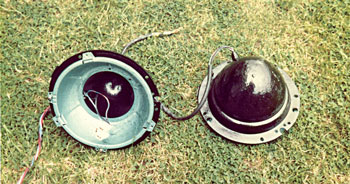
New headlamp bowls and backing in 1981 after painting with Hammerite paint and in much the same condition 26 years later due to the use of front under wing shields
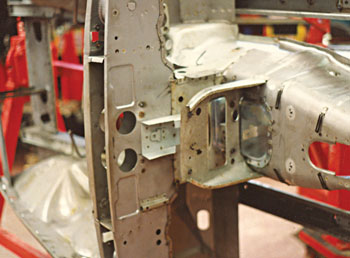
Fresh air vents on the fascia need a cold air supply and essentially this RV8 body section image shows the two holes into the airbox section quite clearly above the actual tunnel
Not that this was a major issue to sort out, as I used the common lower rear wing repair section to replace the damaged wing section, once the small affected area of the sill was cut out and a new section seam welded in. Interestingly before replacing the outer wing section there was a grandstand view of the rear of the pin hole with a clear rust stain running down the inside of the wheelarch as clear as an Alpine Waterfall. This pinhole was permanently dealt with by a spot of weld, before a fresh brushing of Waxoyl.
Face level fresh air vents
Having committed to the later post 1976 MGB dash early on in the process, questions of what to do with the standard fresh air vents arose, use them as air vents of something else? These vents were not fitted prior to 1972 model year MGBs and so there wasn’t any provision for the air feed path within my older bodyshell. However, the availability of that donor 1979 shell once again provided a simple solution of cutting out the section where the two holes are punched through the cars bulkhead into the heater air intake cavity. Fitting this section into my earlier shell was by comparison to the other work really quite simple to achieve, if a little awkward for access, even when the body is stripped down.
To be continued next month
Roger Parker