Nitrous Oxide Injected BGT V8 part 2
It’s the 30th November, my birthday and I’ve decided to treat myself to a day off work, stripping the new (second hand) Rover V8 engine I’d purchased on eBay in readiness for a rebuild.
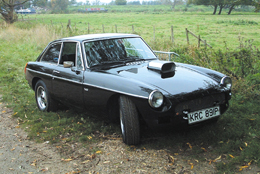
Perry’s Nitrous Oxide Injected BGT V8
There is nothing wrong with the present engine, but as I’ve pushed her quite hard through the 2005 season at the track, I thought I had better prepare another for the new gearbox set up.
The V8 engine had been jointly owned by two chaps who had planned to install it in a hotrod; a Ford Popular I think. They said they had sent the engine off for a rebuild, but sometime after getting it back they decided to shelve the project.
The downside and main gamble was that the engine had been stored for several years. I did pop over to have a look at it before purchase and it appeared to be OK. My biggest worry was rust in the bores. The seller told me that it had been regularly sprayed with WD40. I deliberated for a while but then thought that the engine was going to cost less than two decent tyres, so what the hell. He also threw in a starter motor, alternator and two V8 inlet manifolds with SU carbs fitted to clinch the deal.
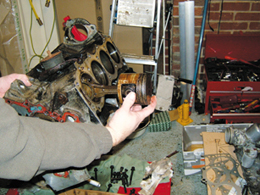
Locking the engine onto the stand and tried to turn the crank pulley with no success. Even my trusty 24” Stilsons couldn’t move anything. Oh well, time to start and begin pulling bits off.
First I removed the sump to find just a smear of oil and the solidified remains of assembly lube (or so I thought) hanging as solid droplets from the crank and big end journals. Actually it was more like soft candle wax than oil. There was also a small, but worrying amount of emulsified oil/water droplets hanging around the sump area, not good.
Undeterred I removed the oil suction strainer and started to dose everything with 3 in 1 oil.
Back to the top end, I removed the tatty rocker covers and started to remove the head bolts on the left bank, 1,2,3,5, where’s number 4? Missing, but I carried on regardless hoping that it was just an oversight by the builder. All the bolts came undone with a crisp snap until I got to number 10, which just rotated freely. I thought it may have been another oversight and decided to attempt to tighten it, but no such luck. It turned with no resistance.
By this time I was starting to get a little peeved. So I quickly removed the heads and placed them on the floor so I could inspect the bores. That’s when I realised I should have listened to my instincts about the engine being stored with no spark plugs fitted.
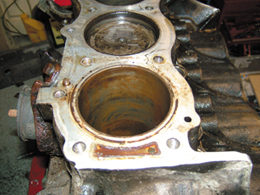
I peered into the bores to find that there was surface rust in every pot above the piston line. I revolved it upside down and looked in with a torch to see that below the pistons, the bores were reasonable as far as I could see. It was now obvious that some of the piston rings may have rusted onto the liners. So I set to work with a good soaking of WD40 and a little gentle tapping of the tops of the pistons.
But, still no movement. I stripped out the push rods and followers, which didn’t look quite the same as the ones I put in the other engine last year.
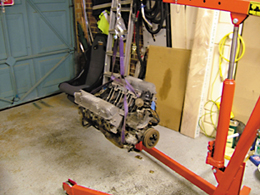
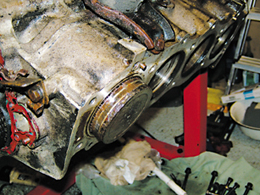
The engine as it arrived
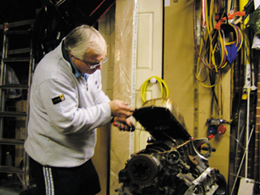
Lifting off the sump
I sprayed everything with WD40 inside and out and went for a cuppa.
An hour later I returned, thinking that I was going to give the crank a little twist and everything would be OK. Yeah, right.
So I set to work with a little wet and dry to gently clean the bores as best I could, which didn’t take very long at all. My confidence was building, I tapped the crank with an aluminium hammer and it moved a little, then a little more, then it came free.
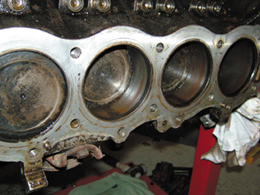
Rust in the bores
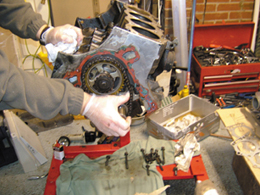
The cam chain assembly was found to be quite loose
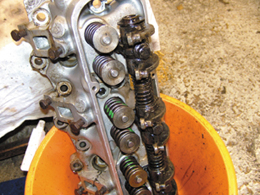
Rebuilt heads with old rocker gear
With the big socket on the crank I rocked it back and forth. Then started a complete rotation and at first it was turning quite smoothly (apart from the gritty rasp from the bores) until it stopped dead.
Back the other way to get all the pistons down in turn so I could clean the bores and wash with yet more WD40. After an hour she was turning nicely apart from the point where she locked up whichever way I turned it. That’s when I had a really good look into the bores and noticed an odd bit of pitting in number 2 cylinder. The liner looks suspiciously like it may be pin holed to the waterway.
After all, standing for several years with a little condensation now and again can wreak havoc, as we all know. All down to not fitting some spare spark plugs.
I gave the bores a good wash with WD40 and some more rubbing with wet and dry until I couldn’t feel any raised particles, by this time I wasn’t too worried about going over the top with the wet and dry paper. I got all the bores smooth above the pistons, gave it a liberal squirt of 20/50 and started the turning again. She spins quite smoothly until I reach this high spot again. I’m now beginning to think that one of the liners may have become distorted somehow. I throw the breaker bar on the floor, and wander off to get another cuppa, while I think of my next course of action, which quite frankly at this point, was to throw this one away, and pull out the factory block for reworking. Don’t give up so easy, I told myself. Push on; let’s see what this thing is hiding. I started to remove the bearing caps and found that it had all new big end bearings which appeared to be in tip top condition to start with, along with new main bearings, thrust washers and rear oil seal. I was determined to find the source of the sticky point when trying to turn it over. Number 1 piston I removed without any difficulty, but as I removed the number 2 piston big end cap I spotted a problem, a noticeable scuff on the bearing shell. This could be part of the problem. Then I noticed the oil holes in the crank journal were blocked with what appeared to be grease. There is no way a professional would have smeared grease everywhere like this.
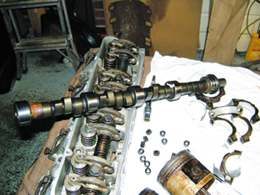
Although suffering with minor surface rust the camshaft was in fact new
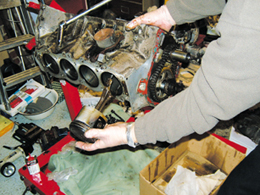
Number 1 piston was removed without any difficulty
Then I tried to remove number 2 piston; it was not going to budge. Eventually, the gentle tapping turned into full blown whacking with the mallet and a drift, the piston started to move, but not before I had broken a piece off.
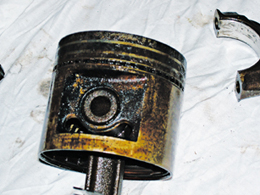
Moisture in this bore had started a slow process of corrosion which over the years had managed to rust the new rings tightly into the piston grooves
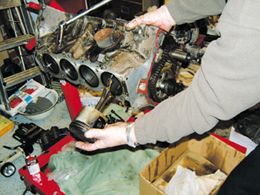
Dirt contamination damage
Now I was past the point of no return, where’s the big hammer?
The piston broke free and popped out about an inch, that’s when I realised this block may be dead. There had obviously been moisture in the bore when it was assembled. This had started a slow process of corrosion over the years that had managed to rust the new rings tightly into the piston grooves and semi weld the whole lot into the bore. The number two big end bearing shells were also scuffed due to dirt in the shells, from an unclean assembly.
Then I tried to run another piston into the number 2 liner, but it was not having any of it. This bore appears to have somehow distorted.
After a good night’s sleep, I woke refreshed and set off to work, but all day long this engine was in the back of my mind. I was getting frustrated with the waste of money. I managed to get home by 6pm and went straight into the garage, mumbling something to Gill about needing to find out what this problem was. As I closed the garage door I heard her say something along the lines of “hello love, had a good day, do you want a cuppa?” A minute later the cuppa was brought in with a smile as I was gowning up and slipping into my latex (gloves that is) ready to attack this thing.
Time to finish this voyage of discovery, and at least tot up the total losses on the project so far.
I checked the cam chain assembly to find it was quite loose, so I removed the chain and sprockets to get to the camshaft. This came out easily, and I could tell straight away that, although suffering with minor surface rust, it was in fact new. I measured it against an old standard V8 cam and found that the lobes were 2mm higher, so as the guy said, it does have a fast cam fitted.
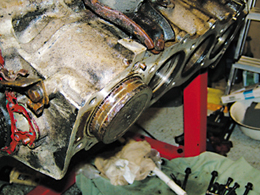
Piston rings corroded
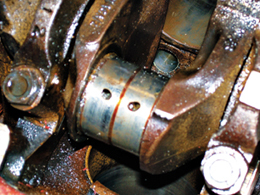
Piston finally removed
This engine was becoming more of a puzzle by the hour. Why would someone want to fit a new camshaft and re-fit the old chain assembly?
I was beginning to kick myself for not acknowledging my own misgivings in the first place. But sometimes I get carried away seeing the end result in my mind and miss the obvious. All I could see was a gleaming lump of power, but when I removed my rose tinted spectacles, what I was looking at was a cruddy lump of scrap metal. It was now getting on into the evening, and the tea turned into a bottle of beer while I took a seat on my little stool.
I contemplated my option of rebuilding the factory block as a race engine. After all, there was nothing really wrong with it apart from a puff of blue smoke now and again, a badly stretched cam chain and a little big end rumble. I started to survey the fruits of my two days labour, what a flipping mess.
This was when I noticed something shining at me from under the rags I had laid down to catch the oil etc. One of the cylinder heads I previously removed but had not inspected seemed to have quite a clean spot on the underside. I pulled the rags away and couldn’t believe what I was seeing. Shiny, brand new valves staring up at me.
So I removed all the rags and pulled the heads out from under the engine cradle. There was masking tape over the exhaust ports, so dirty I hadn’t noticed it before. I peeled this off and looked inside to find beautifully clean ports, with nice shiny valve stems and guides lurking inside. I flipped the heads over and realised that, although an old rocker assembly had been re-fitted, the valves, guides and springs were all new and covered in a dusty layer of thick oil.
Corrosion in the bores
New valves in reconditioned head
I quickly got to rubbing and wiping to reveal two pristine 3.5 litre cylinder heads, which have had all new valves and guides fitted, plus the valves are the larger size that are on my spare 4.6 heads. The inlet ports have been smoothed and polished, although, they are not quite as big as the 4.6 ports. I wiped the valve springs and found they too were new, along with the spring caps and collets.
I couldn’t believe what I was seeing, I know the guy said it had been off for a rebuild, but when I saw how dirty the actual engine was, I didn’t think that it had been very extensive. I was now asking myself just how far this “rebuild” had gone.
At least I could heave a sigh of relief when I realised my £100 had bought me a really good pair of heads, even if the block was scrap. I then started to put this puzzle together. The previous owner had probably sent the heads to a professional for refurbishment and upgrade. The block could not have been re-bored as the carbon ring at the top of the liners was still intact. He must have just fitted new rings and ends to the old components, hoping it would be OK.
This makes more sense, as the people he said did the rebuild (Real Steel) would never have sent an assembled block back with a head bolt missing and certainly not with a stripped thread.
Pushrod and cam follower
I decided to pop in and see the guys at Real Steel for a chat. After I explained the story and showed them the push rods and lifters. They matched them up with their Rover spares, and identified the rods as heavy-duty standard type and the lifters as the Rhoades hi rev model. These are the type that bleed down under 3500 rpm and sound a bit noisy but give better low rev efficiency, but go quiet when pumped up to above 3500 rpm to give maximum lift. This means that if I can identify the type of camshaft I have, I may be able to run higher peak rpm when racing.
On the way home I started to smile to myself about my eBay disaster, which was turning out to be a little gold mine.
The head work at today’s prices is over £500, Rhoades lifters £85, Fast cam £150, plus a load of saleable items like rings and bearings. So all in all I’m quite pleased with the way my birthday treat worked out.
I’m now sitting back on my little stool in the garage, staring longingly at the greasy lump under the workbench that has served this car well for the last 30 years.
I think it’s time for the Phoenix to rise from the ashes. How nice it would be if this car could power to victory at the track, using the original 30 year-old block that it came from Abingdon with. I’m starting to see things again. It must be time to remove those spectacles for the time being.
As Christmas was approaching I wouldn’t be able to get any real work done on the block before the 25th, but was able to take the old block for chemical cleaning and a re-bore, or I may treat her to brand new liners for Christmas.
So in the meantime, I am going to remove the doors, seats, carpets, boot shelf and rear seat deck. The scrap block will still serve a very useful purpose while the original is away for reworking. I will use it to marry up to the new gearbox for trial fitting in the car.
That’s when I will start to see just how much I have bitten off with this strange conversion.
Perry Stephenson