Through Perspex Darkly – MG Midget Sidescreens
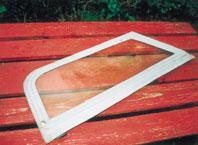
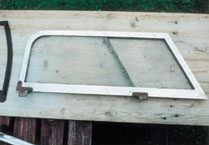
Back in 1963 you could still buy a brand new MG Midget fitted with clip on sidescreens. These were a direct evolution from the type of sidescreen fitted to the Austin-Healey Sprite MK 1. First they were made from a transparent Vybak film with fabric edges mounted on a thin metal frame. Then the Vybak sidescreens were replaced by a new design consisting of a much more rigid aluminium frame with Perspex window panels. Originally on the Sprite only the back panels would slide. But by the time they were fitted to the Midget both Perspex windows would slide to allow you to make hand signals or just to provide a little extra ventilation.
My first MG was a 1963 Midget with a 1098cc engine, front disc brakes and sidescreens. When I bought it (over 30 years ago) the little MG was already 9 years old and those original sidescreens were rather shabby, difficult to see through and inclined to rattle at speed. This was not a major problem for a hardy young man, as at that time I usually drove the Midget with the hood off and the sidescreens removed. I only fitted them on wet or very cold days.
|
|
During the time I owned the Midget I made various attempts to dismantle the screens with the intention of renewing the Perspex and the felt channel, in order to improve side visibility and stop that irritating rattle. However I just couldn’t work out how to get the wretched things apart. So I made enquiries about buying a replacement set and received a quote from University Motors for a larger amount than I had paid for the entire car.
A visit to a local coach trimmer, a Mr Gentle who operated at Quayside in Cambridge (sadly his premises are now long gone and have been replaced by a ‘trendy wine bar’) resulted in his sage advice that the windows could be removed by springing them out. At the time this seemed an almost impossible task and I was reluctant to risk cracking the Perspex, so I gave up the idea of reconditioning the sidescreens and settled for jamming a piece of paper between the sliding windows to stop them rattling. Eventually I replaced the ’63 Midget and with better example, a ’65 model in excellent condition and with wind up windows.
|
|
So it was not until last year that the problem of Midget sidescreens returned when my brother in law, was completing the rebuild on his 1963 Midget. Mike’s Midget had very shabby sidescreens and we discussed possible ways of restoring them, we even tried to locate a replacement set. Eventually we decided to order new felt, new rubbers and new chrome fixings and attempt to refurbish the screens ourselves.
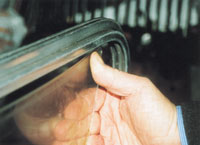
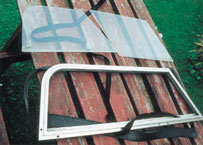
We calculated that we had nothing to lose by attempting to dismantle the screens by bending the Perspex, if we broke it then we then we would then be forced to make up some new ones. First, we removed the rubber surround and then clamped the aluminium frame firmly in a bench mounted vice. Taking a strong grip on the perspex and adopting a ruthless approach enabled us to bend the window sufficiently for it to be removed. Having the frame securely clamped in a vice is absolutely essential for the success of this operation.
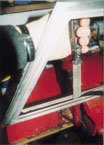
|
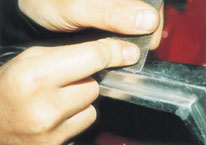
|
With the Perspex out it is possible to thoroughly clean and polish the surface of the aluminium frame and restore its appearance. Although the final result was not ‘like new’ we decided it would be smart enough to serve on a day to day basis.
It was then possible to polish the Perspex windows prior to re-fitting which improved both their appearance and transparency.
With the Perspex removed, the old felt channel, which by this time had become very tattered and sparse, can be replaced. The new replacement channel is very thick in contrast to the original and it comes in a flat strip and therefore needs to be pressed into the frame, then shaped and finally cut to length.
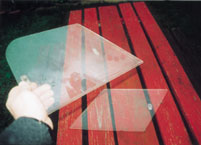
|
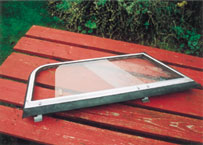
|
The first difficulty is to get the felt into the channel. I folded it in half and squeezed it in a vice to make it take on the shape of the inside of the channel. Then of course, once inserted it closed completely and would not allow the re-insertion of the Perspex. It needed ‘breaking-in’ to achieve the right channel-like profile. I did this by inserting a short length of an old Perspex number plate and by sliding it about, up and down, managed to re-form the desired shape. This process took ages but eventually it was possible to re-insert the perspex window. Again with the frame securely clamped in a bench mounted vice.
As an extra refurbishing touch I removed the corroded sidescreen to door clamps and went over them with a wire brush on an angle grinder. A quick coat of primer and aluminium silver restored their appearance. The clamps were then re-fitted using new chrome headed bolts.
Finally the moulded outer rubber seal can be replaced; this is best done when the rubber is warm and pliable. This is the most straightforward part of the operation and the rubber can be slotted in the aluminium frame fairly easily.
So at last, the great Midget sidescreen problem was finally resolved, albeit thirty years later on.
Richard Ladds