MGF Boot Leak
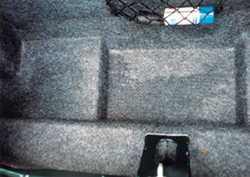
Boot Leak
We have been running the BRG MGF, P281 DDF for a few weeks now and have experienced a number of small problems that are known to afflict some examples of this modern MG sports car.
The first task we decided to tackle was the water ingress into the boot. With the ‘wonderful’ summer that we have had this year it was felt that making sure everything was kept dry would be important. There is nothing worse than arriving at your destination to find that your bags are soggy and the boot is damp.
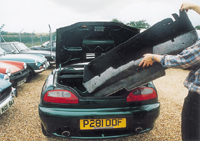
The first course of action is to remove the boot carpet. This is a relatively easy task with three simple push fit fasteners against the fire wall of the boot and a firm hand is needed to pull some of the carpet away from the bonnet release handle. Once this is all released then the whole moulded carpet section and soundproofing for the boot can be removed and stored in a warm area to dry out.
With the carpet removed the boot space can be wiped dry, the lid shut and then you can sit back and wait for it to rain. If patience is not your strong point then a hose pipe can be used to simulate a typical ‘summer’s day’. Once your prolonged heavy shower has finished, the boot lid can be opened and then a thorough investigation for water ingress can be made.
 |
 |
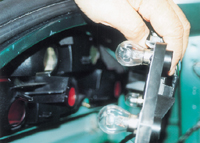 |
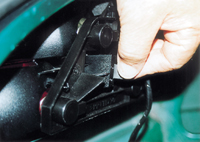
| Unfasten the push fit plastic studs and the boot carpet liner can be removed as a unit | The rear lamp bulb unit is release by pinching the plastic retaining clips | Bulb assembly can now be withdrawn |
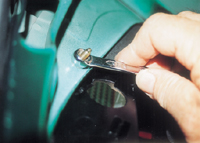 |
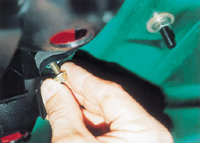 |
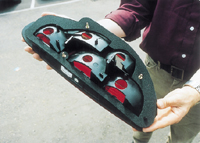 |
| Undo the three retaining bolts for the rear lamp cluster | Withdraw the bolts | Remove the old seal and replace with a new seal taking care to locate it exactly before bolting lens unit back into place |
In our case a small puddle was found in the nearside rear well. On further investigation we found that the source of the water was from the rear light cluster. The rubber seal was behaving like a sponge and when full to capacity acted as a funnel directing water straight into the boot. A look at the offside rear light seal revealed that it was also wet but not yet letting water into the boot. However, a new seal for each rear light was ordered.
Removal of the rear lamp unit is very straightforward. Release the board that holds all of the bulbs by pressing together the two plastic tabs. Then, using an 8mm ring spanner or socket, remove the three retaining nuts that hold the lens assembly to the car. The unit can now be gently pulled away. You will hear the seal release as you do this.
The old seal can now be pulled off of the back of the lens unit and the new one put in place. Make sure that you align the rubber seal carefully, particularly along the bottom where you need to push the locating ‘tabs’ into the body of the lens. The whole seal and lens unit can now be replaced back onto the car and the securing nuts tightened.
Be careful while doing this that you do not over tighten the nuts and cause damage to the lens unit. Reconnect the bulb board to the lens unit and listen for the ‘click’ as the clips fasten. Finally check that all of the lights work. We did not put the boot carpet back in straight away, as we wanted to check that the seals did not leak in the next downpour. Once happy that all is watertight the moulded carpet can be replaced and refastened.