MGA Fuel Pump Renewal
Fuel for Thought
MGA Fuel System & Pump
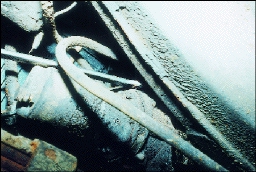
There are a number of variations on the fuel pump specified for the MGA so I would advise that, before ordering a replacement, you take a look at what you have fitted to your particular model. Note if the fuel pipes have banjo unions or screwed elbows and also if the car is negative or positive earth. Armed with this information you should be sure of obtaining the correct pump.
Take great care to ensure that you keep all possible sources of ignition away from the area you are working in. As you are all aware, petrol fumes are explosive, so be careful, just a single spark could cause you great problems, so avoid any trailing electrical inspection lamp leads and always be sure to disconnect batteries before begining any dismantling work.
 If possible try and run the car as low as possible on fuel before fitting the pump. This will allow you to jack one side of the car up in order to take the remaining fuel to the other side of the petrol tank. Which will help prevent too much petrol running down your arm and up your sleeve when you remove the fuel pipes, which is both unpleasant and dangerous.
Removal
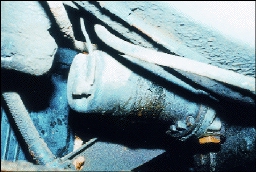
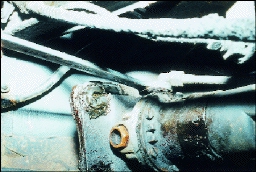
Disconnect the negative terminal on the battery, jack the car up on the driver’s side and secure on axle stands. Remove the rear road wheel and have a look underneath to locate the pump. As mentioned before there are a number of variations of pumps, on this occasion the pump being changed is on a negative earth car with screw-on unions rather than banjo fittings.
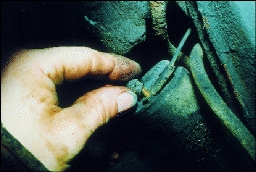
 The first task is to disconnect the pump’s electrical leads, both the live and earth. The live feed which is to the rear of the pump disconnects by unscrewing the knurled nut, while the earth lead may have a number of options. This will mean either pulling off a spade terminal or when the pump has been removed from the mounting, unscrewing a tag on the top of the pump body.
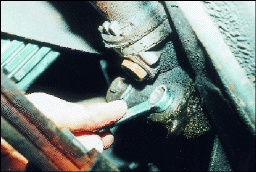
Once the electrical leads are disconnected the fuel unions can be loosened. It is very difficult to get a spanner up in the space available to undo the unions, but persevere and you will finally be rewarded with the pinch being taken off. Have a metal container under the pump at this stage as a small amount of fuel will be released from the pump. If you cannot crack the seal on the unions then you will have to carry out the next procedure first.
Undo the two nuts and bolts, with a 7 /16th ring spanner that holds the pump to the bracket on the chassis. These will allow the pump to be gently lowered to allow better access. If it was possible to remove the unions, the pump will now lift away, however, if not then be very careful not to crack or strain the metal fuel pipes as the pump is allowed to drop slightly. You should now be able to undo the unions and remove the pump from under the car.
 |
 |
 Changing the Parts
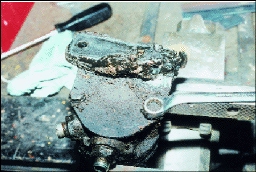
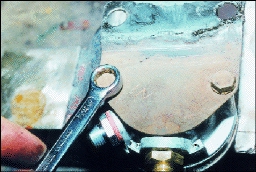
With the pump out of the car you can transfer the proceedings to the more comfortable surroundings of a workbench. Place the old pump in a vice and remove the mounting plate. Mark up on the plate the position of the inlet union to ensure that it gets fitted back in the correct place.
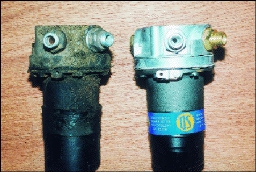
Place the new and old pump side by side and compare all the dimensions including the inlet/outlet unions and fixing threads. Once you are happy that the replacement pump is the same as the old unit, replace the mounting plate onto the new pump.
 |
 |
Refitting of Pump
With the mounting plate changed over from the old unit, the pump is now ready to be fitted back to the car. Remove all the protective plastic caps from the pump unions and offer the fuel lines up to the pump. It is best to start the unions on their threads while the pump is not attached to the car. This will prevent the possiblity of cross threading the unions. When both inlet and outlet pipes are connected then tighten them as much as possible, again taking care not to fracture any pipe by straining it while the pump is not attached to the chassis mounting bracket. With the pipes tight refit the pump properly on to the chassis bracket. Now that the pump is securely fixed try and give one more nip on the pipe unions. It is essential that these are really tight to form a leak free join.
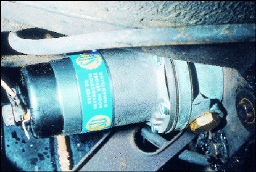 The electrical earth and feed leads can now be attached. Clear all your tools out of the way and make sure there are no traces of fuel nearby producing vapour that could be ignited. Once you are confident the area is safe then re connect the battery earth lead.
Switch on the ignition a listen for the sound of the pump ticking away. If it does not, then try giving it a gentle knock and it should burst into life. If it does not the first port of call is to check that you have power to the pump. Once it has started and reached pressure it will stop ticking. Now check that you have no fuel leaks around the unions. If there appears to be a slight weep then try turning the union by another flat of the nut this should be enough to stop the leak.
Finally replace the road wheel place back onto its road wheels and take the car up the road for a test drive.
Tell Tale Signs of Fuel System Leaks
The most obvious sign of a fuel leak is often ignored, but do you find that we you open the garage door and you can smell a stale petrol aroma? If the answer is yes then read on.
Fibre Washers
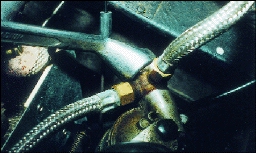
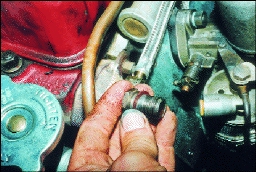
Another potential problem area often overlooked, is the condition of the fibre washers that seal the joint between the banjo fuel union and the carburettor inlet. These washers will deteriorate over the years but are seldom replaced. They often start to weep, sometimes giving tell tale signs, such as a dark damp stain on the carburettor body.
Replacement is simple. Using a ring spanner undo the large union nut, taking care not to spill too much petrol. Remove the nut from the carburettor and banjo union, taking note that there is a fibre washer on both sides of the banjo union. Place new washers either side of the banjo and refit using the union nut.
Repeat the same operation for the other carburettor and then check that both nuts are tight. Finally switch the ignition on, allow the fuel pump to pressurize the system and check for any leaks from the unions. If there are any leaks then, as with the fuel pump, give the nut another slight turn to tighten it further.
 |
 |
Fuel Sender Unit
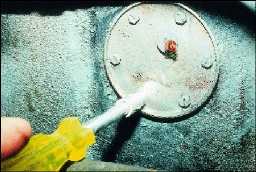
Another area that can cause a stale fuel smell but otherwise go unnoticed, is the seal for the fuel gauge sender unit.
 Replacement
The replacement of this seal requires the car to be jacked up and supported in a similar way to that required for the replacement of the fuel pump. Once in this position and having removed the rear wheel it is possible to see the sender unit in the side of the fuel tank. Remove the earth lead from the battery and the single wire that goes to the sender unit. The six small bolts can now be undone to release the sender from the tank.
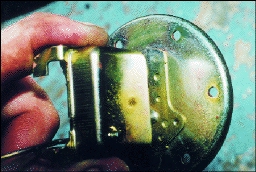 Carefully clean both the sender unit and fuel tank faces to remove any traces of dirt, oil or old gasket that could possibly cause a new gasket to leak. Once clean, offer up a new gasket (it could be cork or thick gasket paper) hold the unit in position until you have all six bolts in place. Tighten the bolts in a diagonal pattern until tight. If you over tighten any of the bolts you will see the gasket bulging out of the side of the sender unit. If this occurs then back the bolt off slightly.
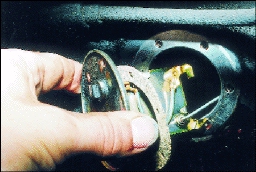 Finally, replace the road wheel and lower car back on the ground, fil the car up with fuel and do a thorough visual check for petrol leaks.
With all these areas covered you should now be able to open the garage door and not smell stale petrol.
|
 |
For more details about these or any other replacement parts for your MGA – please contact MGOC Spares Department on 01954 230928