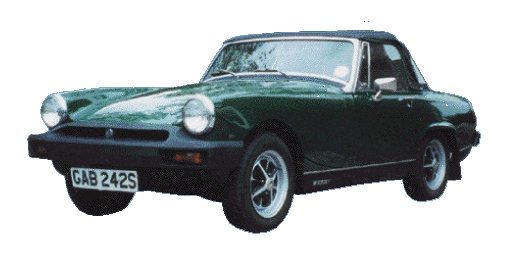
1978 MG Midget Rebuild
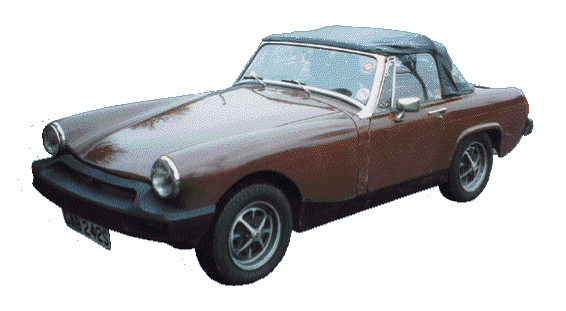
1978 MG Midget Rebuild
I bought the Midget on 1st August 1998 and over the winter myself and a friend have completely stripped and restored the car. Luckily my friend is a retired mechanic, has body shop expertise and gave up many hours of his time – between us both it took us around 350 man-hours. This is the first MG that I have owned, with my only regret being that I did not buy one sooner!
 When I bought the Midget it was Russet Brown and needed a lot of work doing to it. Fortunately the previous owner had two new wings and a new door fitted before he sold it, so that helped. We serviced the brakes and as it had a current MOT which ran out in October. It was then that I garaged the car until after Christmas when we planned to make a start. However, because of work pressures we did not start on the work until early March 1999.
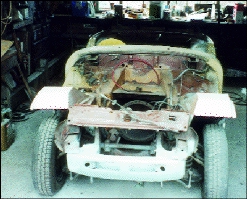
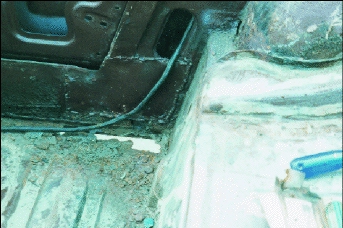 Our first job was to completely strip down the car, apart from the basic running gear, so that we could still move it – but this was later removed to enable us to repair the under body. It was then that we could see the full extent of the rot, which as usual was worse than originally thought. The floor needed a lot of welding, both ‘A’ posts needed replacing and so much work to do we almost gave up there and then. However, we rolled up our sleeves and set to work. The floor was in such a state we were amazed no one had fallen through when behind the wheel!
I ordered my panels from the Owners Club – boot lid, doors, ‘A’ posts, bonnet, wheel arches, inner sills – and we began welding, and welding, and welding! Firstly we welded the floor, replacing the floor pans on both sides as well as both foot wells. At the same time we replaced the spring hangers for the rear suspension.
The next job was to replace the outer sills and repair the inner sills. Whilst doing this we replaced the jacking points that had corroded badly. Next the ‘A’ posts were replaced on both sides. We repaired the inner wheel arches and valance on the front.
Moving to the rear of the car we found extensive rot around seat belt anchorage’s which needed much welding. The boot floor, rear inner arches and rear wing bottoms were repaired and replaced the outer wheel arches. The outer wheel arches were particularly bad due to deep rust and previous repairs. It took us three weeks of very hard work, long hours and continuous welding before we had a solid base to start working – it felt like three years!
The next job was to prepare the car for spraying. We gave the car several coats of primer so as to fully protect the car. Now for the biggest decision of all. WHAT COLOUR WAS THE CAR GOING TO BE? I had thought of keeping it brown, but, as the entire car had been primed and brown was not my preferred colour I decided to change it. After looking through hundreds of magazines and researching colours which were available at the time my car was manufactured, I chose Brooklands Green, and before I could change my mind immediately went out and bought the paint.
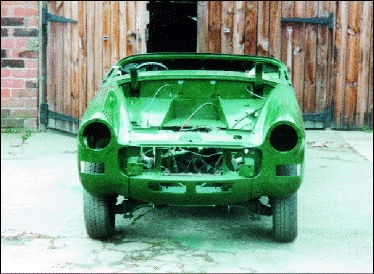 We then sprayed the car which was beginning to look better every day. With the body sprayed we painted the wings, doors, bonnet and boot lid before fitting. The car was then ‘T’ cut and waxed very well before anything else was refitted. It was now our little baby and we spent hours making sure everything was perfect.
All the underside of the car was undersealed and waxoyled. Once this had been completed we thoroughly overhauled, cleaned and painted the engine before re-fitting. At the same time we replaced the clutch as this was showing signs of wear.
With the engine in, the running gear was reassembled. NOW FOR THE MOMENT OF TRUTH – WOULD THE CAR START?
It did, first time and we were delighted but very exhausted!
We replaced all the brake pipes and cylinders because the original ones had totally perished. Then came the easy work – refitting the chrome work and badges – some of which needed replacing. I bought a new black carpet set, which was very easy to fit, and I recovered my seats with black covers with a green piping to match the car’s new colour. We decided the old hood spoiled the effect so I bought a new one from an MG show for £40! – This took us a full two days to fit as we couldn’t get it to seal – but was well worth the effort. With all these fitted the car now looked immaculate!
The car was now ready for its MOT – would it pass? Were the brakes spot on? Would the emissions be correct? Had we done all the welding? We both waited nervously while the mechanic put the car through its paces. We need not have worried the car passed with flying colours and the mechanics were so impressed with the car they asked if we would like to take some photos of the underside from the pit – which of course we did!
The car was complete and back on the road for May – March to May – from an almost wreck to a purring beauty.
During the restoration we were amazed at the ready availability and reasonable prices of parts and the all knowledge and information that people were willing to pass on to us was priceless. Some of the tips must have saved me a fortune, as did our many trips to auto jumbles and shows looking for bargains!
My advice to anybody dreaming of an MG is to stop dreaming and buy one! You won’t regret it, it’s the best thing I’ve ever bought and hope to enjoy driving and showing it for many years. Of course it is made a lot easier if you have a mate with lots of hands-on experience!
We are planning to exhibit the Midget at various car shows. Come along and have a chat – we like nothing better than talking about our baby. We have many photos – as you probably have guessed – of the car in various stages of restoration and would gladly pass on any of our newly acquired knowledge.
Shane Sevens