Fitting MGB GT V8 Tubular Exhaust Manifolds and System
Fitting MGB GT V8 Tubular Exhaust Manifolds and System
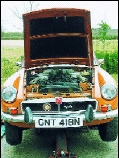 Many MGB GT V8 owners will know that the original cast iron manifolds are prone to cracking. While it is possible to repair a cracked manifold by welding it will never be as good as new and you can be sure that it will eventually crack again.
The only way to guarantee that you will not have the problem of cast manifolds cracking again is to replace them. However, new cast manifolds are no longer available and even if you can find a second hand unit, it will most likely have already been welded. Therefore the only option available is to fit new tubular replacement manifolds.
In the case of our V8 on inspection we discovered that we needed to fit new manifolds and a complete new exhaust system as well.
 Removal
With the car on a flat surface apply the handbrake, disconnect the earth lead to the battery then jack up the front and place securely on axle stands.
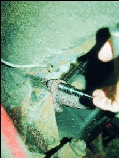
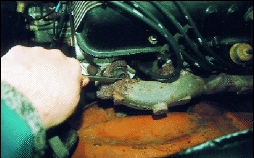
Disconnect the central exhaust hanging bracket, the rear mount and then support the whole system at the back with a block of wood. Attention now turns towards the front of the car. You will now have to slide underneath the engine and locate where the two front pipes join up with the cast manifolds on either side of the engine. Each side is secured by three nuts which you will need to release with a 1/2″ ring spanner. Once these are undone you will find that the two down pipes will be stuck fast into the cast manifolds. To release these you will need to apply some gentle persuasion, possibly with a hammer and then wriggle the whole system back and forth until it releases, usually with a loud clang.
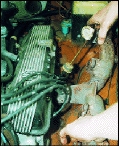 Manifold Bolts
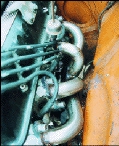
Now the fun begins! Most of the work will now take place inside the engine bay. Release the bolts that locate the two air filter cans and remove them, this will give better access to the manifold bolts. Work up a sense of achievement by undoing the eight bolts, which fasten the manifold to head, on the nearside of the car, with a 9/16th socket. With all the bolts removed the manifold can now be lifted out of the way.
However, that was the easy side, so prepare yourself for the manifold on the other side. There are two very difficult bolts at the bottom centre of this manifold. Access here is very tight and you have to be patient as each bolt will need to be undone by a flat at a time. Once all the bolts are undone and removed you may be lucky and find that you can lift the manifold straight out. This is most unlikely though, invariably you will have to remove the steering column and possibly even the starter motor. After removing one or both of these components the manifold can now be withdrawn.
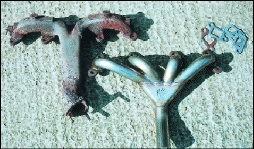 Removing steering column
To remove the steering column you will need to release the two track rod ends from the steering arms and undo the four rack retaining bolts from the front crossmember under the car. Release the lower steering UJ bolt and then slide out the rack assembly from under the front valence of the car.
With both manifolds removed take a close and critical look at the engine mounts. If you suspect they are worn or split then replace them now as there is much more room to work with the exhaust manifolds out the way. This may seem quite a simple task but beware because it can take you a lot longer than you expect. Fitting the mounts themselves is a straightforward but fiddly task because of the limited access to the mounting nuts and bolts. The real problem with the engine mounts is the time taken to set the level of the engine in the engine bay, as it is all too easy to find that the engine is cantered over too far to the right or to the left. An upright position for the engine is critical to ensure adequate clearance for the tubular manifolds and to prevent them from knocking against the inner wings. If after refitting the engine it looks to be sagging in either direction it is well worth taking the time to adjust the position of the engine and adjust the mounting blocks until all is square.
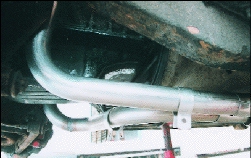 Fitting the Manifolds
The approach of belt and braces was used in the fitting of the manifolds. Smear a thin layer of exhaust paste onto the manifold flanges, place on the exhaust gaskets and then put another layer of exhaust paste onto the gasket face.
The exhaust paste acts like a glue, as well as a sealer, so that the gaskets should not fall off when the manifolds are offered up into position. With the manifolds in place secure with bolts. To allow greater access to the area we used allen key headed set screws. These set screws made the job of tightening up far easier than if had we used the original standard bolts. The only bolt that may cause difficulty on refitting is on the driver’s side of the engine, this is the bottom bolt of number four outlet. This bolt may need to be shortened slightly to allow it to go past one of the pipes of the manifold. Once you are confident that all the manifold bolts are threading up correctly continue to tighten until all are secure.
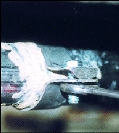
 Downpipes and Y-Piece
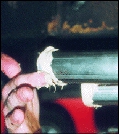
It is a good idea to trial fit and dry assemble the downpipes and exhaust system, as it will take time to achieve a good fit. Slide the L shaped downpipe onto the passenger side exhaust manifold and the S shaped one onto the driver’s side. These two pipes will now converge underneath the passenger floor. Now offer up the Y-Piece into the two downpipes taking care to make sure that the pipes overlap fully and that there are no small holes where the slits of the outside pipes go over the inside pipes. Any small holes here will give rise to an exhaust blow.
At this stage it is worth checking that the centre and rear exhaust brackets are in good condition. If any are split or damaged then replace them. Now you can offer the silencer system into place and check it for alignment through the cross-member cut out and also check the clearance past the rear shock absorber drop link. Once you are happy with the fit then pull it all apart for final assembly.
 Final Assembly
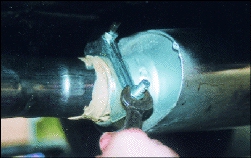
With all the pipes off, apply a layer of exhaust paste on the manifold stubs. Slide on both downpipes, place the two exhaust clamps required on each downpipe and apply exhaust paste to the inside pipes that go into the Y-Piece.
Fit the Y-Piece, apply more exhaust paste to the rear of the Y and attach the silencer system. Carry out a final check for small/large holes that may cause an exhaust blow as well as alignment. When you are sure that everything lines up correctly, clamp up all of the joints, clamps and mounting brackets. Refit the air filter cans and lower the car to the ground.
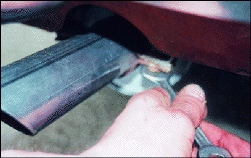 Connect the earth lead and start the car. Let it tick over until the engine has warmed up. Listen for any sound of an exhaust blow. If you can hear anything then establish where it is coming from, turn the engine off and allow enough time for the pipes to cool down. When the system is cool take apart the blowing area check for the cause of the blow, such as misalignment and then reassemble using more exhaust paste and new gaskets if necessary.
When there is no blowing audible turn the engine off and leave for about half an hour to allow the exhaust paste to cure. Once cured, take the car for a road test and check for any knocks or bangs of the exhaust on the cross-member or rear drop link. If the system knocks investigate the reason and either change the angle of one of the pipes or if it is only just touching use a lever to adjust in position.
The manifolds and system should now be a good leak free fit without any knocking against the underbody and provide many years of quiet and efficient service.