Replacing the steering rack gaiter
Replacing the steering rack gaiter
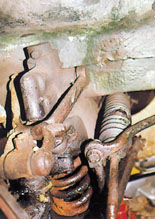
When a spilt develops in your steering rack seal or rubber gaiter the lubricant will be lost and dirt can enter the rack. This can damage its delicate moving parts and cause premature wear. A split steering rack gaiter is an MoT failure point so it is well worth replacing the damaged part as quickly as possible.
| Split steering rack seal or gaiter. |
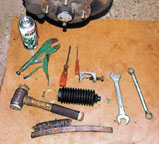 |
The tools necessary to replace a steering rack seal. Mole grips, Phillips screwdriver, a screwdriver with a fine flat blade, ball joint separator, open ended spanner, ring spanner, new seal or gaiter complete with clips, soft hammer and wire brush. |
Jack up you car and support it securely on axle stands, never work on an unsupported car. Remove the road wheel and turn the steering on full lock to get the best access to the steering arm, ball joint and tie-rod. Before you can remove and refit the split rubber gaiter it will be necessary to disconnect the track rod end from the steering arm of the rack and to do this you will require a special tool. After refitting the track rod end it will be necessary to have the tracking reset.
First you will need a ball joint separator to remove the track rod end which is very firmly located in the steering arm. A ball joint separator is inexpensive and can be bought at most tool distributors. Before attempting to undo any of the nuts use a wire brush to thoroughly clean the tie rod lock nut and the track rod nut. Pay particular attention to cleaning up the thread of the tie rod itself. A few squirts of DWF on the nuts and thread will also help the dismantling process
The second difficulty you will encounter is that by undoing and removing the track rod end you will disturb the setting of the tracking of your car. Tracking is best set up by a tyre fitter or specialist with appropriate equipment. However, by carefully counting the number of exposed threads, it will be possible to remove and replace the track rod end very close to its original position. At least, close enough for you to be able to drive the car to a specialist for fine adjustment.
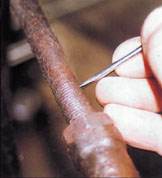 Carefully counting the turns of thread with the fine blade of a screwdriver. |
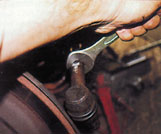 Loosen the lock nut on the tie rod of the steering rack and turn it back by a few turns. |
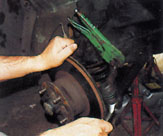 Before removing the track rod end undo and remove the nut which locates it in the steering arm. |
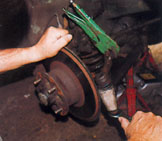 Attach the ball joint separator taking care not to damage the rubber boot as you slide the forked part into position. Turn the bolt gently and progressively, as the pressure increases the tip is inclined to slip out of position. Keep up steady pressure until the track rod is pressed out of the steering arm. Take care because the track rod end will reach a certain point and then be suddenly released. |
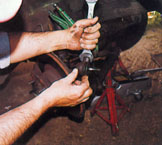 Once released the track rod end can now be unscrewed from the tie rod. The tie rod will rotate unless located firmly, a mole wrench is ideal to clamp the tie rod in position. The track rod end can then be unscrewed with a spanner and rotated until it is removed from the tie rod. |
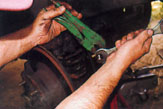 Next undo the lock nut from the tie rod. |
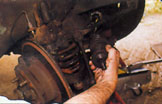 Now you can undo the clips from the rubber seal or gaiter and slide it off the steering arm. |
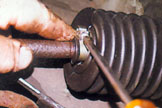 Slide the new boot into place and re-tighten the clips at both ends. |
Put the track rod end back onto the tie rod and try to recover its original position by counting the threads again. Finally, tighten up all nuts and fixings and refit the road wheels. At the first opportunity, have the tracking of your MG checked and reset. Incorrect tracking will result in uneven tyre wear and could also cause unnecessary wear to the front suspension and steering.
Any lost lubricant will need to be replenished. MGB steering racks hold one third of a pint of Castrol EP 90 and this is available in a plastic container complete with an applicator nozzle. To apply the lubricant you can tilt the car, by raising one side at a time and supporting the body. Then turn the steering onto full lock and insert the nozzle inside the rubber seal, repeating this process for the other side. Alternatively you can remove the cover and damper assembly from the steering rack and apply the lubricant directly into the rack. Be very careful to replace the cover and other parts correctly and in particular avoid getting any particles of dirt inside the steering rack.
Richard Ladds.