Fitting a Wraparound Hardtop
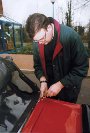
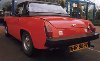
There are few pleasures to match the delights of driving an open sports car on a fine day but in the depths of winter when the weather is cold, driving a soft top car even with the hood up can become a hardship. By fitting your MG with a hardtop you can have the best of both worlds, an open car for the summer and a closed coupe for the winter. A hardtop is also a very practical option as it will provide you with extra comfort in combination with improved security. The hardtop featured in this article is the wraparound type fitted with a large rear screen.
Fitting a Hardtop
Matt Foster of the MGOC Spares & Accessories Department demonstrates how to fit a new hardtop on Claire Lunt’s MG Midget. Claire ordered her hardtop from MGOC Spares & Accessories and on collection she took advantage of their free fitting service. Claire was accompanied on her visit by her father Spencer Lunt who is also an Owners’ Club member. The car featured is an MG Midget 1500 which has a body mounted fully folding hood as a standard fitting. In order to fit the hardtop to this model of Midget it is advisable to completely remove the hood and frame assembly. This is not as complex a task as it might appear. The frame of the hood is attached to the body at both sides by three captive bolts and the hood itself is clamped down along the back of the cockpit by a chrome rail located by seven self tapping screws.
First unclip the hood rail and undo all the lift the dot hood fasteners, just as if you were lowering the hood. Then use a Phillips or crosshead screwdriver to remove the chrome screws that locate the hood and chrome strip along the rear of the cockpit. Be careful not to damage the chrome strip or lose any of the screws or their special chrome cup washers. Lift the rear window of the hood and rest it out of the way, then unfasten the three mounting bolts which hold the base of the frame to the cockpit side. You will need to use one of these bolts to locate the lower hard top mounting bracket against the side of the cockpit. You can either refit the remaining bolts back into the other captive nuts in the cockpit side for safe keeping, or put them in a plastic bag along with the chrome screws and other hood fittings. When both sides are unfastened you can lift the hood and frame assembly clear. It helps to have some assistance with this to avoid scratching the bodywork. You can now store the hood away carefully, so that it will be ready for refitting next summer. Although it is possible to leave the folded hood in place, there is very little advantage to be gained by doing so, as the folded hood takes up a great deal of the cabin space behind the seats and if left there will be more prone to wear and possible damage.
| Removing the chrome strip that retains the hood against the rear edge of the cockpit |
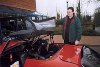 Rest the rear window and fabric of the hood out of the way on top the frame while removing the side mounting brackets. |
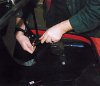 Undoing the three retaining bolts. |
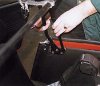 The new hardtop fixing bracket in place lined up with the mounting bracket on the hardtop. |
Fixing the Brackets
Now you can attach the L-shaped brackets that fix the hardtop at the sides. These simple brackets are each located by a single bolt and have an elongated hole to allow a wide range of adjustment. The hardtop is fixed at either side by these mounting brackets and by two more brackets which clamp onto the top rail of the windscreen, using the same location points as the header rail of the folding hood.
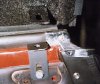 The long bolt and washers are fitted through the brackets. |
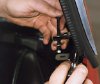 After careful alignment the hard top can be bolted into place. |
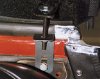 The front mountings of the hard top fixes on to the screen rail using bolts and clamps. |
Aligning the Hardtop
| Lift the hardtop and offer it up into position, it is a good idea to have a friend to assist you with this, as it is very easy to misalign the hardtop or damage the paintwork as you lower it into place. Manoeuvre the hardtop to align all the mounting brackets. Thread the bolts through into place and then carefully tighten them to bring the hardtop down into position. The way that the hardtop locates on the top rail of the windscreen is critical because it has to be forward enough for the seal to fit correctly before you put any tension on the bolts. Remember that when you fit a new hardtop all the seals will be new and very springy, therefore it may take some time to get the location quite right. Also fibreglass hardtops are flexible and although they will eventually settle down to the shape of your car they can sometimes seem difficult to align at first. Be patient and keep adjusting the brackets until everything looks square. Once you are satisfied the top is in the right position tighten up all four bolts. Removal is just a straightforward reversal of this procedure and you will find that once your hardtop has been fitted and lined up correctly it will be easier to take it on and off in the future. Most people refit the hood for summer use while others take their hardtop off on fine days and run with just a full length tonneau cover, this can be risky as a bright sunny day can quickly turn to heavy rain in this country but it does add to the fun of driving an open car. |
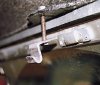 When everything is fully aligned the cockpit has a very snug feel.
|
| When storing a hardtop do not leave it resting on the ground in the same position as if it were fitted to the car because the sides may easily distort and spread. To store your hardtop safely either rest it against a wall, balancing on its rear edge, the one below the back window, or make up a sling and hoist it up into the roof of your garage. |  Hardtop Storage |