MGA MkI 1600 Radiator and Water Pump Replacement.
There may be a number of occasions where it is necessary to remove the radiator or to replace/remove the water pump of your MGA.
1 If the car has been in use for a number of years or you are unsure of its history, having just acquired it, it may be a wise precaution to replace the water pump and check the radiator’s condition.
2 An overheating car is not a car that you will enjoy driving, especially in these days of heavy traffic, whilst on the open road the car may be fine but you will dread going through towns for fear of the temperature gauge spiralling upwards to the overheating zone. The problem may not appear for sometime but will eventually become increasingly bad until finally something has to give, either a hose, a head gasket or serious engine damage accompanied by an embarrassing cloud of steam. A simple check of the radiator and perhaps a replacement water pump could transform the car and your driving pleasure.
| Making sure that the engine is cold, place a container under the car and locate the drain plug at the bottom of the radiator. This may be a simple nut or possibly a small tap. Gently undo the nut or tap and let the water run out into the container, release the radiator cap as this will now help with the draining process. Keep this water/anti-freeze mixture because if it is under two years old it can be reused. If however it is over or almost two years old discard the old coolant and when refilling the water system up replace with new anti-freeze. While the cooling system is draining, use a 1/2″ Socket or ring spanner to loosen the six bolts which fix the radiator into the car. At this stage you will also have to improvise a support strut for the bonnet, as the radiator top has a hole in it which serves as location slot to hold the original bonnet stay. A suitable length of wood or broom handle makes an ideal substitute for the bonnet strut. |
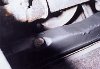
Drain plug at the bottom of radiator. 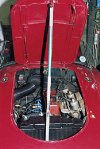 A useful tip to hold bonnet open without using the stay. |
Now release both the top and bottom radiator hoses by undoing the worm-drive clips and pulling the hoses off. The radiator securing bolts can now be removed starting with the bottom two on either side and finally the remaining two at the top. The radiator will now lift straight up and out. Be careful with this procedure as the radiator is a very tight fit on each side and it is quite possible to scrape the paint off either side of the engine bay!
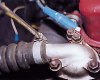 Releasing the top hose. |
 Removing the top fixing bolt from the radiator. |
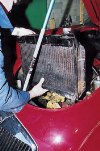 Withdrawing the radiator. |
Replace or Renew the Radiator?
Once the radiator is removed it is easier to make a more informed choice on whether to either renew or just flush and replace the radiator. If in doubt always renew the radiator – it is better to be safe than sorry.
To flush out the radiator, put a hose into the bottom tube of the radiator, turn on the hose and let it run and allow water to flow out of the top tube. You should find that white deposits flow out with the water depending on how blocked the radiator is. Restricted water flow indicates severe corrosion, as does a considerable amount of brown rusty sludge. Eventually the water being flushed through should scour out all the debris and pour out clean from the top tube.
How to be sure
As a guide, with all the water removed from the radiator, weigh the old unit and compare it’s weight to a new reconditioned radiator. A new MGA radiator weighs just over 6 kgs. In a comparative test there was found to be a difference of about 5 kgs between the weight of the old and new radiator. Therefore there was about 5 kgs of rust and rubbish deposited in the core of the old radiator. This weight difference was taken after flushing had been attempted therefore the decision to replace the radiator was made. Other factors can influence the choice of whether to renew or not, such as a damaged matrix, or leaking of joints between matrix and header tanks and poor sealing between radiator cap and radiator.
N.B. If you intend to replace the water pump do not refit the raditor before carrying out the water pump replacement.
Refitting of Radiator
On refitting the new radiator or replacing the original flushed out radiator it is advisable to renew all the water hoses and clips at the same time. These can be purchased separately or in kits with all the hoses and worm-drive clips necessary.
Lower the radiator back into position and locate with the top two fixing bolts. Now replace the other four bolts and do them up all finger tight, finally tighten using a 1/2″ socket or ring spanner. Fit the replacement hoses with new worm-drive clips and tighten them all. The bottom clip on the bottom hose of the radiator is not an easy clip to either undo or tighten and you may need to use a small socket with a universal joint.
With all clips and bolts tightened (do not forget the drain bolt/tap at the bottom of the radiator) and the bonnet stay back into it’s proper position on the radiator, fill the cooling system up with water and anti-freeze as necessary. Replace the radiator cap and start the car up, let it get to operating temperature then check carefully for coolant leaks on all joints. Finally, once the car has cooled down, check the water level again.
You can now enjoy the car even if you come across unexpected traffic delays without worrying about overheating.
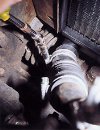 The difficult bottom hose clip. |
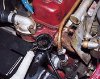 Refilling cooling system. |
Water Pump Removal
The water pump can suffer from wear in its bearing and this will be apparent by excessive movement and eventually water leaks around the water pump housing.
With the radiator removed the task of replacing the water pump is very straight forward. Slacken off the top two bolts holding the dynamo to the engine. Using a 9/16″ socket undo and remove the dynamo adjusting strap bolt remove the fan belt, remove the top two fixing bolts and place the dynamo up out of the way.
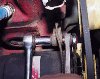 Slackening the top dynamo bolts. |
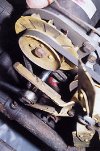 Removing adjustment strap nut. |
Undo the worm-drive clip holding the bottom hose to the water pump and remove the hose. Now remove, with a 7/16″ socket, the four bolts holding the fan and water pump pulley on to the water pump. The fan and pulley will then come away in two parts. This reveals the water pump and the four secure bolts which can clearly be seen and accessed. Undo all four bolts taking note of the different lengths used and the position in which they came from. With all four bolts removed the pump can now be gently pulled away, it may be necessary to give the pump a gentle tap with the wooden shaft of a hammer to help it on it’s way.
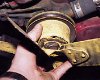 The two parts of fan and water pump pulley. |
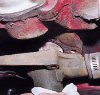 Releasing of water pump. |
Replacement of New Water Pump
Clean the face of the block where the water pump is to go, remove all traces of old gasket and gasket sealer using a Stanley knife blade out of it’s handle. Take care here as the blade is very sharp. Place the old and the new pumps side by side and compare them, check that the holes are in identical positions. You may find slight differences in appearance due to the pumps being made by different manufacturers. Run a thin layer of gasket sealer on to the surface of the block where the water pump will go and onto the face of the pump that mates with the block. Place the new water pump gasket onto the face of the pump and pass two bolts through the holes in the pump to keep the gasket in position. Offer up the pump with the gasket to the block and screw in the bolts until finger tight. Replace the other two bolts, again until finger tight, then do all four up to the specified torque. In this case 25 lb/ft.
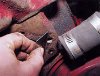 Cleaning up the mating surfaces. |
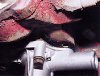 Replacement of water pump clearly showing gasket and sealer. |
With the water pump replaced you can then refit the radiator as detailed in the section above. If your car is overheating checking and refurbishing your cooling system should always be your first response to overcome the problem.