MGA Mk1 1600cc Service – (Part 1)
The items listed below were examined, checked and adjusted as necessary for this 1960 MGA Mk1 1600cc:-
Engine Oil – Recommended to change every 3000 miles or 3 months.
Oil Filter Change – Recommended to change every 6000 miles or 6 months.
Gear Box Oil Check and Oil Replacement – Recommended to check every 3000 miles and replace every 6000 miles or 6 months.
Rear Axle Oil Check and Oil Replacement – Recommended to check every 3000 miles and replace every 6000 miles or 6 months.
(Safety note: Please be aware that when working on any car, that you have taken appropriate measures to ensure the car is stable, especially when working underneath. It is recommended that the battery is disconnected at all times to avoid any accidental starting of the car. Also, please dispose of waste materials and oil in an eco-friendly and responsible fashion!)
Engine Oil
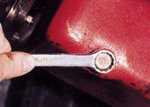
| * Jack the front of car up onto axle stands, having chocked the rear wheels. * Check car is secure and safe. * Disconect battery (safety measure to prevent accidental starting). * Locate sump plug – found on the offside rear of sump pan. * Place suitable container under sump to collect old oil. It is important to ensure that this container has at least an 8 pint (4.6 litres) capacity. * Using a 3/4″ ring spanner or socket, gently undo the sump plug by one turn. |
Undoing the sump drain plug. |
| * The sump plug should now be able to be undone by using your fingers. * Slowly undo the plug, making sure that the copper washer also is removed with the plug so it is not lost in the dirty oil. * Just before the plug is completely unscrewed, a small drip of oil will start to come out which is a useful indication that the rest is about to follow quickly! |
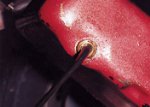 Ensure that you have a suitable container correctly positioned to catch the waste oil. |
NOTE: If the engine has recently been run, be careful that the oil temperature is not too hot (i.e. melting plastic containers or burning your hands).
| * Once all the oil has drained out, replace the sump plug and copper washer. * Place car back on wheels – it is important that it is level, and reconnect battery. * Add more oil as required with respect to dip stick reading, allowing time for oil to settle between each top-up. |
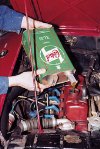 With the correct grade of oil (we use either Castrol XL30 or XL20/50 for this MGA) pour in approx. 6 pints (3.5 litres) into the engine. |
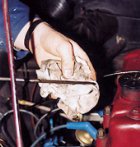 Allow 5 minutes to for the oil to settle then check the level with dip stick. |
Oil Filter Change
Whilst changing the oil, it is recommended to change to filter at the same time while the car is on axle stands and battery is disconnected.
* The oil filter on this MGA is located three quarters of the way down the right hand side of the engine, towards the front.
* The filter element is of a paper type, which sits in a metal bowl. To remove, it is necessary to release the single nut found at the bottom of the bowl using a 5/8″ combination spanner.
* Place a container underneath the filter as oil will start to emerge when you undo the nut. Support the metal filter bowl with one hand while undoing the nut with the other.
* Once the nut is fully undone quickly but carefully bring the metal filter bowl downwards over the container.
* From the metal filter bowl remove the paper filter element making sure that the large metal disk has not stuck to the bottom of this filter. If it has, remove and discard old paper element.
* Pour out oil from the metal filter bowl, taking care not to lose the spring which is located on the centre spindle.
* Clean thoroughly in petrol the filter bowl, centre spindle, spring and large washer.
* The metal filter bowl uses a rubber sealing ring to prevent oil leaks from the joint between itself and the engine. It is recommended that this seal is replaced at the same time as the filter.
| To remove this sealing ring, if it has not already fallen out with filter, a pair of long nose pliers will do the job. | 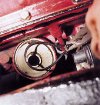 |
* To replace the sealing ring, push simultaneously on four points back into the groove from whence it came. The remainder of the ring can be pushed segment by segment afterwards.
* Reassemble the metal filter bowl with new filter in place, making sure that the large metal washer and spring are included.
* Offer this assembly up to the engine and slowy tighten the nut using your fingers until you are sure that the filter bowl has gone back straight and a good seal has been made. Finally tighten the nut to 15 lbft torque.
* Put car back on its own wheels, making sure it is level, and reconnect battery.
* Disconnect the ignition lead from the coil to the distributor.
* Turn the engine over until oil pressure has been obtained.
* Check oil level and top up as necessary.
* Reconnect the ignition lead to the coil and distributor making sure that there are no tools in the way of the engine. Start engine.
* Check that while the engine is running, there are no oil leaks and that oil pressure is constant.
Gear Box Oil Check
This must be done with the car on level ground.
* It is almost impossible to see down this hole and so everything is done by touch.
* Once level is correct replace dipstick and rubber grommet.
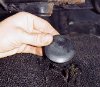 Locate the inspection hole, found on the transmission tunnel towards the engine on the driver’s side. This has a large rubber grommet over the hole which must be removed. |
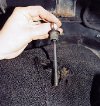 Place your fingers straight down into the hole and you will feel the top of the gearbox dipstick. Pull this out, wipe clean, replace and check levels. |
 If oil level is low, top-up by adding correct oil grade (we used Castrol XL30). This has to be done through the inspection hole, via a funnel and jug. |
| Replacing the Oil: * Jack car onto axle stands and disconnect battery. * Place a suitable container under gearbox, with at least a 4.5 pint (2.6 litre) capacity. * Allow oil to drain. * Replace drain plug and return car to wheels on level standing. Reconnect battery. * Add approx. 4 pints (2.2 litres) and check level, filling up as required. |
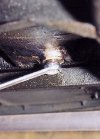 Remove the gear box drain plug, found at the bottom of the gearbox, using a 3/4″ ring spanner. |
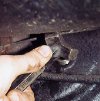 Loosen filler plug, found half way up rear of axle casing using a either a special square drive tool or a 1/2″ ratchet sometimes fits. |
| Rear Axle Oil Check * On level ground, jack up car onto axle stands front and rear. * The correct level is obtained when a slight trickle of oil emerges from the hole once filler plug is removed. * Once correct level obtained, replace filler plug and return car to ground. |
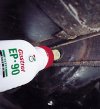 If no oil comes out then top-up by adding oil through this hole. We used Castrol EP90. |
| Replacing Oil: * Place suitable container capable of holding 2.25 pints (1.3 litres) under rear axle casing. * Remove the drain plug found centrally at the bottom of the rear axle casing with the square drive tool. * Once all of oil is drained, then replace drain plug and fill through filler hole with 2 pints (1.1 litres) of the recommended oil. |
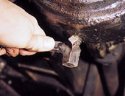 Finally, check level as above and replace filler plug. |
Next month: Setting up the ignition system on the MGA.
Jonathan Kimber