MGA Twin Cam Rebuild (part 4)
A Twin Cam called Ratty Part 4
John Day continues his Twin Cam Rebuild
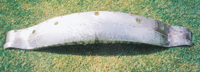
At the end of Part 3, Ratty the MGA Twin Cam found in a barn, had most of the bodywork completed and I thought I was ready for spraying. The front valance had still to be repaired but surely this would be straightforward and would not cause me too much of a problem? How wrong can you be? It turned out to be the most challenging panel of all to repair due to its relatively complex shape and the fact that it was rusty and bent from accidents in the past. I nearly gave up trying to salvage the remains but other second-hand valances I looked at tended to be just as bad. In the end, with a lot of patience, I managed to save the original which means that all the external panels except one rear wing originated from Ratty.
front valence after major repair and replacement of rusty metal
At last, after nearly six months of intensive metalworking and mig-welding I had reached the stage where painting could begin. However I still had two issues to resolve. What colour was the car to be painted and did I really want to do the work myself? I knew from the records that the original colour was Old English White but I was undecided and had considered something more radical like British Racing Green, which was not a factory option. From an aesthetic point of view I favoured the green but my head won the argument on the basis that originality is safest for a totally rebuilt car. Any area of non-originality can reduce the resale value of the finished product and is therefore an important consideration when spending a large sum of money on a rebuild. Old English White to my mind is one of those colours that can appear rather bland in isolation but looks very different on a finished car. The original interior was red with grey carpets and I have seen a quite few examples of rebuilt MGAs in this colour combination and have to admit it does suit the car. The twin cam coupe is notoriously hot inside so the lighter colour will be better for summer use.
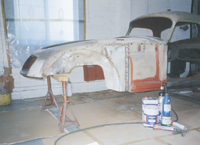
Body-tub with materials for re-spray
With the colour choice rationalised the next question was whether to contract the spraying to a professional or do it myself. As I mentioned in the last report, I have sprayed a number of MGs and each time I vow it will be the last. On the plus side for doing the work there is the considerable cost saving, most of which is labour, and the satisfaction you have tackled one of the jobs most people avoid. On the other hand it is an undeniably messy process requiring a lot of space and you are limited to using cellulose paint on the grounds of safety if you are doing the work in or around the home environment. 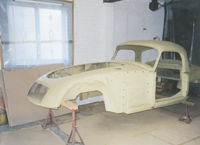 Body-tub in etch primer, also called ‘Desert Camouflage
Professional spray-shops offer and prefer to use the more modern two pack paints but this method of finishing cannot be used safely without special breathing protection and extraction equipment to protect anyone else in the vicinity. At the time the car was constructed most manufacturers were using cellulose paint, which is not as tough as two-pack paint but it does have the advantage that chips and minor damage can be touched-in and invisibly blended. As mentioned in Part 3 paint spraying is a toxic operation and it is highly recommended that anyone considering using cellulose paint should invest in a good quality mask with activated carbon filters to remove both dust and solvent. The spray area should also be well ventilated and visitors discouraged until the solvent has evaporated and of course no naked flames in the vicinity!
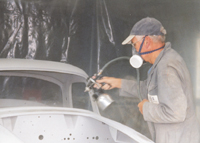
Spraying in grey primer
After much deliberation I decided to do the painting myself in the garage but it would need a lot of preparation to avoid over-spray and dust affecting my other MGs. I have the luxury of a double-length/ double-width garage and a separate workshop in which to work, so it was possible to create sufficient space to dismantle the newly finished body from the chassis and remove all the panels. Nevertheless I was surprised to find just how much room was needed when this was done. I wanted to have the body-tub in isolation in an area with sufficient space to allow good access for spraying. The photographs show that to achieve this I divided the garage in two with a simple plastic screen sealed all round with duct tape. Two of the MGs were entombed behind this screen but it would not be for too long and I piled everything not required around them. My only access to the back area was by a side door and some very athletic movements were required to reach anything I found I needed during spraying. My black and blue shins and grazed elbows are a record of how often I needed to revisit the back part during the spraying. Here was an example of more use of the brain would have given the body less pain!
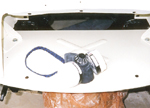
A good quality facemask for dust and solvent protection is essential
With a plan of action sorted out and space to work the next step was to purchase the materials. We are very lucky in our town to have a company called Nu-agane telephone 01234 400049, a specialist supplier of vehicle refinishing materials. I have used this company for many years and found their products excellent and their advice invaluable. One of the most important components of the spraying process with cellulose paint is the thinners. Cheap thinners can be purchased for cleaning the spray equipment but for final top-coats it is essential that only the best quality is used with anti-bloom properties and an agent to slow the paint curing process. Nu-agane have developed their own products and their Highgloss 100% virgin cellulose solvent gives outstanding results. In order to get started my shopping list was as follows;
1. 5 Litres OEW gloss top coat
2. 5 Litres Highgloss thinners
3. 25 Litres cheap thinners
4. 1 Litre Hibuild etch-primer
5. 5 Litres Hibuild primer (grey)
6. 1 quire 400 & 1000 grade wet & dry paper
7. 2 tubes seam sealer
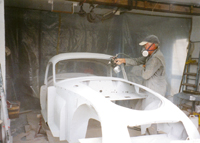
Spraying grey primer
This little order came to £175 and was increased by another 2 litres of OEW and 5 litres of best thinners as the spraying progressed. One of the attached photographs shows the car ready for spraying with the paint tins next to it on the floor. It does not look like much for the money but good quality products are not cheap and the finish is worth it in the end. 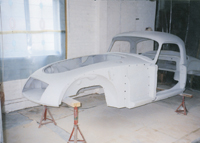
Body-tub in grey primer
The photograph with the paint tins before starting also shows that the vulnerable sill areas were painted with red Bondaprimer specially formulated for fabricated constructions and which has a high zinc content. I have used it on many rebuilds to give extra protection to sills and box sections and have been impressed with its performance. All the seams on the body tub were prepared with the sealer and allowed to harden overnight. The next day work commenced with me spraying the whole body tub inside and out with etch-primer using a light coat at first, followed 30 minutes later with a much heavier covering. This used all the etch primer on just the body tub so more would have to be purchased for the panels. In the past the etch primer I used was very thin and difficult to use without causing paint runs. The Hibuild type is much thicker and a very satisfactory finish was achieved. It was good to see the car one colour again even if it was the shade of desert camouflage!
Feeling the imperfections
After about 4 hours to allow the etch-primer to cure I applied the first double coat of grey primer. Once again a light first coat, followed minutes later with a much heavier coat ensured a good layer of paint was applied. The primer dried sufficiently in about 3 hours to start rubbing down and the most important part of the spray work had begun. It is at this stage the final quality of the job is determined. My method is much the same as many others and involves the use of a smooth block of wood about 15cms by 10cms to support the wet and dry paper. Starting with the rougher wet and dry paper (400 grade) on the block all areas were smoothed with the aid of household soap and water. (Janet can never understand why used bars of soap from the kitchen and utility room keep disappearing!) The object is to rub down all the primer to remove any high spots. I use a guide coat to assist the visualisation of this process and this involves dusting the primer before rubbing down with a contrasting coloured paint from an aerosol. Black works well on grey primer.
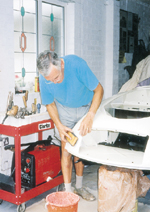
‘Blocking’ topcoat with fine wet and dry paper
Once the “blocking” began all the light covering of black paint on the high areas was quickly removed making the low areas very easy to identify. Rubbing down continued until etch paint started to show through and then two more coats of primer were applied. The idea is that spraying primer and blocking several times eventually fills the low areas and leaves a very flat surface as a base for the final top-coat. Hardly anyone, including me, can be bothered to put in the effort required to get this part of the job done perfectly because it is so boring! Short cuts can be taken like using a smaller block or less coats but the best rule of thumb is to use the biggest block you can manage and when you think you have achieved perfection give it one more double coat. The good news is then that only you will probably be able to see the small imperfections on the finished work. 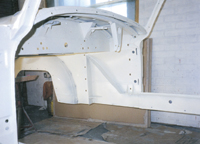
Body-tub fully painted Old English white on the inside
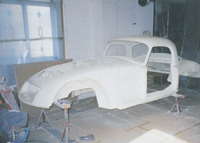
Once I was satisfied with the primer I applied the first coats of OEW using the light then heavy technique, followed by rubbing down with 1000 grade. At this stage any low areas still around showed up more clearly than with the primer so a guide coat was not required. After about 4 double coats I was reasonably happy with the finish and the paint was left for several days to harden off before polishing. 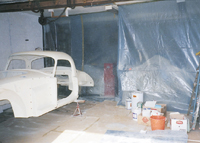
Body-tub in Old English White – note screen to protect cars at the back of garage
I must say it did feel good to see the body tub in final paint colour but now there is the small matter of 4 wings, 2 doors, bonnet, boot, 6 under-wing panels, the battery-cover, bonnet and boot hinges, not to mention the front valance left to paint! I have decided that I will spray all these items one at a time in the workshop which at least allowed me to release the other 2 MGs trapped at the back of the garage/spray-booth. I was pleased to find that over-spray and dust had not penetrated my temporary screen and the MGs could be used without cleaning. 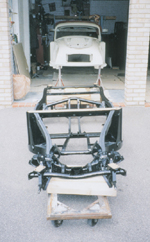
Chassis and body before final fitting
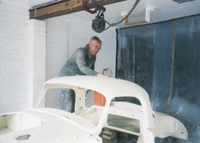
With a finished body in the garage and a painted chassis in the workshop, it was time to bring the two together. This would now enable the workshop to become a spray booth for the body panels. The body and the chassis are light enough for two reasonably fit enthusiasts to handle but we needed simple lifting equipment to ensure that the body came to rest in a controlled manner. I used a block and tackle with a simple spreader and lifting beam to raise and then lower the body as shown in the photograph. Now it was a simple matter to fit and tighten twenty-seven screw fasteners, which hold the body to the chassis.
 |
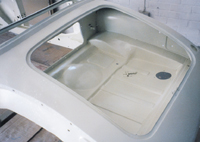 |
| Body-tub with final coat of Old English white | Boot floor repaired and painted Old English White |
 |
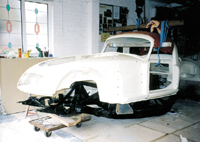 |
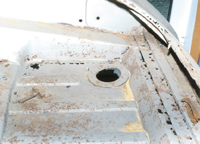
| Boot floor before repair | Lowering the body onto the chassis – with care |