MGB Fuel Tank Replacement
MGB Fuel Tank Replacement
There are many reasons for replacing a fuel tank but the most usual is corrosion. Either internally with rust flakes causing the pick up pipe to block or externally causing the tank to become porous and leak, this normally occurs at the top of the tank were dirt will accumulate in the indented part of the pressed steel and trap moisture.
In our particular case the tank on this 1969 MGB had an unusual fault as it had corroded through at the bottom of the tank and not on the top panel. Having just spent £25 on fuel the driver was not impressed to find the petrol coming straight through the bottom and pouring out all over the road.
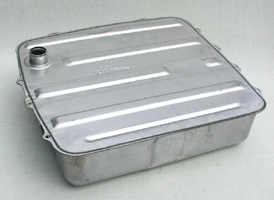
There a number of different tanks available so do make sure on that new tank looks the same. Once happy that you have the correct replacement tank bring out the Hammerite paint and give the it a couple of protective coats. Once the paint is dry apply some Waxoyl on the top of the tank and after it is fitted then apply to the sides and bottom. If you cover the whole tank with Waxoyl before fitting you really will get in a mess.
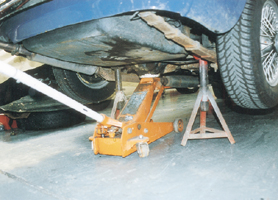
First task when replacing the tank is to disconnect the battery earth lead. Then chock the front wheels, jack the rear of the car up and support securely on axle stands. You now have two options, either disconnect the fuel pipe from the outlet on the tank, place a pipe over it and drain the remaining fuel into a can or carefully block the outlet hole up so that fuel does not leak everywhere. Once this is carried out disconnect the wires that run to the fuel tank sender unit situated near to the fuel outlet pipe.
 |
 |
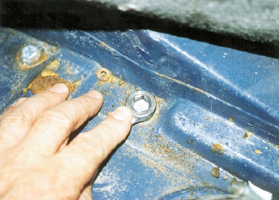 |
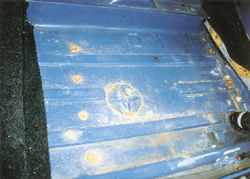
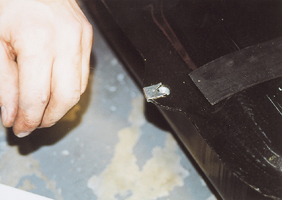
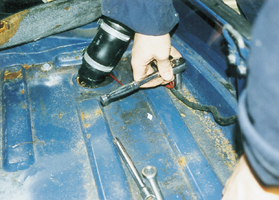
From inside the car remove the contents from the boot including the spare wheel and boot floor carpet. You should now be able to see three fixings on the right hand side of the boot, four to the left and two close to the back panel. The fixings will consist of bolts through to threaded clips on the tank and either nuts and bolt or studs. If they are studs then you will only see a round flat disc that is the underside of the stud. Once again from inside the boot, release all the bolt heads that you can see fixed in to the clips on the tank. At this stage there is no danger of the tank falling out on your foot.
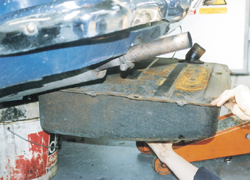
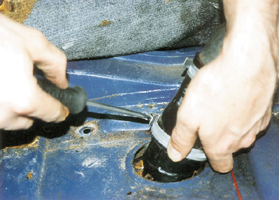
Place a jack under the centre of the tank with a large section of wood to spread the load on the bottom. The rest of the fixings that hold the tank in place against the boot floor can now be removed. Finally release the two worm drive clips that hold the filler neck tube rubber in place. The filler neck can be pulled up and out away from the neck of the tank. Place a cover over, or tape up, the hole in the neck to stop fuel coming out and dirt getting in.
The jack can now be slowly let down and the tank should drop with the jack. It is likely that you will have to push the tank slightly forward to allow it to clear the curve of the rear valance. Be careful at this stage not to get caught up on the petrol pipe as it is suprising how easily they fracture. The remaining fuel in the tank can now be decanted into a suitable container using a funnel with a filter in it to stop the rust debris entering the new tank.
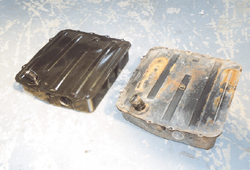 It is now an ideal opportunity, because it is easier to do out of the car, to change the tank sender units over. With a new tank it is always a good idea to use a new fitting kit which should comprise of all new fixings and seals that are required to fit the tank. This kit should also include a new sender unit seal and retainer.
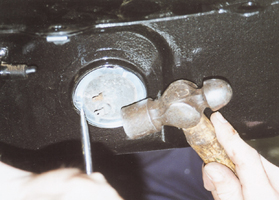
The old sender can be removed by drifting the retainer ring in an anti clockwise direction until it becomes loose. It can then be lifted off followed by lifting out the sender unit. Try to have both tanks side by side in the same orientation, as this will allow the sender to be swopped over saving any confusion in the way it fits. Remember the rubber seal goes in first, centre it, then replace the tank sender unit and fix with the new retaining ring. Fit loosely and then drift in to place making sure that the ring locks equally on the three lugs of the tank. Now slide the new foam seal, that seals the hole around the neck and floor hole, over the tank neck and in to place. The fitting kit should also come with three or four rubber strips that are designed to go between the top of tank and the bottom of the boot floor to stop vibration occurring while driving along, so make sure to fit these.
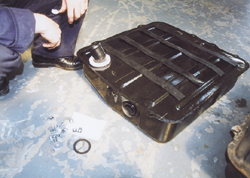
The tank can now be lifted back in to place and the jack placed but under to support it while you loosely replace all the fixings. Once all of the nuts and bolts are finger tight you can apply a spanner and socket to firmly fix the tank back in place. Attach the filler neck tube to the tank and tighten the clips. Make sure that you are pressing firmly inwards while doing this as you can get a small gap in the filler neck and rear grommet area that will allow water in to the boot area. Remove the bung from the tank on the inlet pipe and fix the outlet pipe back on by hand finally nipping tight with a spanner. While working in this area the sender unit wires can be connected.
All that now remains is to put in some fuel and turn the ignition on. Once the fuel pump has stopped ‘ticking’ the joints and sender unit seal should be checked for leaks. The MGB is now ready for the road again – without the fuel leak or smell.
Electrolytically coated corrosion resistant fuel tanks are now available for the MGB and Midget from MGOC Spares and they will be much more resistant to future rust.
  |
  |