ZR 160 Rear Silencer Replacement
As sure as night follows day you can guarantee that mild steel will, at some point rust. Long term this means expensive bodywork but over a short time scale items such as the exhaust system will corrode and need replacing. Short journeys where condensation builds up on the inside of the pipes in combination with exterior conditions the system is exposed to all contribute to give an exhaust system a hard life. A car that is consistently used from cold and but then driven for at least a 20 mile journey will normally have a system that lasts longer.
The example in this feature is a four year old ZR 160 with just over 25,000 miles. However, as we will see the rear section of the exhaust was in need of replacement. Looking at the cost of an MG Rover original replacement, in mild steel, and the costs of an aftermarket unit, in stainless steel, the stainless system was chosen on the grounds of both longevity of life and cost. The ZR is an extremely popular car and with that goes a huge range in available styles for rear exhaust boxes and here an as near standard unit was chosen.
Out of the factory the 160 has a control valve fitted to one of the rear pipes to help with cold running and drive by noise tests. Once the engine has warmed up the valve opens and gives the full effect and benefit of a twin tailpipe system. Replacement rear silencers, including the original MG Rover part, do not have this valve fitted as it is no longer to pass a drive by noise test. Later production cars had changes to the systems resulting in the deletion of this valve from new.
Removal
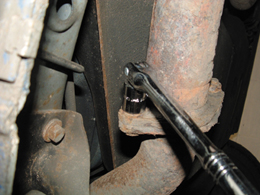
Ensuring you are working on level ground jack the rear of the car up and support securely on axle stands making sure that you do not place them in a place that might interfere with the work you are just about to carry out. With the car secure inspect the two nuts and studs that bolt the joint of the centre pipe and rear silencer together. Wire brush the area and then soak the nuts in penetrating fluid. Allow about 10 minutes and then carefully try to undo the nuts. Depending on the age of the car you may be able to get them undone. However, in about 80% of cases you are more likely going to need to either use a nut splitter to remove the nuts or use an angle grinder to grind the whole stud off. If you choose the angle grinder route be very careful as the fuel tank and brake lines are in very close proximity with the obvious safety implications involved. Do not under estimate the heat and damage that can be done by a shower of sparks from a grinder.
Attempting to remove the very corroded nut
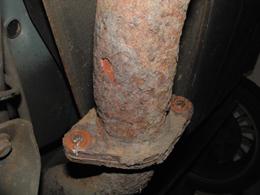
The two pipes joint after a grinder was required to remove the nuts
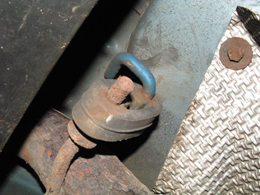
Note the corrosion holding this front rubber mount in place
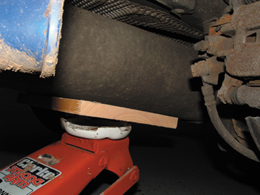
Trolley jack helping out by taking the weight of the silencer
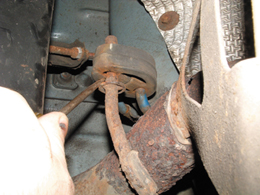
Using an old screwdriver to lever off the rubber mount
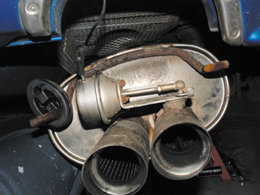
Silencer in lowered position where the valve, fitted to the 160, and vacuum pipe can clearly be seen
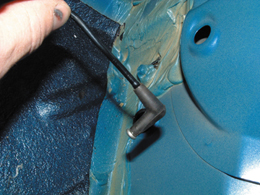
Vacuum pipe being taken and blocked up in the boot
Now that the joint between the two pipes has been broken you can turn your attention to the three rubber mounts that the silencer hangs from. Usually these are quite hard rubber and you will need to use an old screwdriver or similar tool to help you prise and prod the rubbers off. A good dose of penetrating fluid on the rubber and their mounting bars will help you release the fixing. Before finally pulling off the rubber use a trolley jack on the under side of the silencer to take the weight as the unit is surprisingly heavy and a helping hand or jack may save some pain. Now the rubber can be removed and the silencer lowered down. The small vacuum pipe on the exhaust valve can be disconnected and the whole rear assembly threaded out towards the rear of the car having negotiated the axle with the curved end of the pipe. You may need to increase the height of the car to get everything at the right angle. Once out position the old and new units side by side to check the fixing brackets and dimensions are all the same.
You will see in the images that this example required replacing as it had become perforated all around the joint of the pipe into the silencer and at the point of the strengthening plate causing an initial small blow but one that over time developed into a full blown exhaust.
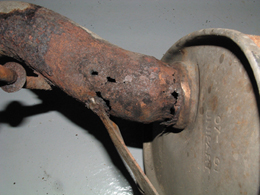
The obvious reason for the exhaust blow
Refit
As this ZR is the 160 version the vacuum pipe to the exhaust valve needed to be pulled up in to the boot area and the end plugged. This is achieved by disconnecting the small rubber elbow from the main vacuum pipe, pulling the main pipe up in to the boot area, replacing the elbow and using a self tapping screw to close the hole. The new rear silencer is ready for installation. Using the reverse technique of the removal, thread the new rear section into position and support the assembly with the trolley jack. You can then carefully insert a new metal gasket that sits between the rear and middle sections and loosely join the two with new nuts and bolts, do not tighten at the stage. The two rear rubber mountings can now be fixed back on to the car, followed by the third rubber that sits just in front of the silencer. Now that the section is in position the joint, with new gasket, can be fully tightened.
You will now need to check the position of the rear tail pipe or pipes as with fabrication and production tolerances you can find that the tail pipe may not sit centrally in the rear bumper cut out. If it’s not central then it will be necessary to ‘tweak’ the mounting points until the correct position is obtained. Once you are happy with this positioning then the car can be returned to the ground off the axle stands, the car can then be started and you can check that the joint of the mid and rear sections is not blowing.
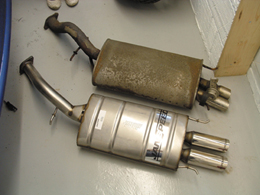
Old and new side by side to ensure dimensions and brackets are the same
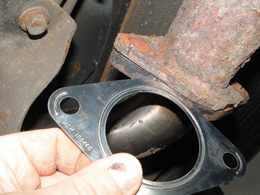
Always use a new gasket to ensure a good gas tight seal
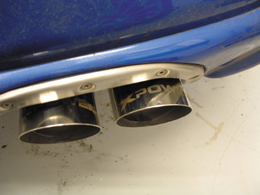
The finished rear exhaust view
Interestingly, we found that the car seemed, from a ‘seat of the pants perspective’ rather than rolling road figures, to pull and perform better after the fitting of this replacement silencer a result that was slightly unexpected enjoyable nonetheless. The exhaust note was also slightly deeper and perhaps more noticeable but by no means intrusive.