MGB GT Heated Rear Window Replacement
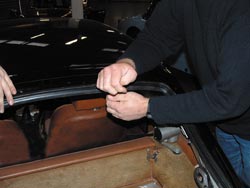
There are many reasons why owners find it necessary to remove the rear screen from their BGT. Finding that after a rain shower the boot top carpet is wet may indicate that the rear seal is leaking. Trying to look out of the rear window on a frosty morning when only a single bar of the heated rear screen is working may also be enough encouragement to remove and replace the screen.
On this occasion the rear tailgate was to be re-sprayed and rather than mask up around the screen rubber the option of a more professional finish meant we chose to remove the screen completely.
Removal
Remove the earth lead from the battery to avoid any possible short circuits when disconnecting the wires from the rear screen. You must first look at releasing the chrome finishing strips from the rear seal. You could attempt to gently prise these out and try and re-use the seals, but for ease of the operation and peace of mind we chose to use a new seal. It was therefore just a matter of carefully cutting around the seal to release the chrome finishers. Once the finishers are off you can find the ends of the rubber inner locking strip, inside the main seal, and prize one end out. It is then just a case of pulling the locking strip seal out of the main seal. Following the removal of the locking strip the upper part of the main seal can be cut all the way around the screen taking care not to scalp the feed and earth wires that are located at the side of the screen. Once this half of the screen has been removed then the screen can be gently lifted away and the wires disconnected from the bullet connectors just behind the trim that sits across the car from C post to C post. At this stage it is worth keeping the remaining main seal connected to the screen as it will be very useful when refitting. If work is being carried out to the tailgate then ensure that you keep the delicate rear screen in a safe place so that it does not get damaged, which is so easily done.
1. Using the palm of your hand (or hammer shaft) to ensure the main seal is fully home in position
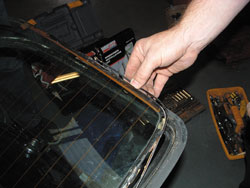
2. Removing the wires from around the glass while the old seal is still in position around the screen for reference purposes
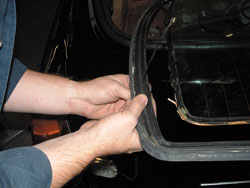
3. Pulling the supply and earth wires out if the old main seal
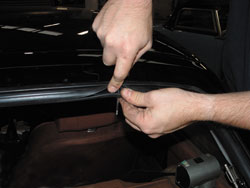
4. Use a bradle to make the holes in the new seal, although you may need to open these up slightly with a sharp knife
Refitting
Once you have decided to replace the rear screen it really does help if you have an assistant with you because there are a number of occasions where more than one pair of hands is extremely useful.
Take the new rear main screen seal and position in place on to the edge of the tailgate glass aperture. Use the palm of your hand or the shaft of a hammer to gently position the seal firmly home on the lip. Once the seal is neatly positioned in place all around the glass aperture you will need to look at the screen and the old seal. By looking at the position of the wires you can roughly measure where you will need to make a hole either side in the new seal to accept the power and earth wires that must be attached to the rear screen heater. Obviously, if you are fitting an un-heated rear screen this does not apply. Once you have located the position of where the holes for wires need to go, use a bradle to punch each hole through the seal. Once happy that they are in the correct place take the wires off of the rear screen and pull them out of the old seal. You can now push the wires through the new seal. You may also find it necessary to open up the new holes slightly to ensure the small spade terminals on the end of the wires can pass through the new holes. Once the spade connector is through the seal, pull enough wire through so that you have just sufficient to make the connection. This can be fine tuned later on when you properly fit the screen into the main seal.
You now need to locate a cord into the part of the main seal where the glass should sit. There are special screen fitting kits available with the correct tools to help you do this and they are well worth the expense, but if you do not have a fitting kit then carefully push a nylon type cord into the channel of the seal, all the way around the aperture. This cord is meant to be pulled out of the rubber channel as the screen sits in position and as it comes out of the channel will then ‘lip’ the main seal around the glass.
Now that the cord is in place you can offer up the rear screen and carefully place the bottom edge into the main seal. A small amount of force is required here and you would be well advised to wear thick gloves. We chose not to, which allowed more movement and feel but to avoid the risk of slipping and cutting yourself badly gloves are recommended. Once the screen has been gently forced downwards it should sit in place in the channel at the base of the seal. At this stage you need to connect the wires to the two spade terminals either side of the screen. It is now possible to start to pull the cord out. Hold the corner seals to stop the cord from just pulling out at each corner, which should lip the seal around the screen. Make sure as you pull the cord around the screen glass that it is the correct side of each wire to the heating elements, if not it may pull the terminals off and you will need to start again. The last two top corners and the top edge are the most difficult parts of the operation to get the seal to settle in to place. Once past the danger points of the two wires you will find that having an assistant on the inside of the tailgate is a great help in pushing the seal out and into position. You will find that for the last inch it’s extremely difficult to pull the cord out but once it’s out the screen should be seated nicely in the main seal.
Now that it’s correctly in place it is necessary to use a locking strip seal to spread the main seal, which has the effect of securely locking the screen into position. This can be carried out with a bladed screwdriver but, as with most jobs, there is a specialist tool for the task which makes it so much easier. Start along the bottom run in the middle of the tailgate and run the locking strip all the way around the main seal. Using lubrication such as a releasing fluid in a spray can all the way around the main seal helps considerably and speeds up the way in which the seal goes in to place. Once you are back to the beginning of the run cut the locking strip to length and use a bladed screwdriver to finish off the installation. At this stage inspect around the whole main seal and check/adjust as necessary the location of the locking strip in the main seal.
Once the locking strip is fitted to your satisfaction all that remains is the tedious task of re-fitting the chrome finishing strips. This takes a great amount of patience, with the key word being lubrication. A non-silicone based lubricant or product such as washing up liquid should be used. Cover the whole main seal area with the chosen lubricant and then offer the first half of the finisher into place. It is worth trying to position the outer edge of the finisher in to the main seal and then use a smoothed off/blunted screwdriver to lip the inner part of the seal over the inside of the chrome finisher. This way, if you do slip during installation you will go towards the screen, which will normally just bounce the tool off, rather than the paintwork which will scratch. It is a very slow process in which you will have to take an inch or two at a time. Once you have fitted both sides all you then need to do is to fit the two small chrome joiners, that cover the joint between the two main finishers and then check the operation of the rear screen heater. Do not forget to refit the bullet connectors under the trim for both the live and earth leads.
Now you have completed the fit you should have resolved either the issue with leaks or replaced that non-functioning rear screen heater to give you a much clearer view, especially during the cold, damp and dark winter months.
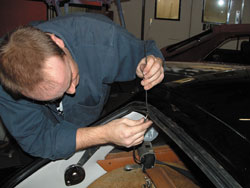
5. Having made the new holes feed the supply wires through
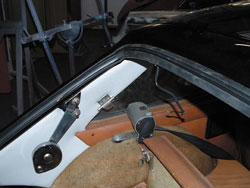
6. Wires fed through and in position
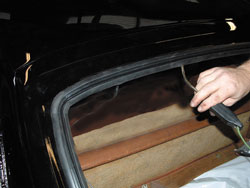
7. Feeding the fitting cord in to position around the main seal
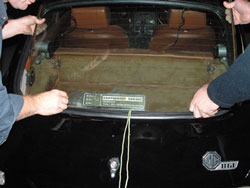
8. With the cord in place the rear screen can be offered up into place and pushed in to the bottom channel
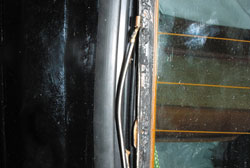
9. Attached the feed and earth wires to the rear screen taking care to position them the inside of the cord use to fit the screen
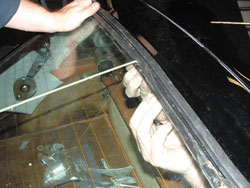
10. The last two corners and top stretch is the most difficult and some help from inside the car is invaluable
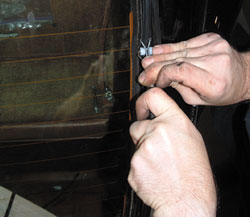
11. Using the right ‘tool for the job’ really does help, aiding and speeding up the task
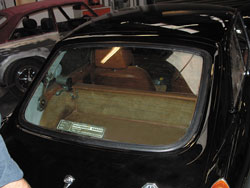
12. New seal and locking strip all in place and correctly fitted with just the chrome finishers left to replace
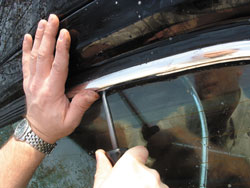
13. Once again the right tool is essential to pull out the seal and locate the chrome trim
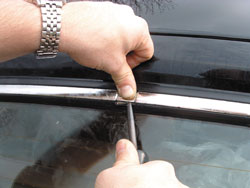
14. Finisher offered into place and located by pulling out the channel in the window seal
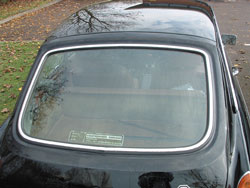
15. Chrome finisher trim in place