An MGB Story
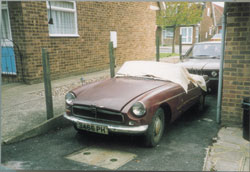
Don’t Yawn… but can I tell you a story? (or a short history of a very long restoration of an MGB Roadster)
It was one of those typical situations, chatting to a mate of a mate in my local pub. He said, “I know this bloke with an old style MG sitting in a barn on a Suffolk farm. I think he calls it a ‘pull handle’ model of an MGB Roadster; it’s just begging to be restored”.
As we’d had several MGs in the family over the years, this seemed like a good idea at the time. Now, some 10 years later, I’ve got a few physical (and mental) scars to dispute that. No…. it’s been a lot of fun and now it’s ‘on the road’, the sense of achievement is fantastic. I’d mucked about with and repaired numerous cars with ‘big’ brother and Dad since I was at school and elevated to the giddy heights of restoring (solo effort) a kit car Tornado Typhoon complete with E93A engine/gearbox. This was in the ‘60s and I eventually sold it to Dad for £5. He promptly put flash wheels on it, sold it for £150 and ‘emigrated’ to New Zealand again (for the 3rd time on the proceeds).
My new ‘toy’ was duly delivered on a low-loader and I gave it the once over. What a state! The actual restoration of the MGB took me 7 years, working mainly just at weekends. Being a ‘newly born anorak’, I started a dated time sheet of hours spent, an interesting exercise as it comes to a total of 2,792 hours. Yes, that’s 372 working days and 75 working weeks.
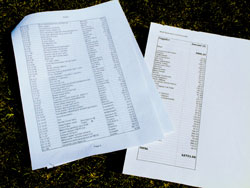
I also noted down all the money spent with dates and each of the supplier’s names, the total is £12,711… a fact skilfully kept from wife, Jill. I also owe much to these ‘suppliers’ for their help and advice; hence my acknowledgements list at the end of this story. I’ve leant a few golden rules of amateur restoration: read all the books, ask questions and listen, listen to those who have ‘been there before’. It’s worth mentioning here an excellent publication: ‘MGB Guide to Purchase & DIY Restoration’ by Lindsay Porter (Haynes). It highlights many pitfalls in restoring a “B” and is well laid out in easy stages with photographs. Also a great help was the MGOC’s ‘Practical and Technical Tips’ handbook.
Are you sitting comfortably? Then I’ll begin…
First thing to do is to strip it down bit by bit and start removing the “heavy gear”. To help re-assembly, I made sketches and took photographs of positions of parts, routes of pipes etc. I boxed everything I could and listed where the parts were stored in the garage. I put them in an alphabetical Excel file on my PC; all very ‘anorak’ but this approach proved essential later on! At this point, I persuaded Jill that it might be easier for her to have a smaller garden (she’s the Titchmarsh of the household). I then had a much larger garage built.
Now looking at a very bare and barren MGB, I listened to my mentors, “brace it” they said, “particularly across the door openings”. This is very sound advice. I used strips of angle iron and Dexion; anything to avoid distortion as the monocoque is weakened by the removal of corroded metal, particularly the sill sections. Next thing to do, learn how to weld! More chats with mates and poring over books from the library. I bought a MIG welder and all that goes with it, a full-face head-shield, gauntlets etc. and after a few minor accidents and burns; I was welding everything in sight.
As found
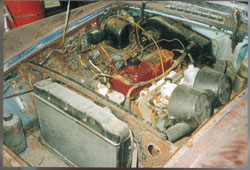
Long neglected engine bay
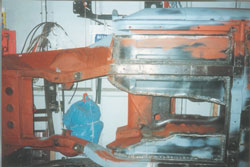
Body on its side to facilitate extensive floor and chassis leg repairs
OK so far- now let’s get going
I now started to stock up with parts and these were ‘catalogued’ on the PC and boxed. I then completely replaced the sills on the shell; a tricky job but with care, it worked out OK. Alignment I learnt is so essential. After the sills I chopped out what was left of the floor panels and welded new ones in place together with new spring mountings. Again, lining up these ‘hangers’ was a bit hit and miss but fortunately they lined up with the rear shackles.
Now a big headache, oh dear! I noticed a major problem! One of the main front side members was cracked. This proved a bit of a crossroads for me; I was tempted to give up the whole project. The repair was beyond my limited welding skills. After lots of discussions with some friendly experts and lots of heart searching, one of these welding experts replaced and securely welded in a new section and all was saved.
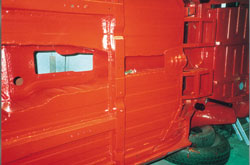
Underside treated with special 2 pack paint
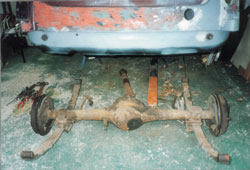
Rear axle before
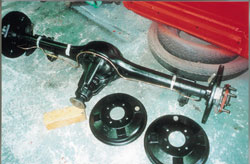
Rear axle after
Refurbishing the body was next:
– lower rear wings
– inner rear wings
– patching up the front wings (which was a waste of time, as later I still had to fit brand new ones)
To keep up the interest, I started on some of the basic mechanical rebuilds e.g. front and rear suspension, cross-members, steering etc. Cleaning up, priming and painting cross-members gave me a lot of encouragement; things like lapping in king-pins made it feel like progress was being made. By now, however I’d started to ponder whether it might have been best to have invested in a complete Club Heritage shell but at the time I don’t think exact ‘copies’ were available.
The ‘B’ doors
As you can imagine, both doors were rotten at the bottom. I’d removed all the locks, window regulators etc. (carefully labelling and boxing as I did), and realised how bad the doors were. “Buy new ones” I hear you say. But you can’t for a MK 1 ‘B’ I’m afraid. Second-hand ones are hard to find and expensive. I patched up the best I could but the n/s door had to be re-skinned; again a first for me and not something I’d recommend. Sure, it all seems fine carefully flattening the old bent skin flange and removing it; it’s what you’re left with; a wobbly framework. But, with a bit of care, I managed a to make reasonable job.
Fitting, shaping and welding the new skin was fun and I felt achievement. With great dollops of welding everywhere, on and across the framework, I wielded the angle grinder with avengeance.
The original fuel tank was retained; that’s the oval ended one. The helpful chaps at Essex Radiators & Coachworks checked it out and repaired a cracked seam. Once fitted with a new sender unit, I strapped the tank back in position and then coated it all with oodles of gooey under-seal. With bodywork well on the way, I turned to body protection and paintwork but not so fast. My old compressor was under powered so I had to buy a 50 litre/14cfm second hand one.
Now for a bit of colour
I wanted to do as much of the spraying myself as possible, so a reasonable spray gun was called for. Watching some colour go on certainly boosts the ego. After priming the underside, I coated it with an excellent red coachwork paint recommended by Leonard Brooks Ltd (it’s worth mentioning here that to help with welding in new floor panels etc., I’d turned the body on its side, supported from the garage roof and then chocked underneath). With the body upright and well prepared, I started on the primer and again listening to Brooks advice I went for Iso-cyanate. Whether this is a wise move for an amateur is debatable; it’s lethal stuff and I had to buy an air-fed mask and dual pipe converter belt; more expense (this unit feeds air to the mask and the spray gun, but it set me back £100). I stopped here and had my friends at 3M Coachworks add an excellent Tartan Red top coat treatment in 2pack… All suspension units, brakes and steering assembly were fitted to the body and now we were a “rolling shell”.
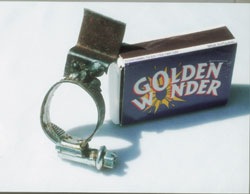
Special bracket devised by Vic to grip early door lock barrels
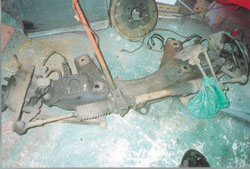
Front suspension before
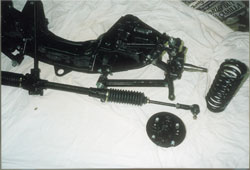
Front suspension after
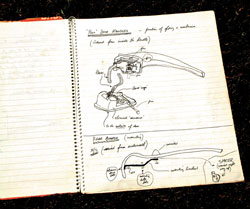
The bits that make it go
Engine, no problem. There wasn’t a contest! It had to be a reconditioned unit from the MGOC. Bearing in mind it’s a MK 1, 3-bearing crankshaft and unleaded head, this doesn’t come cheap but I’m delighted now I went to the expense.
Gearbox, this became a nightmare and one of those times when penny-pinching doesn’t pay. This was a real downside to the whole project and wasted a lot of time. I left the original unit for repair with a so-called Romford based gearbox specialist for no less than three months and was then told that after stripping it down, it was beyond repair. I collected the ‘bits’ in an oily old cardboard box ”thanks a bundle!” I said. Synchro had gone, so had 1st, 2nd and reverse gears.
Next mistake was to buy a second-hand gearbox, ‘on spec.’ from a Doddinghurst club member, who’d advertised in EMG, for £200, it proved to be just as bad as my original one! I really felt let down at this point. Unscrupulous sprang to mind and as for me, ’stupid’ summed me up! I went to Autogear in Canvey Island and they sorted everything out for me; after a week I had a completely rebuilt gearbox with the added luxury of overdrive (an ‘extra’ back in 1963). Again, it cost more than I’d budgeted for but the waste of time and wasted money was much more painful. But now I’m delighted with the gearbox.
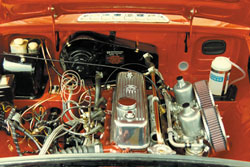
Engine bay
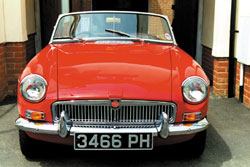
Front end early grille and bumpers
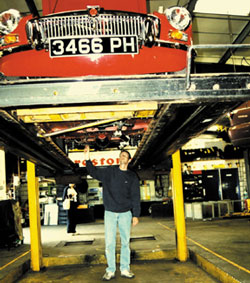
Underside inspection
The home straight
The best part of restorations, obviously, is putting back all the refurbished parts and adding the new ones. I collected together parts such as door handles (pull type); numberplate light covers etc. etc., and together with the rear bumper, had them re-chromed. Fitting them back was a joy. Brian Brown (Restorations) fitted the engine/gearbox and wired in the new loom. He’d already fitted the new windscreen, definitely a job for those who know how. Boy! Does Brian know his stuff! I can only sing out praises for his knowledge and skill You’ll find him in Hitchin, Herts and his details appear near the back of EMG.
Not so hasty
Older MGB’s can be challenging for an amateur, and that’s being polite! I didn’t know how difficult and costly it is, for example, to find replacement quarter lights. Fortunately, MGOC supply all the connecting parts, handles, rubber mouldings etc. but when the originals are broken at the corners, it’s not so easy. Another chore is making sure the securing post is strong. This all amounts to one thing, patience! I also found out how difficult original early seat frames are to find. But I easily welded and repaired them and they looked like new after a touch of Hammerite, but then I turned to the experts again. I bought new foams, and rubber membranes and shipped the whole lot off to Classic British Sports Car Parts, in Plymouth. Back came two excellent, complete seats in black hide with red piping.
The fancy bits
I’d already had the Minilite wheels stove-enamelled in silver and they looked good. Now it was time for some more fun. Fitting the door mechanisms proved easier than I thought. The window regulators and the door locks were OK and working. I fitted new lock barrels and in no time, the doors shut and locked. The door ‘fit’ was reasonable but much improved later with just a bit of adjustment and persuasion. This is where the accuracy of my DIY new sills were put to the test; and it wasn’t too bad.
The clips that hold the lock barrels are adequate but not perfect so I’ve designed a lock barrel retainer to stop them turning in the door holes. It’s made from a flange welded to a small ‘Jubilee’ clip. l’m hoping one of the spares companies may market it.
Adding the door and rear panel trims was easy. I then tackled the carpet. It’s not an easy job but following the sequence in the Restoration Guide helped. Before all of this, I’d laid down an MGOC sound proofing kit and though it does take more time, I would recommend fitting one. Seats were properly secured, dashboard completed, the hood/tonneau pegs fitted. Boy, now we are motoring.
But…what about the rain?
After spending so much time and money on the overall project, I didn’t skimp on the ‘lid’. Fullbridge Restorations (Maldon) refurbished and stove enamelled the hood frame then made and fitted the hood plus a full tonneau, both in mohair; they look a treat! At Fullbridge, Darryl and Rick (bosses) and Dave (upholstery) were more than helpful, a couple of examples: fitting quarter light mounted rear view mirrors (they pointed out that door mounted mirrors can sometimes crack the skin of an MGB wing).
The full tonneau doubles as a hood cover and it’s neatly secured by elongated pegs mounted on the vertical battery box panel.
Now the end is really near
Brian Brown was called on again to: fit the carburettors, fit the distributor and then set the timing. Finally he wired up dashboard and instruments. Then started the engine (after a few turns) and tuned the carburettors.
Then at last we drove down the road. I felt very proud but had a sickly, worried feeling in my stomach; what would drop off or go ‘bang’? But all was OK, it didn’t explode, turn over or catch fire and it even stopped when asked to, PHEW!
My sincere thanks to everyone who helped with my rebuild project
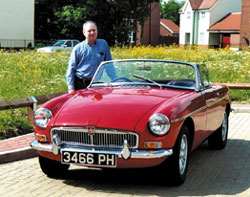
Vic with his MGB
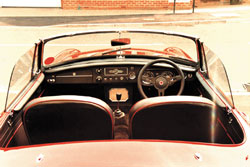
Classic interior but modern steering wheel
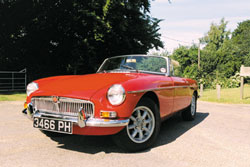
The impressive quality of panel fit and finish is a credit to Vic’s care and attention throughout the rebuild
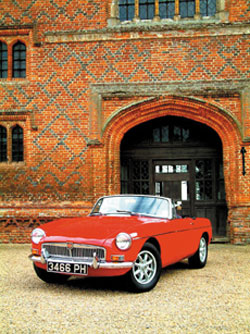
Imposing MGB in an imposing gateway
Vic Birch
Acknowledgements
Without these guys and gals, my little project would have been impossible:
3M Coachwork
Andrew Turner (carburettors)
Autogear Gearboxes
Blueprint Spares
Brandon Spares
Brian Brown Classics
CCS Paints
Cheshire Parts
David Hodgson Instruments
David James (Windscreen Clinic)
Essex Radiators
Fullbridge Restorations, Maldon
Leonard Brooks Paints
Maldon Panels
MG Hive
MGOC Spares and Technical Advice
Moss Europe
Morvac Paints Romford
Renzland Forge Colchester
Sussex Classic Car Parts
Thurston Engineering
W King Plating
…and last, but not least:
Mike Jones and the ‘gang’ at Epping Area MGOC (0801)