A Twin Cam called Ratty Part 10
My report this month mainly concerns the work required to finish the engine and the decision I have made concerning a five-speed gearbox. There are also some notes on using home plating kits and my difficulty in finding MGA grilles suitable for restoration.
At the end of the last report I was getting ready to complete the engine rebuild by fitting the timing chain and I knew this was a task that would need care and precision. Other owners had given me prior warning that accurate valve timing was critical for the smooth running and reliability of a twin cam MG engine. According to my friends even a small error in fitting the drive chain and sprockets could result in much reduced power and even physical damage to the valves and pistons. In the time I have owned Ratty I have collected a number of articles about rebuilding the twin cam engine and some of this information has been helpful. On the subject of valve timing however the advice has been downright confusing so working on the basis that you can have too much information I decided to adopt the procedure described in the workshop manual.
|
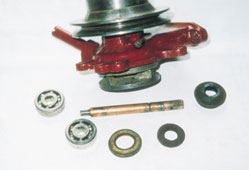 |
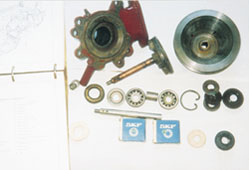
| Water pump stripped for rebuild with new parts from Peter Woods | Rebuilt water pump. Note original parts taken out as replaced |
I know workshop manuals are not meant to be a gripping read but I found the instructions about setting the valve timing on the MGA Twin Cam particularly obtuse. I read and re-read the same part many times before understanding that the easy way to achieve correct valve timing is to use a special locking tool that holds each camshaft in its position whilst the chain is fitted. Much of the other advice in the manual deals with how to check if the valves are set correctly and how to alter the timing.
 I was unable to track down anyone who had a pair of cam locking tools and so decided to produce my own from a drawing in the manual. Fortunately they proved to be relatively straightforward to make out of some steel off cuts I had in stock. With the camshafts locked the chain was fitted without difficulty and I then checked the valve timing using the method suggested in the manual. I suppose this is a good example of how ‘myth and legend’ in any task can distort our thinking and lead us to believe a job is too difficult to achieve.
Many things on a Twin Cam are special and peculiar to the car. The water pump, as far as I know, is one such part unique to the model and almost impossible to source if you are unlucky not to have one. I was obviously concerned therefore to find that the one that came with the car did not revolve and was, to put it delicately, ratty! When I eventually managed to get it apart I found that the whole thing was very rusty inside and the shaft had corroded to the impeller. The water seals were brittle and worn and could not be re-used. This put me in quite a dilemma because the car obviously had to have a water pump.
I checked with the usual MG suppliers but no one had a replacement. Not for the first time Peter Woods came to my rescue with replacement parts to rebuild the original unit. He provided a new stainless steel shaft, new seals and bearings and some good advice on how to remove the old shaft from the impeller using a lathe. He also advised me to improve the water seal contact on the impeller by incorporating a brass sleeve which also had to be machined. The second-hand lathe I bought some years ago seemed an extravagant luxury at the time but it has been invaluable during my restoration of Ratty.
 |
 |
 |
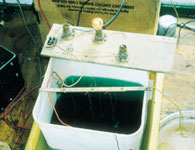 |
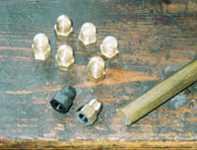
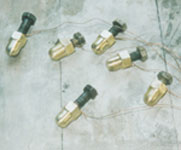
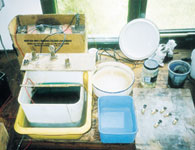
| Acorn nuts for cam covers, two original before and after polishing and 6 new ones made of brass | Preparing brass acorn nuts for nickel plating | Nickel-plating kit. Green nickel salts in plastic tub, bulb holders for controlling current, 12 volt battery, caustic cleaning solution in enamel bowl and plain water in blue plastic container | Plating process underway, acorn nuts can be seen in the solution and bulb indicating current is flowing |
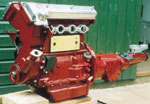
The finished engine now sat on the bench but without the camshaft covers fitted there was a risk of objects accidentally finding their way inside. The covers however looked so corroded they were crying out to be polished. It took days of work to remove a considerable depth of oxidised alloy and to arrive at anything approaching a shiny lustre. It was a rewarding task and worth all the effort involved because I believe the covers are the crowning glory of this handsome looking engine.
I also had trouble with the six acorn nuts used to hold the camshaft covers in place. One was missing and the other five were very rusty after sharing their space with a colony of rats for thirty years. I decided to make six replacement nuts out of brass on the lathe and nickel-plated them using the kit I have had since 1980. The finish that can be achieved on both steel and brass is excellent and the option to do-it yourself can save a lot of time and money on the smaller items during a rebuild. Nickel imparts a shiny and protective finish to polished parts but has the advantage that it does not make smaller items such as fittings look over-restored. It can also be left unpolished for less obvious parts where only protection from corrosion is required.
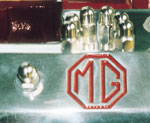 Acorn nuta finished and polished
The kit I use was purchased was from a company named Tec-Nick and it came with a very helpful booklet of instructions about starting plating and tips on preparing parts. As you may remember from school chemistry lessons the method employed in electro-plating is to put a solution of metal salts in a non-ferrous vessel, into which an anode and cathode are suspended. If a small voltage is applied between the anode and cathode, metal is transferred from the anode through the solution and deposited on the cathode. The following procedure shows just how simple the process is in practice.
The kit provides nickel salts which are dissolved in water in a plastic tub. It also includes two plates of pure nickel which are the anodes. The parts you want to plate are the cathodes and these are suspended in the solution from a brass bar. The plating process is started when the positive terminal of a 12 volt car battery is connected through a low wattage bulb to the nickel anodes and the negative terminal is connected to the parts to be plated. It is necessary to control the current flowing in the circuit but this is easily achieved with different sized filament bulbs in circuit. The plating procedure is explained in much more detail in the instructions.
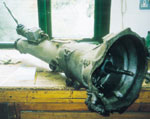 Gearbox prior to examination
Nickel-plating of course was never used on MGs made in the sixties; the standard finish for all the smaller parts would have been zinc. A zinc plating kit is now available from the Frost’s catalogue and possibly Tec-Nick but I have not tried this finish for myself and therefore cannot endorse its effectiveness.
In Part 9 I mentioned that I was considering replacing the standard gearbox with a five-speed version from a Ford Sierra. This is now a well-tried and reversible option available for a number of MG models, with well-engineered conversion kits available from Hi-Gear. Why would you want to fit a Ford gearbox in an MGA? The short answer is that they are well made, plentiful, and have synchromesh on all five gears. They are also available in a range of gear ratios making it easy to find the right match for your application. In my case I want to use Ratty for long distance European touring and liked the idea of a fifth gear for relaxed motorway cruising. Some of the Ford gear ratios would also make better use of the Twin Cam’s high revving capabilities and improve overtaking.
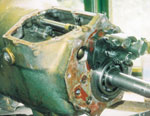 Examining gearbox internals
Although I can see the advantages of doing this, the total cost is significant with the conversion kit costing £700 and a reconditioned Ford Sierra gearbox anything between £400 and £700 depending on the ratios selected. Even if I do all the work myself it will cost at least £1,100 and I cannot justify this expense at the moment.
I have also considered fitting an overdrive to the original MG gearbox to give more relaxed cruising. My research showed that it would be possible to obtain the parts to make the conversion but the cost including a rebuilt overdrive would be £600.Once again I felt I could not justify the expense and there is the disadvantage that the conversion would also require major alterations to the gearbox and prop shaft tunnel metal work.
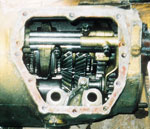 Examining gearbox internals
My final option which would be replacing the crown wheel and pinion to give a higher overall ratio is probably the most attractive from a cost point of view. Standard parts are used in the original differential to give either 10 or 20 percent higher ratios reducing the engine speed at any given road speed by the same proportion. A completely rebuilt differential with a new high ratio CWP would cost £300. Unfortunately the downside of making this modification is that it obviously changes all the gear ratios, not just fourth gear and other twin cam owners have advised me that this could alter the whole driving experience of the car.
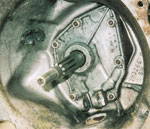 Gearbox input shaft in excellent condition
After much thought I have decided to make no drastic changes to the transmission for the time being, a decision finalised after I had stripped the gearbox down and found that it was in very good condition. It was interesting to note that the original gearbox had been replaced by a factory rebuilt ‘Gold Seal’ unit that was date stamped May 1965. The car was taken off the road in 1968 so it is likely that the gearbox had seen less than 3 years use, consistent with its general condition. Faced with a ‘no-cost’ option or £1,100 for a desirable five-speed conversion I am afraid common sense prevailed. It seemed logical to finish the car and try it in its standard form. I know there will be plenty of time to develop improvements at a later stage.
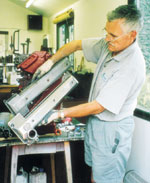
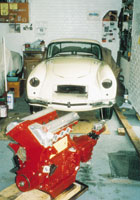
 The operation to replace the engine and gearbox in the car was another of those delightful milestone moments in the rebuild and I enjoyed every moment of the installation. The photographs show the engine being installed without the gearbox fitted using a simple block and tackle. I prefer this method to the more modern hydraulic arm lift because you are so much closer to the engine as it is lowered into the engine bay. The block and tackle has sentimental value having belonged to both my grandfather and father and as a lad I helped them both use it to remove engines from a variety of pre-war cars. Before he invested in this lifting gear, my grandfather would crouch on the chassis with a rope around his neck and lift the engine out using the strength in his legs and back. As a back sufferer the thought of this today makes me cringe! Although space in the engine bay is limited the engine was refitted without difficulty or damage to the surrounding painted areas. I decided against adopting the advice given in the manual to fit the engine and gearbox together as it would have been necessary to tilt the whole assembly at an alarming angle and even then it would have been a tight squeeze. Once the engine was in place I fitted the gearbox from inside the car. I had made a very useful clutch alignment tool on the lathe and this facilitated assembly of the gearbox to the engine.
 |
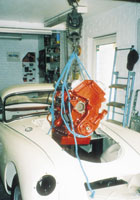 |
| Getting ready to fit the engine and gearbox | Easy does it using the block and tackle! |
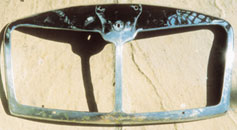
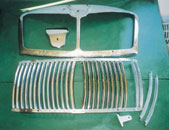
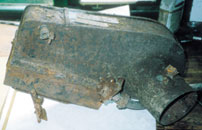
It is very difficult to buy a replacement grille for an MGA at the moment. The one that came with Ratty was incorrect for the year of the car and was recessed instead of following the line of the bodywork. It was also extremely bent and distorted and would obviously have to be replaced. I had been looking for a restorable replacement for at least a year but to no avail and it was becoming an urgent priority to find something I could use.
 |
 |
 |
 |
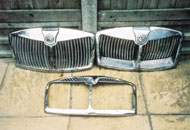
| Assortment of grilles. Top left K Herkes’s £12 find at Silverstone. Top right, Ratty’s original grille and bottom, surround only found at Silverstone | Close up of grille surround before plating | Restoring the £12 grille, stainless slats being removed one at a time. Dents removed from surround | In the next instalment, the challenge of dealing with a truly ‘Ratty’ heater |
Then at the MG Silverstone meeting this year I managed to buy an original surround for £50 and felt delighted to have at least part of the grille although the traders I spoke to indicated that I would be very lucky to find the stainless slats needed to complete the unit. Imagine my surprise and delight when my good friend Keith Herkes managed to buy a complete grille for £12. What a find! I now had three surrounds and one set of correct slats. The £12 grille was an excellent buy and I was able to straighten out all the slats and remove the dents in the surround before taking it for chrome plating. I mention this quickly but the work involved took two weeks of painstaking tapping and polishing before I was satisfied. After all the chrome grill on any MG is a very prominent feature of the car.
Shortly I shall be starting on the refit of the engine bay and prop shaft before fitting the gearbox tunnel and floorboards.