MGB GT Windscreen Replacement
Windscreen replacement on an MGB GT is a difficult task and one that even professionals will approach with some caution but fitting a new screen or replacing a worn screen rubber is a job that can be can be accomplished by a determined amateur with care and patience. Damaged or opaque windscreens will lead to an MoT failure while a re-spray will require the removal of the windscreen; whatever the reason, you may find that you need to replace your BGT’s screen or fit a new rubber seal, so here is your step by step guide.
Tools you require
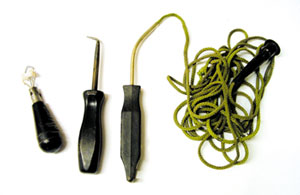
The task can be eased by obtaining the correct tools for the job. Specialist automotive tool companies such as Sealey sell windscreen fitting kits.
Tools from left to right – locking seal installer, pig tail pick, cord to install main window seal
Removal
Ideally it is best to carry out this job in a garage or under cover. If the weather turns inclement, then you can still carry on with the task in hand without working under pressure. First remove each wiper arm and blade by just pulling off the arms from the wheel box stubs. The next task is to remove the chrome finishing strips which ‘frame’ the windscreen itself. In the majority of cases it is sensible to replace the main windscreen rubber at the same time, so you can sacrifice the old rubber to ease the removal of the chrome trims and screen. Carefully cut around the edges of the chrome strips with a sharp Stanley knife and lift the finishers away from the seal on the sides, top, bottom and corners.
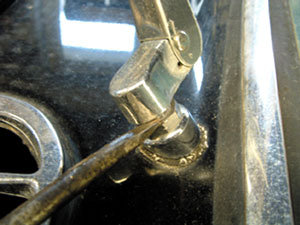
Carefully remove the wiper arms from the wheel boxes
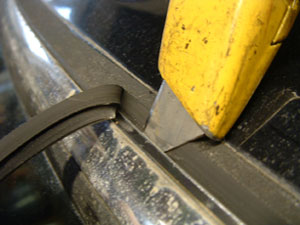
Using a sharp knife cut the seal away to release the chrome surrounds
Next on the agenda is to release the press-in rubber locking strip that spreads the main seal and locks both seal and windscreen into place and prevents the screen ending up on your lap at speed. A thin small screwdriver or curved pick is ideal for this. Once the locking strip has been removed you can cut around the rest of the seal to expose the edges of the screen. Once again use a sharp Stanley knife blade for this and use the feel of the screen as a guide to where your knife should be. Take this procedure slowly to avoid cutting the interior trim or scratching the paintwork.
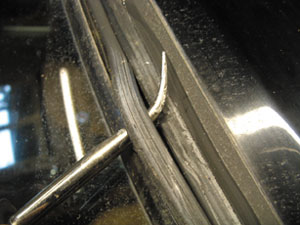
Using a suitable tool release the locking strip all the way around the screen seal
Once the rubber edge is cut away and you can see the edges of the screen, then carefully place your hand on the top inside of the screen and gently push the glass outwards. The windscreen should now be released forwards and come away from the seal. It is best to wear gloves at this point as you will need to grasp the screen and remove it from the car, place the whole front windscreen in a suitable place for safe storage. Now that the windscreen glass is removed you can pull the main screen seal away from the edges of the screen aperture in the body of the GT.
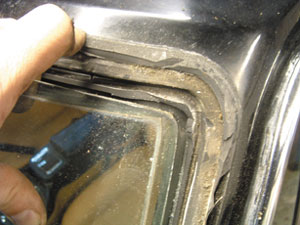
Now the locking seal, chrome trims have been removed the seal can be cut around the screen and the screen removed from the car.
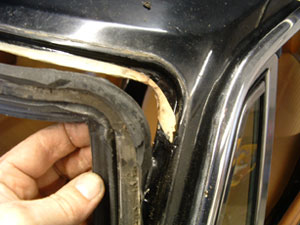
Carefully remove the old seal
Preparation and Refit
Clean up the screen surround area and carefully position the new screen seal in place. Reasonable force is necessary to push the seal firmly onto the screen surround of the body to prevent the seal’s top edge from falling away every time that you offer it up. This is a frustrating task that is guaranteed to try your patience. Once the seal is in place you need to run a length of nylon cord around the inside of the seal moulding, inside the groove where the windscreen itself will ultimately sit. You can use a length of suitable nylon cord and a flat bladed screwdriver to place it in position. Better still you can purchase a windscreen installation kit which will have a length of this cord included, plus a special tool to insert the cord, as well as a tool to fit the locking seal and some curved picks.
Once the cord is in position the windscreen glass can be offered up into place. When you are happy that the glass is correctly positioned centrally in the aperture then try to engage the bottom of the screen into the groove of the seal for the glass. It is suprising how much force you can exert on the screen (while wearing gloves) but unfortunately you never quite know how far you can push this until it’s too late, you have been warned. Once the glass is very roughly in position then you can start to remove the cord along the bottom of the seal by carefully pulling it out, making sure the seal is re-forming itself correctly or lipping around the glass as you do so. It is possible to pull the cord through the seal without correctly lipping the seal over, and so I found it easier to hold the cord in each corner as you work your way around the screen. Once one side of the bottom and half of the side seal has been lipped into place move to the other side of the car and perform the same process. Continue this until the seal and cord is ready to meet at the top middle part of the screen. It will now become quite difficult to move the cord and lip the seal over. However, if you persevere, you will find that as the cord comes completely out of the seal as it completes the lipping process around the screen, giving you a comprehensive seal all around the screen and body aperture.
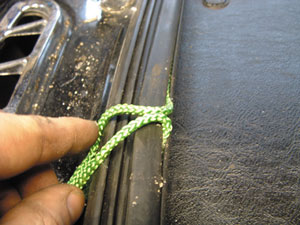
Install the cord into the seal and meet up in the middle, bottom, of the screen aperture
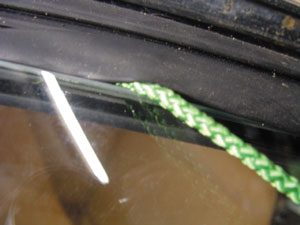
Pull the cord around lipping the seal over until you meet up at the top middle of the screen where it will start to become difficult
Locking Seal
This is one area where using a special tool will save you hours of effort. To install the locking strip you need to spread the main screen seal and then push the locking seal into place. While installing this locking seal can be carried out by employing a vast number of hands and screwdrivers it is much easier to use the proper tool. This tool has a wire spreader and small wheel attachment to roll the looking seal into place and saves not only time but also scratched paintwork and your temper, making it a worthwhile investment. Once properly installed the screen is held firmly in place and it would be safe to drive the car without risk of the screen falling out or suffering from any water ingress. Out of interest there should not be the need for any sealer but if you find the screen or seal does leak, then try applying some windscreen sealer under the seal on the body and screen side.
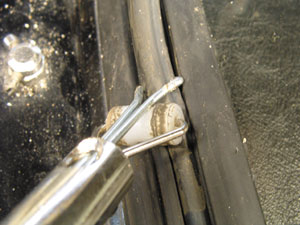
Using a special tool to insert the locking strip in to the main seal
Chrome Strip Replacement
Now that the screen is firmly back in position you are only left with the task of replacing the chrome strips. This may appear to be an easy task but there are different approaches. Some people re-fit the chrome strips ‘dry’ while other choose the lubrication route. On this occasion plenty of washing up liquid was employed. Any lubricant could be used from Vaseline to body lotion but good old washing up liquid serves just as well. Smear the seal area with the chosen lubricant and slide the chrome strip as far as possible into position, working from the body side. It is a good idea to carry this out, approaching from the body side if you can, because if you slip it is better to slip onto the screen which is more forgiving than the paintwork. Once the trim is in, use a thin screwdriver or pick, similar in shape to the one shown, to lip the thin rubber seal around the chrome surround. Once about an inch or so of trim is in position it should start to hold itself in place giving you another hand free to assist with the fitting. You can now work your way slowly around the chrome trims. I fitted all four corners first but there is nothing to stop you fitting each part around the screen as you go. Once all four corners and trims are in place you can press down on all of them, ensure each section is securely in place and then finish off by wiping up the excess lubricant and cleaning the surrounding area.
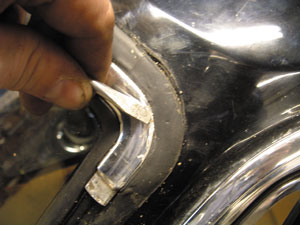
Carefully using a screwdriver to fit the corner chrome trims
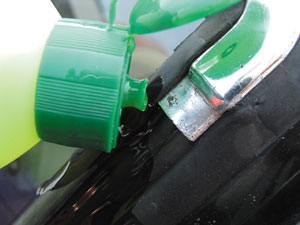
Washing up liquid is a useful lubricant for installation
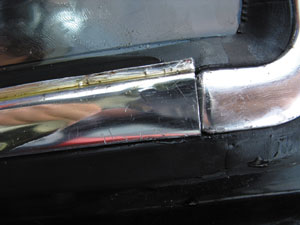
Try to install the chrome strip in to the body side first to help reduce the risk of scratching the paint
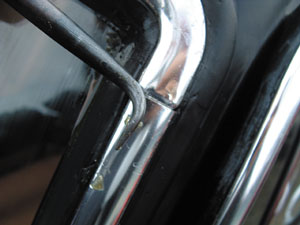
‘Pig Tail’ shaped tool used for ‘lipping’ the seal over the chrome trim – a very useful tool but you could modify a screwdriver to suit
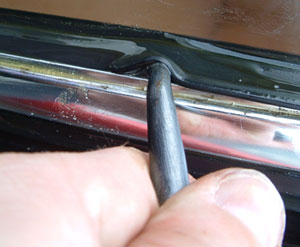
Tool being used to install chrome trims in to place