1275 Midget Goes Unleaded
Go Unleaded
Changing times for a 1275 Midget
With the demise of Leaded petrol many owners of MGs have been making decisions about what fuel to use in their cars. Owners have a number of choices. Lead Replacement Petrol is the solution offered by the major fuel companies but LRP has not yet been independently tested nor, as many experts suggest, does it offer the same level of protection of some of the quality additives or mechanical conversions. One of the best and most cost-effective additives is Castrol Valvemaster Plus. This offers protection when running standard Unleaded fuel and the additional benefit of an octane booster which increases the octane level of Unleaded (95 Ron) to that of the original four star (97 Ron). So you do not need to retard the timing to stop pinking and suffer no loss of power. The final option is the mechanical change, replacing the valve seats with a harder material to withstand the rigors of using pure Unleaded fuel. The pros and cons of all of the possible routes could, and I am sure will, be discussed for many more years until we have a pattern of the best option for each marque of car.
In this article we are carrying out the mechanical change on a 1275 Midget. This is a proven route as the conversion has now been available for over ten years. Although, initially, not the most cost effective option, if the car is used on a regular basis either at sustained cruising speeds or towing, then this approach might be your best choice.
Removal of ancillaries
Making sure that the engine is cold, place a large clean container under the car and remove the bottom hose from the radiator to allow the water/antifreeze to drain out. Release the four securing bolts for the air filters and remove them from the engine bay. Access to the throttle linkage is now much better and you can release the throttle and choke cables with relative ease. Throttle return springs will also need to be removed along with the small vacuum advance pipe that runs from the distributor to the SU carburettors. Remove the fuel pipe and block it with a suitable sized bolt, then all the carburettor breather pipes will also need to be disconnected. With a 1/2 inch combination spanner undo the nuts that secure both the carburettors to the inlet manifold. With the nuts off, gently apply some pressure to push the two carburettors together. This can be a bit tricky but try a number of different positions until you find the one that allows you to pull both carbs back off from the inlet manifold studs. In addition this should, keep both the choke and throttle spindles in place. Place carefully out of the way to avoid disturbing the throttle and choke linkage. From each side remove the insulating blocks from the inlet manifold. The heat shield also needs to be removed to gain access to the brass manifold nuts and thick washers. On some cars you will also need to release the bolts that secure the bottom of the shield to two stabilising bars.
Six brass nuts hold on the inlet and exhaust manifold and these can now be removed. This will allow the inlet manifold to be taken off and placed up out of the way. Now you can see the join between exhaust manifold to down pipe. The clamp needs to be removed, the joint broken and the manifold removed out of the way.
On the other side of the engine remove all four-plug leads making sure that you label each one to allow easy replacement. After removing the hose that runs between the valve and heater box, use a 7/16th combination spanner to remove the two bolts that hold on the heater control valve. It may need a gentle tap with a hammer to release the gasket and sealer.
The capillary bulb for the water temperature gauge needs to be very carefully unscrewed and gently curled back out of the way. Take note that there is a converting ring for the capillary bulb still in the head that will need to be removed later.
Removal of the head
With all the ancillaries removed the head can now be tackled. Undo the two rocker cover bolts, the cover can sometimes be difficult to release, again a gentle tap with the shaft of a hammer should break the seal. With the cover removed the rocker shaft assembly and the other head nuts are visible. Following the diagram for slackening and tightening the head bolts in your workshop manual, undo the head nuts a turn at a time in the correct sequence. When the head bolts are slack the four rocker shaft nuts can be removed and the shaft lifted off. Place the shaft onto a clean surface, marking the front end. Working from the front of the engine, remove the push-rods one at a time and place, in order of removal next to the rocker shaft. All of the head nuts can now be removed by hand and placed in a container making sure that you do not lose any of them or the thick washers underneath.
The seal of the mating surfaces of the head and block to the gasket now needs to be broken. Sometimes this can be done by grasping the head at either end and rocking side to side. However, if this does not do the trick, place a lever between the head and water pump area to help lever the head up. Under no circumstance place any lever or attempt to prise between the head and block joint because you run the risk of damaging the mating surfaces , which will lead to possible head gasket problems. Once the seal has been broken the head can be lifted straight up and off of the block. Place the head carefully on a workbench. The thermostat housing can be removed and the thermostat hooked out. With a stud extractor remove the manifold, thermostat housing and rocker shaft fixing studs from the head. At this stage also remove the converter for the temperature gauge, it is easy to forget about this.
Cleaning up the block
There are two methods that can be used to clean up the block. One involves removing all of the cylinder head studs and the other does not. The important aspect is that on assembly when heated, pressurise the area and cause a crack.
While the block and head are all clean check that both mating surfaces are flat by using a straight edge. Slide this carefully along the surface being tested and, using a feeler blade, check for any bumps or dips in the surface. Any fault, however small, could give rise to head gasket failure. Also remember to replace the manifold, thermostat housing and rocker shaft studs. If required or if they are suspect replace with new items.
Refitting
Carry out a final check to ensure that both the mating surfaces are clean. Look at the new head gasket to determine which way round and up it should go. Gaskets will normally have either front or top embossed into them meaning they can only be fitted one way. Once sure of the position place the gasket on the block. Carefully line up the stud holes with the studs and then lower the head onto the block. Replace the push-rods back in the same positions that they came out. Slide the rocker shaft assembly onto its eight locating studs making sure that the balls of the rocker arms locate correctly into the cup of the push rods. Following the tightening chart take up the slack in all of the head nuts remembering to place the thick washers under the nuts.
Once the slack has been taken up tighten with a torque wrench, again in sequence, in increments of 10lb/ft torque until the correct torque has been reached. The four remaining rocker shaft pedestal nuts can now be tightened. Working around the engine the heater control valve can be fitted, using a new gasket and some gasket sealer, replacing the hose and securing with the worm drive clip. The exhaust and inlet manifold, again with a new gasket, can be replaced taking care to make sure that even pressure is applied by the four large washers that hold on both the manifolds. When replacing the exhaust down pipe to the manifold ensure that both surfaces are extremely clean. A small amount of exhaust sealing paste can be used to ensure a good seal when all is tight.
Replacing the gaskets as you go, place onto the inlet manifold, a gasket, the heatshield followed by another gasket, the spacer blocks, another gasket and finally the pair of carbs making sure you apply slight pressure keeping them together so that you do not disturb the throttle and choke linkages. The four nuts can now be tightened the throttle and choke cables attached and the fuel pipe fastened in place. Connect back up any remaining hoses; such as the vacuum advance pipe to the distributor and breather pipe from the timing cover.
Replace the thermostat and using some gasket sealer and a new gasket, bolt back on the thermostat housing. Reconnect both the top and bottom hoses securing with worm drive clips.
As there is possibility of contamination from water or old pieces of gasket making their way into the sump oil, it is recommended that at this stage you drain the oil and replace with new. If you consider it necessary or it is near to a service interval, then it is suggested to replace the oil filter at the same time. It is wise practice to also replace the other service items on the car, such as air filters, fan belt, points, condenser, rotor arm, distributor cap, plugs and plug leads. Once the above have been serviced or replaced, refit the air filters.
After 500 miles remove the rocker cover a re-torque the head nuts, observing the tightening sequence as described in the workshop manual. Finally check the valve clearances and replace the rocker cover.
P.S. When purchasing a torque wrench always buy the best one you can afford.
Before start up
With all of the ancillaries now attached back to the engine the final adjustments can now be made. The tappets need to be checked and adjusted as necessary and the rocker cover refitted using a new gasket. A tip here when fitting a new gasket, sometimes they will not stay in place when you turn the rocker cover over to refit to the engine. Try some glue on the gasket to rocker cover joint, it works wonders.
With the cover now relocated the small heater pipe from the bottom hose to the heater matrix can now be connected and the whole cooling system filled up with the correct water/anti-freeze mixture.
Turn the ignition on and wait for the fuel pump to stop ticking as it fills up the float chambers. Start the car and run it up to its normal operating temperature. Switch off and leave it for about five minutes. Remove the rocker cover and torque up the head nuts again, following the tightening sequence. Check the tappet clearances once again and replace the rocker cover.
The job is now almost complete except for altering the timing. This should be set with a strobe light at 1000rpm with the vacuum pipe from the distributor disconnected. We recommend that you should use a figure that is two or three degrees retarded from that listed in the workshop manual. If, when driving the car, it starts pinking (a sound like gravel is being thrown onto the sump of the car) under load, retard the ignition by a few more degrees until you no longer have the pinking. Once adjusted, take the car up the road for a test run checking, on your return, for any oil or water leaks from any pipes. You also need to check that the head gasket is sealing and that there are no signs of leaks or bubbling at the joint of the head and block.
You can now confidently pull in to the petrol station and fill up with unleaded fuel.
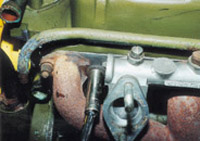
| “1.Using a deep socket to release the manifold to head nuts” |
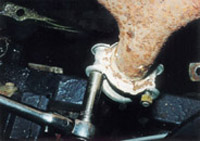 “2.Note the mass of exhaust paste smeared around the manifold joint to help make it leak free” |
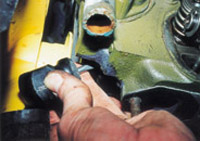 “3.Do not forget to undo the small bypass pipe at the front of the head” |
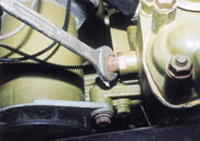 “4.Carefully does it when taking out the temperature sender break the tube and it is a replacement gauge” |
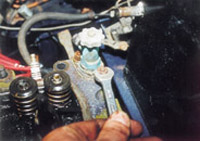 “5.Release the heater valve at the back of the head.” |
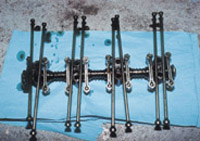 “6.Keep the pushrods in the order that they come out of the engine on the rockershaft is convenient but you could use card with numbers on it “ |
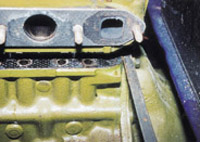 “7.If it puts up a fight you will need to use a lever but be careful not to place it on the mating surfaces “ |
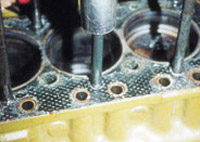 “8.Using a stud remover to take the head studs out of the block.” |
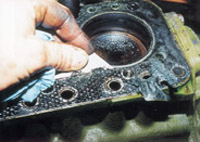 “9.With the studs removed it is easier to clean up the mating surfaces but do not score either surface” |
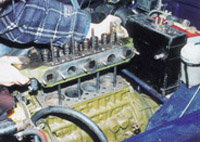 “10.With the surfaces all clean and a new gasket in place the head can now be carefully lowered into place” |
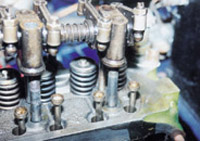 “11.The push rods need to be slid into place and then the rockershaft can be replaced; ensuring the ball socket enters the top of the pushrod” |
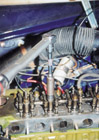 “12.Using a torque wrench, tighten the head down in stages. Carefully follow the tightening sequence and the appropriate torque settings described in the workshop manual” |
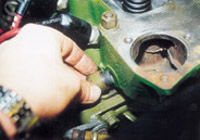 “13.Replacing the converter into the head before re-installing the temperature sender” |
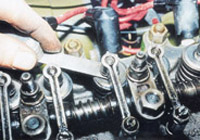 “14.Before replacing the rocker cover check the valve clearances” |
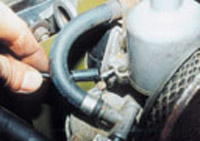 “15.Once you have timed the engine replace the small vacuum pipe on the carburettors” |