Cutting a dashboard for MGs
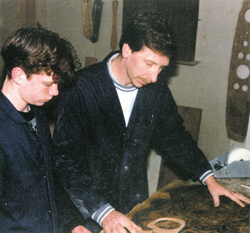
CUTTING A DASH: BURR WALNUT AND CARBON FIBRE FASCIAS FOR MGs
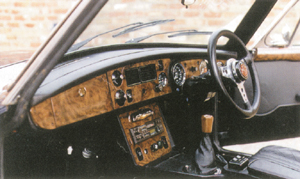
The retro themes now popularly included in modern cars include many that featured in the earliest MG models such as leather fluted seats, burr walnut trim and light coloured instrument faces. Time has not changed the feeling of comfort and luxury these create and as early as 1983 MGOC Accessories pioneered the fitment of genuine burr walnut dashboards and door cappings for MGB and Midget models to re kindle the air of refinement and quality attributed to those early cars.
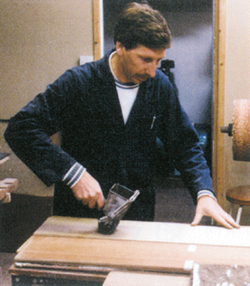
The process of making a burr walnut dashboard for an MGB starts with the selection of suitable sheets of veneer. There are many different shades and grain types, but for the consistent quality American Black burr walnut is considered best. As an extra refinement, the veneer is taken from the tree which has been quarter cut, to enable the veneer pattern to be same at either sides of the fascia, thus giving consistent colour and configuration along its length.
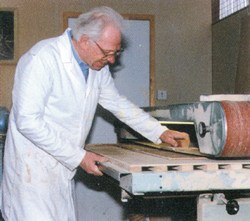
The burr walnut veneer is only 0.5 mm thick, and is mounted onto a special grade of MDF, (Medium Density Fibreboard) that is resistant to heat and dampness. This board provides a dimensionally stable base to protect the veneer from cracking and distortion. After positioning the veneer sheets onto the pre-glued face of the MDF board, it is then placed in a special jig that holds it firmly during the veneering operation. This involves the burr walnut veneer being placed onto the glued MDF. This fascia is placed in a vacuum press with a rubber sheet is laid over the top, the air is sucked out and the rubber membrane is thus pulled down over the surface of the veneer to bond it securely. At the same time heat is applied to cure the adhesive. Using this process, up to five dashboards can be done simultaneously, covering each with an unbroken half millimetre of veneer. The entire dashboard surface is now sanded to remove any imperfections.
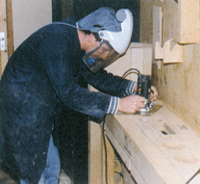
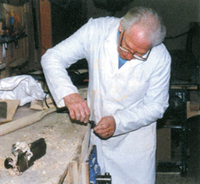
The board is then clamped into position on a jig and the outline of each component piece is cut to shape and numbered to ensure that it remains part of a particular set. The accuracy of the jigs and the skill in developing the patterns determines the final fit of the fascia and great care is taken in cutting each board to achieve that result. The reverse side of the fascias are worked with a router around the instrument and switch holes to provide the various rebates necessary to enable the finished piece to seat flush over the original dash panel.
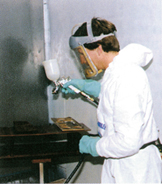
The fascias are now ready for a final sanding and then the painstaking process of hand finishing each piece is carried out. After a final inspection check, the pieces are transferred to the spray booth, where six coats of polyester resin are applied to provide a durable yet flexible coating.
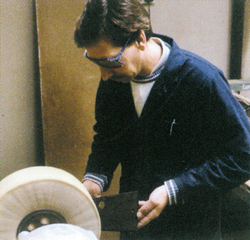
After drying, the polyester coating undergoes three stages of flatting using 240, 400 and finally 800 grade flatting paper, after which each piece is hand finished on the buffing wheel, using progressively finer grades of polish. The coded pieces are then returned to make up particular sets, and then carefully wrapped and packed ready for delivery.
 |
 |
 |
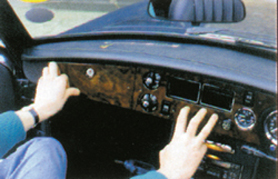
 As the fascia panels are designed to simply layover the existing metal dash panel, and fitting is therefore extremely simple although a degree of care is required. Your will need a drill (the panel set comes complete with instructions, screws and the correct size drill bit), a pointed bradawl and a small Phillips type screwdriver. Firstly remove the chrome strip from the glove box door. Fitting is now basically a process of positioning, marking and screwing each panel into place and should take no more than one hour to complete. As an example, here are the fitment instructions for a 1973 MGB GT. Starting with the fuel gauge right hand panel, position, mark, drill and screw into place. Next fit the Speedo/Rev counter panel in the same way. Taking the main centre panel and glove box panel, offer them up together, checking that their bottom edges are aligned horizontally and that the glove box door has sufficient clearance to operate. Again, mark, drill and screw each piece into place. The final left-hand panel may now be fitted in the same manner.
Console and Gearstick panels are fitted in the same way, and are available in two types for each model – those to fit original equipment two piece centre consoles and those to fit MGOC Accessories one piece leather covered console to match and compliment a new leather interior.
 |
 |
| Dashboards | Burr Walnut | Carbon Fibre |
| MGB/C 1962-1972 | £169.95 | £199.95 |
| MGB 1971-1974 | “ | “ |
| MGB 1975 & V8 | “ | “ |
| MGB 1976 on | “ | “ |
| Console Panels | ||
| MGB up to 1968 | £77.75 | £91.95 |
| MGB 1969-1971 | £81.00 | £91.95 |
| MGB 1971-1976 | £92.50 | £106.75 |
| MGB 1976 on | £92.50 | £103.75 |
| Gearstick Panels | ||
| MGB 1971-1975 | £121.75 | £134.95 |
| MGB 1976 on | £84.25 | £103.50 |
| Console/Gearstick Set | ||
| for Leather one piece Console | £210.50 | £215.75 |
| Door Cappings | ||
| MGB pair | £202.50 | £242.00 |
| GT pair | £209.50 | £242.00 |
| GT 4 piece set | £322.50 | £369.25 |
(Delivery £8.50)
For details of MGB, Midget and MGA Dashboards and to order, contact MGOC Accessories on Swavesey (01954) 231318