John Day’s Workshop Number 3
Exhaust Manifold Stud Replacement
In this month’s workshop notes I will describe some procedures for replacing rusted and broken studs in a typical MGB exhaust manifold. I am sure many owners of older MGs will identify with the problem if they have attempted to fit a new exhaust system at any time.
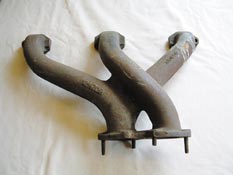
The front down-pipe section of the exhaust system is clamped to the manifold by six brass nuts on studs which are difficult to reach from underneath the car at the best of times, even with a socket and extension. As the brass nuts are gradually unscrewed, usually with much squeaking and graunching, one or more of the studs often break off. The exhaust system cannot now be refitted until these studs are replaced and this can prove quite a dilemma. There is however no need to despair even if your manifold has ended up looking like the example shown in the photographs. It must of course be removed from the engine to carry out these repairs but with a bit of effort and a few tools the damaged studs can be replaced. Whilst the manifold is off the engine it is also an ideal opportunity to improve its appearance by de-rusting and applying heatproof paint.
If you look at the manifold shown in the photographs the studs have three different problems. Two of the studs are intact but will need to be replaced because they are badly corroded and might soon break in service if reused. The other four have sheared off as the nuts were undone but two have left a part of the old stud sticking out and in the worst case two studs have sheared below the surface. The latter are the most challenging to replace because the broken pieces will have to be drilled out and the thread reformed if the manifold is to be reused.
Typical exhaust manifold with rusty or broken studs. |
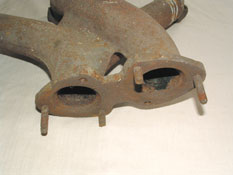 Closer view of the damage to the studs |
The technique I use for removing complete studs is to screw two nuts onto the thread locking them against each other with two spanners. Now penetrating oil such as DWF should be applied all round the threads before an attempt is made to unscrew the stud. If you don’t have any penetrating oil to hand then ‘used’ brake fluid can also be quite effective. A good tip when unscrewing a very tight and rusted stud is perversely to try tightening it first. The load on the spanner needs to be applied gradually and sometimes a slight crack may be heard as the stud moves. Now try undoing the stud and once again gradually apply the load to the spanner. If you are lucky the spanner can be moved through a small angle and more penetrating fluid can then be applied as the tool is then worked backwards and forwards. Gradually the stud rotation should increase as the fluid does its job and eventually it will be possible to unscrew it all the way out as shown in the photographs. It is also possible to use a proprietary stud removal tool to extract stubborn studs. I find this type of tool works well on applications where there is no corrosion but is less successful in removing rusted studs as found on a manifold.
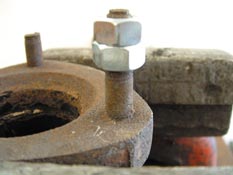 Preparing to remove a rusty stud using two nuts locked together and a ring spanner. |
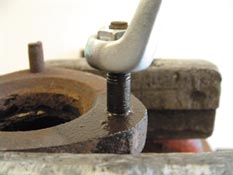 Unscrewing a complete stud using a ring spanner. |
At this stage it is worth looking at the end of the stud which has been removed and noticing that it has a much coarser pitch than the end with the nut. This is because the manifold is manufactured from cast iron and a 5/16th UNC coarse pitch thread is used to give a stronger fixing compared with a UNF fine pitch. When I bought the new studs to do this job I found that the MG parts supplier I used gave me the wrong parts, twice! On the first occasion it was my own fault because I failed to give them sufficient information and they supplied the studs that hold the manifold to the engine. It was easy to spot these were incorrect because they had 5/16th UNF threads (Unified Fine) on both ends and two of the six studs were longer than the others. I returned these and was then sent a manifold repair kit for the exhaust end of the manifold. These studs were all the correct length but due to a stores error they were once again supplied with UNF threads both ends. If this set had been used they would have caused irreparable damage to the threads in the manifold. The moral here is to always double check that the replacement parts you use for a job are the correct specification.
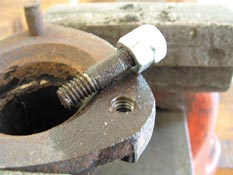 The stud after removal. Note copious amounts of penetrating oil have been used. |
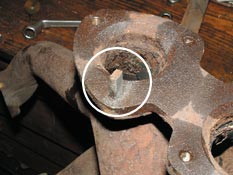 A broken stud ready for removal with a Molegrip wrench. Note the flats filed on the stud end. |
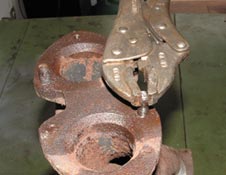 The wrench is clamped on to the flat part of the stud. |
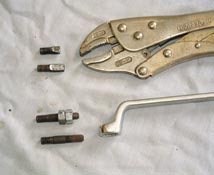 Four studs after removal. |
Returning to the remaining four studs, a similar technique may be used to remove the two where a part is still visible above the surface of the manifold. In this case the studs are too short to accommodate nuts so a mole-grip type of wrench, as shown in the photographs is used to unscrew them. Note that I have filed two flats on the part sticking out of the stud to provide a good surface for the wrench to grip. The release technique however is the same as with the spanner. Apply a tightening load first, followed by load in the opposite direction until a small amount of movement is felt. The penetrating fluid should then begin to work and gradually the stud will be released. It is possible that the stud will shear off close to the manifold during this process and it will thus become a candidate for drilling out as described in the next paragraph.
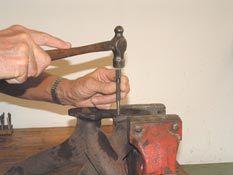 Marking the broken end of a stud with a centre-pop before drilling. |
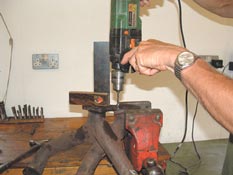 Drilling out the old stud using a 1/ 4inch drill bit. |
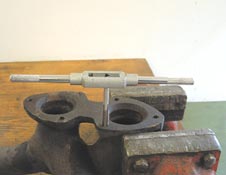 Tapping out the thread using a 5/16 UNC taper tap. |
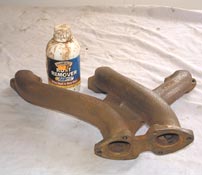 The rust was removed prior to painting using Hammerite Rust Remover. |
Now we are faced with the two studs which have broken off below the surface and these will need to be drilled and the threads re-tapped. As you can see in the photographs the manifold is mounted upside down in an engineering-vice and the broken stud is marked with a centre pop to start the drill. On an MGB the thread used in the manifold is 5/16th inch UNC and a good drill bit for this thread is 1/ 4 inch diameter. The correct drill for other sized studs would of course need to be determined individually. With the bit mounted in an electric drill the centre of the stud is removed as shown in the photograph. It is essential to keep the drill square to the manifold base as the bit cuts and a square is helpful as a guide if available. If you do not have a suitable square, a second person can verify the correct alignment towards and away from you whilst you concentrate on keeping the drill from moving from left or right.
A 5/16th UNC tap is needed now to reform the thread in the newly drilled hole which may be tricky if most of the old stud is left in the manifold threads. For this reason it is best to use a tapered tap which tends to pull the old threads out as it is screwed into the manifold. If you remove the tap after each complete turn and examine the thread hole, it is usually possible to remove pieces of the old stud thread with a sharp pointed object. This might prove long-winded but in the end all six of the manifold threads will be reinstated and ready for new studs to be inserted.
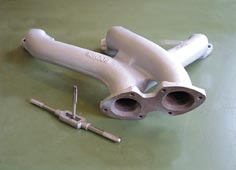 The manifold after painting with Hycote Aluminium High Temperature Paint. |
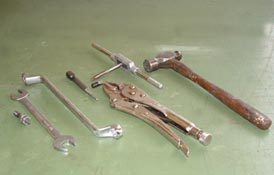 The tools used to repair the manifold. |
The appearance of the engine is important to many MG owners and this is a good time to improve the finish of the manifold. I use Hammerite de-rusting fluid for this type of application as this is an effective way to remove most of the surface rust. Once the rust is removed the surface can be protected with high temperature paint such as Hycote Aluminium which I find stops further unsightly rusting of the manifold for many years.
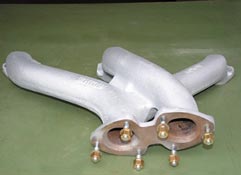
The finished manifold. Note the new studs and brass nuts have been fitted.
Another useful tip when fitting a new exhaust after replacing the studs on the manifold is to fit the front exhaust down pipe to the manifold with the nuts done up only finger tight. This assembly is fitted to the engine and allows you to find the best position for the rest of the exhaust system before tightening the brass manifold nuts from underneath the car with a socket and extension bar.