MG TF window mechanism replacement
The process of ageing brings new wear and age related failures which steadily increase until enough time and miles have passed for a complete cycle to have been encountered. MG Midgets and MGBs are old enough to have gone through this full cycle of issues meaning that there are few ‘new’ problems occurring. On the other hand the MGF, and TF, are still going through their cycle of age and mileage related problems, so each year we are adding brand new failures to the ever-growing list.
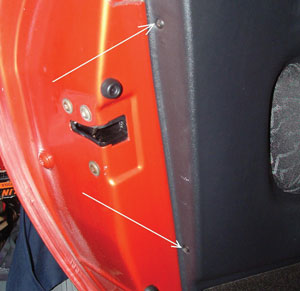
1 Door card removal starts with the two end screws followed by…
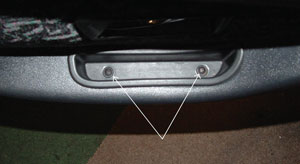
2 …two screws in the base of the door pull followed by…
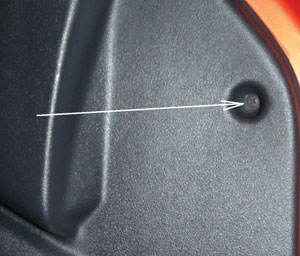
3 …one screw above the speaker and lastly…
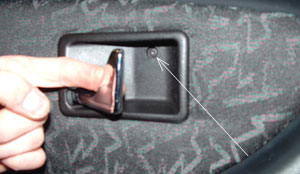
4 …the screw holding the door pull trim. Later cars are the same format
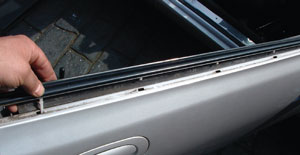
5 If the top exterior trim is to be removed then the retaining clips usually break…
One issue that is cropping up more and more is a failure in the electric window lift mechanisms. I say mechanisms as each window has a scissor lift mechanism with an integrated electric motor. Sometimes the motor fails but other times it’s the gearing between the motor and in the mechanism that breaks. A slowing of the window movement before it stops often points to motor failure, whilst a sudden failure accompanied by crunching and grinding sounds tends to indicate the latter. I have seen both types of failure on the two MGFs on my driveway, one an early model year car and the other a 2001 model year. Interestingly (or not) TFs seem to be suffering this failure more than MGFs and this is believed to be as a result of a supplier change to the production line.
Inconveniently failure is commonly noticed only AFTER you have lowered the window, leaving the problem of raising it, and yes it is usually raining when this happens. Sometimes by using both hands to pull the glass up with a helper operating the window switch to close, the glass can eventually be raised to make the car weather and security tight. If the failure is associated with the motor dying then the window will usually stay raised, but when the gearing breaks a plastic (or soft wood) wedge will be needed to keep the glass fully raised because when driving it will gradually descend downwards.
Replacing is not specifically difficult, and for those familiar with MGB or Midget assemblies the MGF and TF is less fiddly. Buying a replacement will show a couple of variations of component part depending on the age of the car, but essentially all MGF and TFs share the same format. MGF from 1997 to the end of TF production in 2005 (and probably the current TF production – yet to be confirmed) use the same part, although handed, whilst 1995 to 1997 MGFs only use a different pattern electrical plug and slightly different cable length.
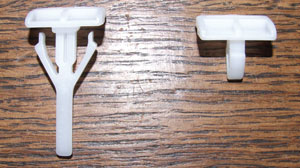
6 …so buy some new ones in anticipation. Two types are used and the common one is the longer one on the left.
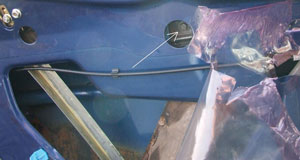
7 Glass is disconnected from the lift mechanism via three bolts, one here…
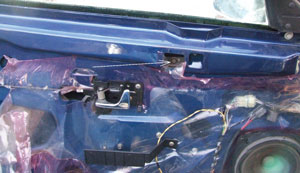
8 …another one here…
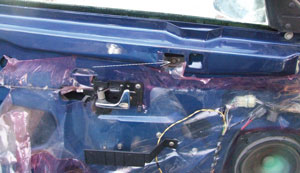
9 and the last is here
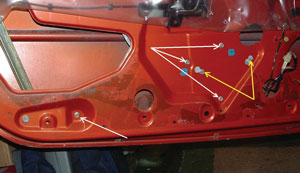
10 Glass removed and now it’s time to remove the lift mechanism by removing or loosening the bolts shown (see text)
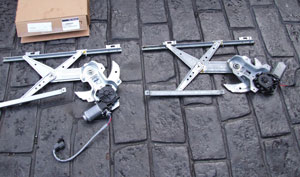
11 New mechanism left and the broken original on the right
Genuine MG replacement motor assemblies are only available for the post 1997 plug configuration, but many non original suppliers cater for both with the older cars covered with a new replacement plug and electrical connectors in a bag for you to replace the plug on the door wiring harness. Instructions are supplied of course, but since there are only two wires, this should not present any real difficulties.
Speaking of instructions, what follows here is to provide additional guidance to make the job simpler, but not a substitute to the information contained within the Workshop manual.
Irrespective of the car’s age or trim style, all door cards (the internal door trim cover) are removed in the same way and there are six screws to be removed. Once removed there should be a vapour barrier, or in simple language a plastic sheet stuck to the door. Carefully peel this off, although with age expect it to tear, or if it has been off before expect to find tears. It is important to reuse or replace this vapour barrier (plastic sheet) to prevent any moisture getting into the back of the door trim, which will be seriously damaged by any water ingress.
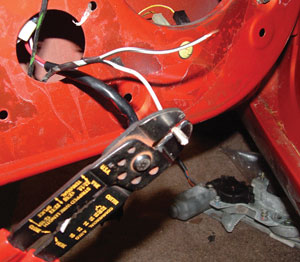
12 On pre 1997 cars (up to VIN WD 30081) door harness wiring plug will need to be changed. Cut off old, bare wire, slide on weather seals before crimping new terminal which…
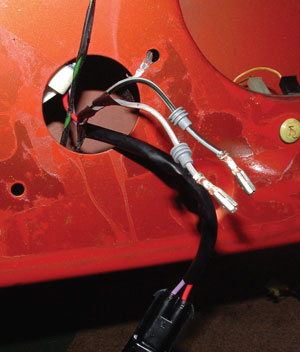
13 …leaves you with two wires like this that are (once you are sure of the correct position) inserted into the new plug…
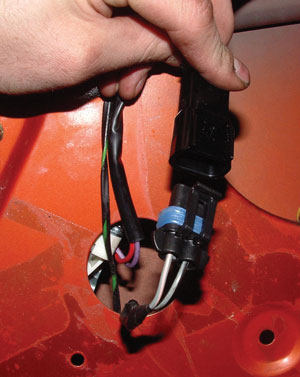
14 …and then the two halves of the plug can be connected and fitted back into position before the trim is refitted.
Now that the inside of the door is exposed and you can start to remove the window. This is not a particularly difficult task but it is a fiddle and I feel that text only instructions would be difficult to interpret, therefore reference to the diagrams in the manual and the images reproduced on these pages should also assist.
My first tip is that the manual advises the door glass should be removed and before that occurs the outer weather trim needs to be removed. However, I have achieved this without removing the outer weather strip, although glass removal needs great care. The bottom bracket where the glass is held is fatter and needs to be positioned roughly mid door, where by gently expanding the gap between outer door skin and inner door frame, the glass is turned end on to get the fat part in the middle, and then it is eased up and out. Refitting is the same process reversed.
If the removal of the weather strip is desired then the plastic clips holding it in place have a double barb and these have to be squeezed together at the same time the trim is lifted to disengage. Image 5 shows a 2000 car with already broken clips, which can occur when trying to lift out the glass. Access to these five clips is at best very tight and the need to use long nose pliers with patience is not helped by plastic that goes brittle with age and there is a good chance that some of them will break, so buying new clips as a matter of course is suggested. There are two types as shown, but I have only come across the long type on the left.
At this stage the window motor and its lift arm mechanism can be removed by first unplugging the electrical plug then the bolts as shown in the images. Two of the bolts arrowed in yellow only need to be loosened as the door has keyed holes that will allow the mechanism to be turned and disengaged once the other bolts are removed. The rest, highlighted with white arrows, are simply removed and the mechanism can be withdrawn from the door.
Image 11 with the two mechanisms together shows the old mechanism (right) next to the new MG Rover branded one (left) and here it is not an error to find the motor is fitted at 180 degrees to the original. This has no impact on the operation of the window or fitting the unit into the door, but it may worry initially because it looks wrong.
Fitting the new lift assembly into the door follows the time honoured ‘refitting is a reversal of removal’ procedure, and indeed it should be that simple. Only the change of the electrical plug on an early MGF adds to the work. Fitting the new plug is quite simple and some elements are shown, but obviously you want the wiring the right way round to ensure the window goes down when the switch is pressed to the down position and not the other way around.
Wiring colour codes are common to all MGF and TF in respect to the door harness, but the colours used on the motor wires can vary, especially if the motor is already a replacement. If there is any doubt about which wire goes where, before pushing the new fitted terminals into the connector block, carefully wrap each connector in some insulation tape and insert onto the motor plug terminals and test operation of the motor against switch position. Once this is known then you can remove the insulation tape and insert the newly fitted terminals into the new connector block and then push the weatherproof seals in behind.
The remainder is just reassembly.