MGA MOT Preparation part 2
Time for an MoT for the MGA PDQ (Part Two)
Last month we started with lights, windscreen, horn, seat belts, batteries, exhaust system and steering. In this last part we complete the set.
Bodywork and Structure
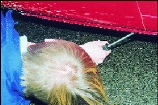
For structural checks it is best to have the car jacked up and placed securely on axle stands. Once up on the stands and you are quite sure that it is safe to work under the car, take a lead-light or torch and an old screwdriver and begin your inspection underneath. Poke around the underside paying particular attention to the sills, chassis rails, floors and suspension pick up points. Any corrosion holes, however small, will produce a fail at the MOT station. Therefore it is in your interests to be very thorough when checking for corrosion damage in the bodywork, as it is best to find any faults before the test. This gives you the opportunity to carry out any repairs that need doing before the MOT. You can either do it yourself (if you have the correct equipment) or have a professional carry out the repair for you.
On structural repairs it is a false economy to just patch up a sill or chassis rail, always replace rather than repair. This approach may seem to cost more money in the short term but overall a full replacement will last much longer and will also be considerably stronger.
 The upper bodywork must also be in good repair as any holes, cracks or severe corrosion within 30cm of a structural component or body mounting point will also result in a failure. You must also check that there are no sharp edges on the exterior bodywork that may present a hazard to either yourself or other road users.
Fuel System
While the car is up on axle stands check that the fuel line is not corroded, all the joints are fuel tight and the tank is securely fixed and in good condition. If anything is suspect, then adjust, tighten or replace. A secure fuel cap must also be fitted – the temporary plastic items that can be purchased are not suitable. The cap should not be loose and must have a sealing ring in good condition to prevent fuel spillage.
Wheels and Tyres
Again with the car up on axle stands remove the wheels from the car. This will give you access to view the brakes and suspension which is detailed in the next section.
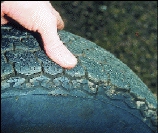
With the wheels off, check the rims for any damage and the tyres for depth of tread. Look for signs of bulging, cuts, splits, and cracks in the side walls or any other defect. Each tyre should have its size marked on at least one side wall. The tyres should also be the same size on each axle (i.e. same size on both fronts and same size on both rears). Make sure they are all at the correct pressure (don’t forget the spare). If in doubt about the condition of a tyre always replace it.
 Suspension, Brakes and Bearings
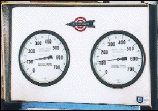
Having checked the condition of the tyre and wheels our attention turns to the braking system. The brake system is tested using a slow speed roller brake tester. The car is driven on to the rollers, the rollers turn the wheels andthe tester will operate the brakes. The braking force is shown up on a display and the tester can see from this if there is any imbalance. Reasons for failing a car on its brakes are if a low reading is achieved due to low linings or seized components in the system. If the test reveals that something is binding, grabbing or an imbalance when each side does not increase and decrease the same (which would cause the car to pull under braking) this would also be a failure. Your car will also fail if there is more than a 25% difference in braking effort between the two wheels that steer the car.
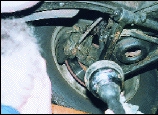 Examine the front discs check for cracks, deep scoring and the minimum thickness as detailed in the workshop manual. Discs must be replaced if they are below the minimum thickness or have any of the marks as discussed. When replacing discs the pads must be replaced at the same time and a ‘bedding in’ period allowed of about 100 miles.
If the discs are in good order then check that the pads have plenty of material on them – if in doubt replace them and again allow them to ‘bed’ in.
Check that the shock absorber is not leaking any oil around the seals and that all the bushes (top trunion, bottom trunion, inner wishbone and anti-roll bar) are in good condition, not perished or deformed and sticking unevenly around the joints – replace in complete sets any bushes that appear suspect. Inspect the wishbones for wear paying particular attention to elongation of the holes where the king pin attaches at the bottom. Check spring pans for corrosion and that the bumpstops are still in place.
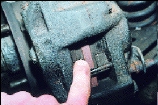 Grease up the front suspension using a grease gun and the grease nipples on the king pins.
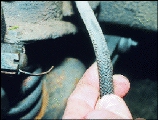
Bend the flexi-brake pipe and check for cracks or any perishing of the rubber, the flexible pipe must not touch the bodywork at any point. If the front caliper pistons are visible then check them for corrosion. All of the brake pipes need checking for corrosion, rubbing (on each other or any other part of the car) and all of the joints and bleed nipples for any signs of leaking brake fluid.
The level of the brake fluid should be checked and topped up if necessary. If the fluid has been in the car for more than two years it is advisable to change it by bleeding the whole system. This is because the fluid absorbs water over a period of time and therefore deteriorates making it less efficient.
Now repeat all these checks on the other side of the car.
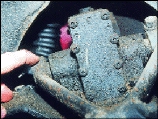 Refit both front wheels. Put the steering on full lock one way and check for rubbing by spinning the wheel and then full lock the other way, again spinning. Investigate any rubbing as this could result in a failure. Grasp the wheel with one hand at the top and one at the bottom try to rock the wheel to test the wheel bearing. There should be a very small amount of play – any more needs to be investigated to see if it is either adjustment/replacement of a wheel bearing of if it is wear in the king-pin/stub axle assembly. If it is wear in the king-pin/stub axle assembly then a replacement is the usual route. Finally spin the wheel round – it should be fairly free and rotate quietly. If it is noisy you will have to replace the wheel bearing. If it will not spin then it is possible the brake caliper has seized. Now repeat on the other side.
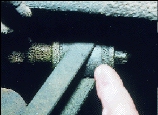 Moving to the rear of the car (making sure that the handbrake is off) remove the rear brake drums. Check the drum internally for cracks, scoring and wear. Note the condition of the shoes and replace if they are either worn or impregnated with oil. If there is a lot of oil about check that the rear oil seal has not failed – rear axle oil has a nasty smell to it whereas brake fluid is almost sweet in smell. If it is rear axle oil you will need to replace the seal, clean the whole area very thoroughly and replace the shoes.
Before replacing the drums check that the wheel cylinders are not seized – place a screwdriver on the shoe and move outwards gently, to see if the piston of the cylinder moves. If not, the wheel cylinder will need to be replaced. Any seepage of brake fluid around the cylinder means that the seals have perished and a new wheel cylinder will be necessary. If you are happy that everything is working correctly replace the drum and adjust up, repeating on the other side.
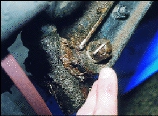 Have an assistant pull on the handbrake and check that it operates both of the rear drums at the same time and that it releases the shoes from the drums when the handbrake is released.
The rear springs should be in good condition paying particular attention to the front eye bush, rear shackle bushes and any corrosion around the pick up points.
Replace the two wheels and carry out the same procedure to test the rear wheel bearings for play and noise as for the front. Lower the whole car back to the ground and check that all the wheel nuts are tight.
 Emissions
Due to the age of this MGA (1960) the only emission test it has to pass is a visual one. This just checks that the cars does not puff out smoke due to a very tired engine using a lot of oil.
However, cars registered from 1st August 1975 will have to pass an emissions test. The car is wired up to a sensor that measures the exhaust gas composition. There are set standards to achieve a pass (CO level <=4.5% and HC level <=1200ppm). Providing you have a well maintained car with a healthy engine, a pass should be easily obtained – most test stations, as with headlamp aim, will adjust the caburettors, if necessary while you are there.
 And Finally
All that remains is to road test the car to make sure all is well and that the car stops in a straight line – ready for the brake test.
Now book an appointment with your local station, feel confident of a pass and have a happy, problem-free twelve months before you do it all again. Hopefully this year the summer will allow us to do more than 450 miles in the MGA.