MGA Twin Cam Rebuild (part 5)
A Twin Cam called Ratty Part 5
 |
At the end of last month’s report I had just finished painting the body tub and was getting ready to spray the wings, doors and other parts needed to make a complete MGA body. Well I am very relieved to report that the spraying is now finished but it has taken me the same time as Phileas Fogg took to go round the world in the Jules Verne novel. Any professional painter reading this article must wonder how on earth it can have taken me eighty days. The answer is simple; it was because I chose to finish each panel one at a time in a small workshop away from the completed body tub. This was obviously a laborious way of going about the work but I was not looking to break any records. By approaching the task in this way I felt each panel could be given the attention it deserved and when it was finished it could be attached to the body tub for ‘safe-keeping’. | 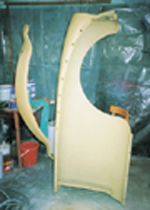 |
 |
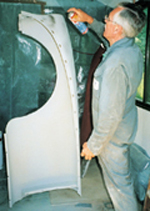
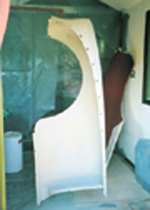
I knew the spraying would be a long haul when I counted an amazing total of 28 individual items to paint. Specifically these were, the body, 4 wings, bonnet, boot lid, 6 under-wing splash panels, 2 inner wing access panels, 2 doors, 2 door shut plates, front valance, 2 sill trims, 4 boot/bonnet hinges and 2 rear light plinths. The MGA is a real Meccano set and this list does not even include all those small items like the bonnet release mechanism etc. that were painted with the relevant panel as the work progressed. Looking at this list the hardest panels to paint were the front wings, due to their size, weight and curvature. After some thought I decided to spray them vertically, suspended on thin cables from the workshop ceiling with the headlight aperture facing upward. This way I could reach both inside and outside surfaces without having to handle the wing during paint application. It was very important to ensure the support wires were strong enough to take the weight and the handling that occurs when spraying. I once had such a misfortune when the tailgate of an MGB dropped to the floor just as the last topcoat was drying. Guess which way up it landed – what a mess. I even carried out all the rubbing down and ‘blocking’ with the wing hanging vertically which gave me a better workout than a keep fit class! As described in part 4 each panel was prepared in the same way with etch-primer, high-build primer and then topcoat. The wings like most panels received an average of 12 coats of paint, 2 etch, 6 of primer and 4 colour. | 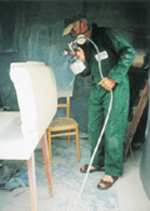 |
 |
The access to my workshop at the back of the house is very restricted and as the time came to carry the first finished front wing out to the body in the garage, great care was needed to avoid any mishap. In fact the awkwardly shaped wings were an accident waiting to happen until they were hung on the body. To make life as easy as possible I had run a thread tap through the captive nuts on the front shroud and got the attachment bolts ready. With two or three bolts loosely holding the wing I could then safely leave it to move on to something else. | 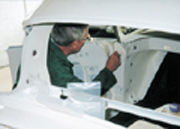 |
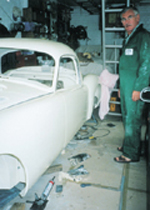 |
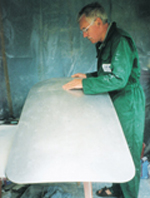
Next on the list were the rear wings. On the MGA these are a particularly voluptuous shape and I have to confess to a certain pleasure in feeling the contours at the rubbing down stage. However the routine of cleaning the spray gun and rubbing down after each coat was starting to get very tedious. I was still in the early stages of this job because even when the four wings were completed there were still 23 items to paint. By now it was beginning to dawn on me just how long the work was going to take because each wing with its repaired surfaces and compound curves needed about a week to prepare and paint. Each coat of primer revealed more areas where the guide coat remained after rubbing down with wet and dry paper on a block. These were the dreaded low areas and they had to be eliminated for a perfect finish. My local paint supplier, mentioned in part 4, was very helpful here in introducing me to a new product called Superskim Fine Surface Stopper manufactured by Tetrosyl that works like a superior cellulose putty. If anyone has used the latter they will share my frustration as to how limited it is in filling any low areas. | 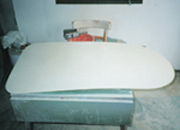 |
 |
A very slight skim of cellulose putty goes on and dries in no time but if you use just that little too much you can lose a day waiting for it to set, only to find it has sunk and more is required. Once the Superskim hardener is mixed with the resin it sets in less than ten minutes to the point where it can be rubbed down. Armed with my new find the quick drying putty and spraying two panels at a time, the work rate now increased quite a bit. However I realised that even though the spraying had started in the hot and dry weather of early July it would be well into the autumn before it was finished. Would I be able to beat the onset of damp cold weather? I sincerely hoped I would because there is no joy in spraying in a closed workshop during the winter months. | 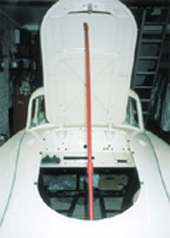 |
 |
The body was by now starting to look quite presentable with all four wings loosely attached but the doors had to be fitted before the wings could be finally bolted up. At the last minute I decided to try the doors on the body before painting even though everything had already been assembled once. This turned out to be a good decision because I found more work was still needed to get an acceptable fit. I am not exactly sure why this happened because only one side of the car was affected. It does show the need for caution in this game because once the parts are painted there is only so much that can be done to rectify errors in the alignment of panels. | 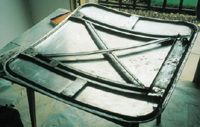 |
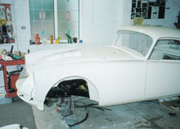 |
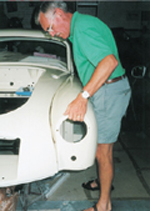
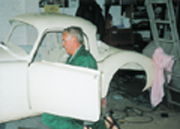
The doors are skinned with soft aluminium sheet and a close examination of their outer faces showed they were covered with slight dents and depressions. A great deal of time was spent improving the finish with first a hammer and dolly and then the skim filler to remove as many of these dents as possible. Adhesion of the first coat of paint to aluminium can sometimes be difficult but I was using a good quality etch primer so I experienced no problems. The doors took about ten days to spray after which they were fitted to the body with the pre-determined packing pieces in place behind the hinges. Now the front and rear wings could be finally bolted up with the plastic fillet between attachment flanges and the shroud. Clearance holes had to be cut first of all in the plastic fillet around the bolts and patience was required to get each wing and its fillet bolted into the optimum position. This was the moment of truth, when all the fitting work and preparation was put to the test and the line-up of the two wings and door could be finally judged. I suppose it is the nature of the restorer to be self critical but any doubts about the quality of what I had achieved were put into perspective by revisiting the photographs of poor old Ratty at the beginning of the restoration! | 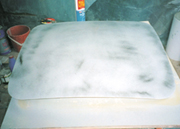 |
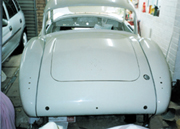 |
Now there were only 21 pieces to paint and I chose the bonnet next. This is constructed in a similar fashion to the doors, with an aluminium skin over a steel frame. As with the doors I felt it was prudent to trial fit the bonnet before painting and I was not surprised to find that it also needed the odd tweak and twist to optimise its alignment with the shroud. Reference books on the MGA’s originality suggest that the bonnet catch and spring should be painted body colour. On Ratty I have chosen to plate both the catch and the spring with nickel using my home plating kit. Nickel should prove more durable than a painted surface and will hopefully allow the catch to function more smoothly. At this stage the bonnet support was not fitted and photographs show the kitchen broom being used in this role during fitting! | 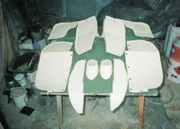 |
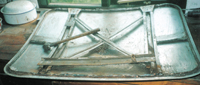
The boot lid is like a smaller version of the bonnet and I expected it to present no problems but admittedly I had not examined it in any detail for some months. Now I discovered unacceptable corrosion in the part of the support frame by the catch so it meant getting out the metalworking equipment again! At least it was a change from rubbing down and the smell of cellulose paint. The underside of the boot lid had not been stripped of the original paint and it is worth adding a cautionary note at this point. Paint stripper seems to get absorbed into aluminium surfaces and must be thoroughly washed off before new paint is applied. I had forgotten how critical this is and ended up removing the etch-coat on the boot lid the first time it was applied because it would not dry. In order to neutralise the stripper I washed the surface with hot detergent liquid and the paint went on perfectly second time around.
With the bonnet and boot lid finished and fitted Ratty was beginning to look more like an MG but I was conscious that even after completing the front valance there were still 18 pieces to spray. Being more realistic it was encouraging to note that most of the remaining bits could be finished to a lower standard than the outer body panels. It would have been pointless for instance to strive for a mirror-like finish on the under-body splash panels, boot and bonnet hinges and inner-wing access panels. Plastic stone-chip paint was used on many of these parts after applying the etch primer and when covered with primer and topcoat a very acceptable finish was achieved. The use of stone-chip paint is a recognised practice and should prove more durable in service.
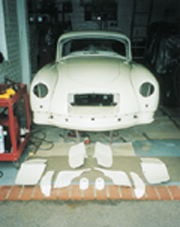
I would not want to speculate on the number of hours I have spent on the spraying but eighty days after starting, the last panel was finished. My time is obviously free but what about the final cost of paint and materials? I estimate around £350 of which £280 was paint and the rest thinners and wet and dry. Although this may seem a lot of money I have been told that a professional sprayer would probably charge in excess of £2,000 for the same work. There is also of course the satisfaction of completing this part of the rebuild myself. Now I have reached my favourite stage in a restoration project with the painted body waiting for parts to be added until the car is finished. The work involved can be taken more leisurely and in more manageable parts, in short the hardest work is behind me!
My new objective now will be to return my dust ridden and paint fumed workshop to its original function and to get the car back on its wheels. In my next report I hope to cover the restoration of the back axle followed by the checking and rebuilding of the front suspension. John Day Captions Applying guide coat to primer Front wing with top coat Front wing and valance with etch primer Mind the paintwork, easy does it! Final fitting of the door Top coating the first door New bolts make the job easier I’m not taking it off again! Feeling for depressions but not depressed yet Checking bonnet hinges (note the kitchen broom) Bonnet fitted Repaired boot lid ready for spraying Metalwork repairs to the boot lid Boot lid with primer and guide coat wonder where all these go? Under body panels and rear light plinths sprayed ‘Body beautiful’