MGF and TF – Rear window replacement
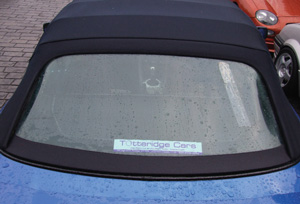
Sorting cloudy or cracked plastic rear windows in MG hoods is not an unfamiliar problem and neither is it a new one. As most hoods that suffer from this problem have not reached the end of their useful life it makes sense to have a specialist sew (cloth hoods) or weld (vinyl hoods) in a new window section.
This approach was the only one available short of a new hood for older cars where the window(s) and the hood are essentially a single entity, but the principle of this replacement is just as valid today as in previous decades, and often a cheaper route.
Makeshift repair
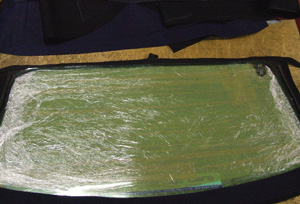
New transparent material for rear window in Cling film
The MGF and TF use a hood that is essentially made up of two sections, the main hood and a separate rear section that carries the rear window. The two are connected together by Velcro on the vertical sides, a zip on the upper horizontal join and then the rear window section is clamped into the lower horizontal rail of the hood frame (the rail that sits into the cars body) with the material sandwiched between two metal plates held together by pop rivets.
The design is one with some forethought, in that the designers knew that the plastic rear window would probably need replacing earlier than the hood, so they provided the means to replace just this section and included this section of hood and rear window as a normal spare part. The replacement of the hood as a unit is covered in a separate section. This section now concentrates on the replacement of just the transparent plastic window section.
Replacing just the plastic window in the existing material is as mentioned a specialist job, as it requires something more robust than your mother’s Singer sewing machine to stitch in the new window material. The guinea pig car for this treatment is a ‘project’ 2002 TF 160 Sprint that was bought at a very favourable price because it was in a rather ‘unloved’ condition. The blue hood actually displayed a slight shade of green; such was the ‘plant growth’ from lack of washing, which with some TLC a remarkably good condition hood emerged. However, the rear window had not only become cloudy but had been cracked so replacement was the only option.
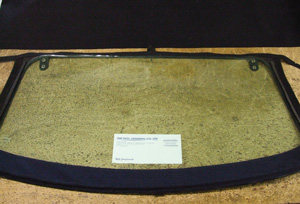
Ready to fit
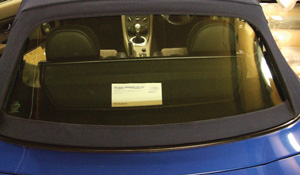
Professional result
Being a coloured hood does not present any variation to the process of replacement of the window compared to the common black hoods. However, as the replacement rear window section spare part is no longer available it left only a complete new hood or a professional window section replacement as available options. With an otherwise very sound condition hood the choice was obvious.
Finding a hood specialist should not be too difficult for most parts of the UK and other major populated areas overseas. There are in fact quite a number of companies making and servicing car hoods, boat hoods, caravan awnings and similar products. My own choice was to use a company that I first had experience with a replacement hood for a TD back in 1967 and the same family company, now being run by the second generation, has been my choice of replacement hoods for my MGB in the 1970s and ‘80s and in more recent times for a friend’s RV8 replacement hood. The company is Don Trimming in Erdington, Birmingham, just a mile from Spaghetti junction so easy to find.
Normally the job is a drop your car in the morning and pick up at lunchtime or later in the afternoon, but I waited and was able to follow the quite detailed replacement. First the hood is released and the lower rear rail eased out of the rear deck of the car’s body. This exposes the lower edge and the line of rivets holding the rear section is visible. These are carefully drilled out to release the locking strip of steel and the rear window material can be detached.
The side Velcro strips are simply separated and the upper zip undone. Before the section can be removed from the car the slider on the zip has to be removed and to do this the clip that holds the end of the zip together, behind the fully undone slider, has to be removed. That then allows the slider to be removed and the window section is now lifted off the car. Owners wishing to reduce the overall costs of this job can do this work themselves and send or take the removed section to their chosen specialist for the new window section to be fitted and the old one removed.
Once out the rear window is flattened on the bench and a new plastic rear window section selected. Apparently there are various qualities of rear windows but those used at Don are to the high quality OE spec which also means they are slightly tinted rather than completely clear as the poorer quality products I have seen elsewhere and which was also fitted into the hood of my MGF when I bought it.
The new window section was bigger than needed in the hood so it was initially trimmed to a more manageable size to allow it to be temporarily attached over the original window, pending final trimming and stitching into the hood material. To effectively protect the new material during the fitting process it was wrapped with Cling film.
The process that saw the accurate and very neat fitting of the new window material, and the removal of the old window section, resulted in a finish indistinguishable from the original. The window fit involved some clearly skilled hands and several clever tricks of the trade developed over many years of experience. Don were rightly sensitive to this information not becoming readily available to competitors, so I have glossed over those details.
Refitting the rear window section to the main hood was a reverse of the removal process aside from the need to use new pop rivets to refit the lower locking strip. These rivets are normally in the natural alloy and can be seen even when the lower hood rail is refitted into the channel in the body. A neat finishing touch from Don was that the rivet heads were dabbed with black paint. At the time this repair was done the drive in and drive out repair cost was £125 plus vat.
Roger Parker