MGF Headlamp Lens Replacement
It’s difficult to avoid all the stones thrown up by the vehicles that surround you on today’s busy roads. Therefore it follows that stone chips in the paintwork are a problem that we have to live with. However, it is fortunately still quite rare to have a larger stone thrown up to crack or smash the headlamp lens but it does happen. Recently we experienced a large stone strike on the Club’s MGF headlamp glass, punching a small hole right through and cracking the lens from top to bottom.
An distinct advantage of the MGF’s headlamp design is that you can replace the lens without the need to replace the whole headlamp assembly. This reduces the cost, so if the worst happens as you only pay for the lens and not the complicated plastic unit behind the lens.
The following pictures and captions follow through the straightforward process of the lens change.
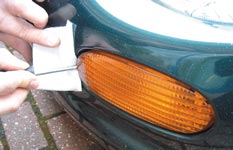
1. The bumper needs to be removed to gain access to the whole headlamp assembly. This entails releasing two main bolts and a number of securing screws. The two main bolts are located behind the indicator units. Carefully insert a small bladed screwdriver to the inside edge of the direction indicator and release the spring clip. This needs to be carried out very carefully, as the plastic retaining clips are easily broken. Should you break one of the clips then you will have to renew the indicator assembly. Once the clip is released you can withdraw the unit and disconnect the electrical connector |
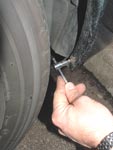 2. There are two retaining screws on the bumper/wheel arch lip that you need to remove. If you put the car on full lock it will allow yourself more room for manoeuvre under the wheel arch |
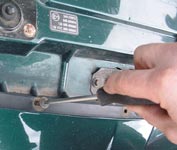 3. Open the front bonnet and you will see the five Phillips screws holding the top edge of the bumper in place. Release these and then place them somewhere safe |
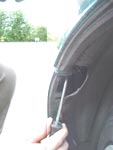 4. There are two more retaining screws behind the wheel arch liner on each side of the car. The rear most of these can be reached by pulling back the liner slightly while the other one which is forward from the arch needs to be accessed from under the car. This will require a jack to be placed under the car and then the body secured on axle stands |
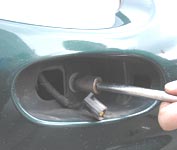 5. With all of the screw fittings removed, the two main bolts can be released and taken out. Place a blanket on the floor and carefully pull the bumper forwards. It should come away from the car but you need to take care to feed to indicator wires through |
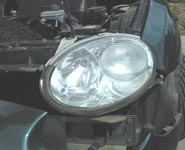 6. In this case we only needed access to one side of the car, so did not take the bumper completely away from the car |
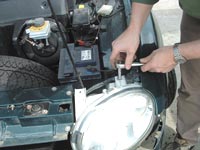 7. Carefully remove the top two bolts that hold the whole assembly in place |
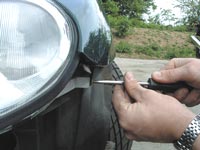 8. Do not forget that there is a side fitting screw that needs to be removed before the headlamp assembly can be withdrawn |
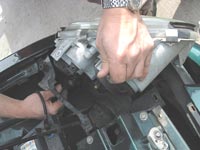 9. Now that the fixings have been released the headlamp unit can be withdrawn from the car and the electrical connector at the back removed and the unit placed carefully away from the car |
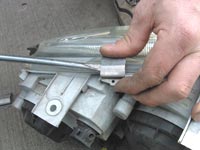 10. Using a bladed screw driver, release the spring clips around the lens and headlamp assembly unit. Take care not to ‘ping’ the clips half way across the garage floor |
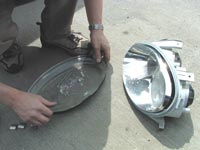 11. Now that all of the clips are off the unit the broken lens can be carefully lifted away from headlamp body. Take care not to cut yourself on any wayward glass |
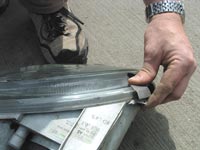 12. Inspect the seal and if it’s in poor condition, replace with the new seal supplied in the lens kit. Take care not to wipe the silver reflector surface too hard as the silver will come off onto your cloth. Once in place the new lens can be offered up and secured with the new clips, which are supplied in the lens kit |
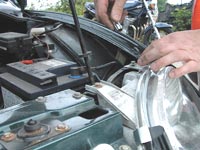 13. The headlamp unit, complete with new lens, can now be replaced into the car and fixed back position using the bolts and screws. You can use the marks made by the screws and bolts to locate the unit back into its original position. Now that the headlamp is secured, the bumper assembly can be refitted following the reverse procedure of its removal. Once again the bumper can be aligned by using the bolt and screw marks as a guide. With all of the fittings back in place the bonnet can be carefully shut and panel gaps checked and adjusted as necessary. Finally we would recommend that the headlamp alignment be checked by your local garage or MoT station. |