MGF Seat Foam Replacement
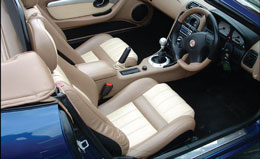
One positive element of the modern MGs are the seats, which are somewhat more supportive than older MG seats. The shape with pronounced side bolsters helps to locate the driver whilst enjoying the Safety Fast element of the cars, but those familiar with the cars also know that the driver’s outer bolters particularly can suffer from damage due to the constant heavier rubbing it gets when the driver gets in and out.
1. Original seat, note ruffled side bolster leather
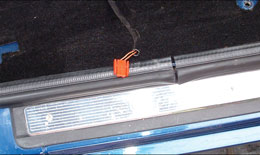
2. Seat belt pre-tensioner connector from under the seat needs to be unplugged. The orange electrical connector is laid on the sill for clarity
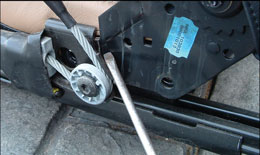
3. Seat belt pre-tensioner needs to be removed to allow back to be removed
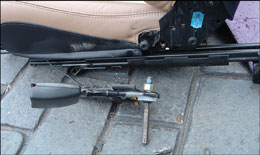
4. Seat belt pre-tensioner removed
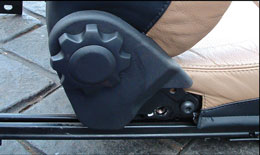
5. Removing the rake adjuster – gently lever the centre cap from opposite sides and it will slide out and then the main wheel can be lifted off
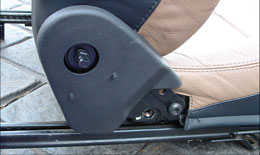
6. Removed rake adjuster awaiting the two plastic locking pegs to be pushed out to allow the cover to be lifted. In this image the pegs have been repositioned ready for refit, but this helps show their positions.
Having recently returned to MGF ownership my chosen car had a few small issues to be dealt with, but nothing of any depth. One oddity was that the driver’s seat outer bolster had collapsed and was well ruffled. This did offer a slight advantage in that the leather cover was less worn than usual. Many people may consider that rectification is a professional job, and whilst I have no in depth experience with vehicle trimming, it seemed like a good time to explore the possibilities of a home repair, plus if it all went pear shaped I could still pass it on to a professional. The change of the seat foam follows the same procedure needed for a cover replacement.
Firstly I bought a new foam, a normal MG Rover spare part, which was a surprisingly low cost at under £20. The detailed preformed shape confirmed that the bolster’s shape was primarily derived from the shape of the foam beneath. Removal of the seat is simple enough using a size 50 six sided spline bit (Torx) although you first need to disconnect the seat belt pretensioner plug under the seat. Any work on the SRS system demands caution and first you must disconnect the battery, then allow at least twenty minutes idle time to ensure any residual power dissipates before you touch any part of the system.
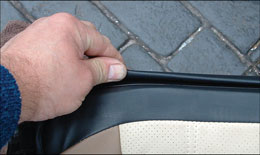
7. Removed backrest, and then unclip the front and back covers where they interlock at the bottom in the plastic moulding
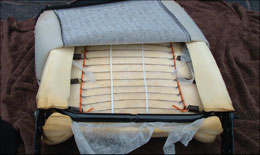
8. Evenly and carefully peel the cover back whilst turning it inside out for easier replacement
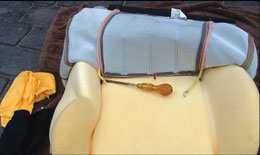
9. Note the distorted foam bolter now becoming visible and screwdriver showing where the one spring wire passes through the foam
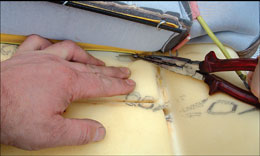
10. A number of bent steel rings hold the cover to embedded wires in the foam and these have to be prised apart and unclipped, skill at dentistry will help here
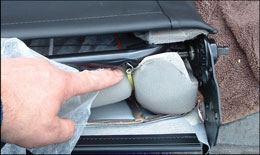
11. Two spring wires are hooked to the lower spar and need to be detached
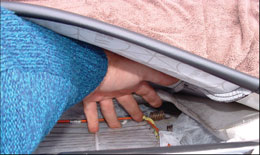
12. These wires pass through the foam and attach to the wire backrest frame (the yellow wire here) and are unclipped from the wire frame
You also have to remove the seat belt right anchor bolt (same spline tool size) before you can remove the seat from the car, and this is best done when the four anchor bolts holding the seat to the floor are removed so you can lift the right side of the seat to allow easier access to this bolt. Once these two items are disconnected then it is just a careful fiddle to remove the seat.
Next the seat belt pre-tensioner is removed along with the four retaining bolts holding the seat back to the base. The pretensioner bracket precludes this removal hence it has to be removed first. Do have a soft cloth or similar to rest the backrest on whilst working on it.
The head restraint is removed and this needs the spring clip retainers to be pulled clear for each leg of the restraint before it will lift out. To access these simply press down the seat material either side of the plastic receptor where the legs slide into. When pushed down the spring clip is visible.
The cover is then slowly and carefully removed as shown in the photos noting that it is best to turn the cover inside out as you go as this makes for better access to the numerous spring clips and also easier refitting. The way the cover is retained against the foam is simple but quite fiddly with a series of rings of bent wire each of which have to have their ends separated enough to allow removal, but not too much otherwise the refit is more difficult. Just enough separation to allow the clip to be twisted off the wire with long nose pliers seems about right.
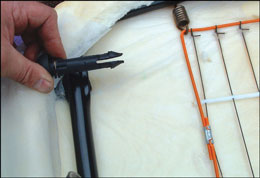
13. Pinching the split end and pushing out of the frame remove the head restraint guides. Note the head restraint is removed first and the old foam is ripped open to show this
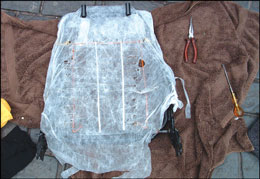
14. Once all clips are released the foam is simply lifted off leaving the soft cover shown over the frame. Note the rags from a previous attempt at packing out the collapsed bolster
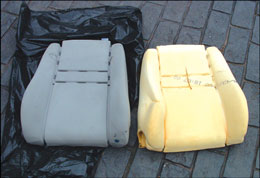
15. Old and new foams, the distortion is obvious
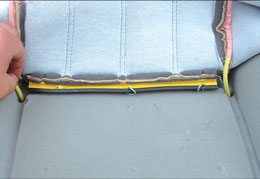
16. New foam in place and cover being rolled back on and the steel clips being refitted as you go
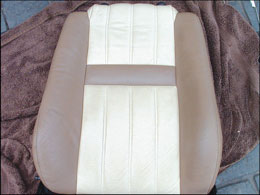
17. Cover refitted and seat ready to be bolted to seat base
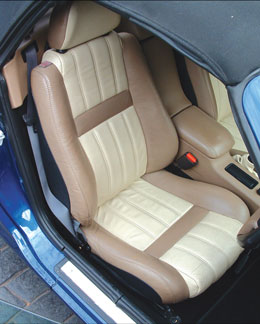
18. Seat refitted, it’s now the right shape and gives even more comfortable support
Once the seat is refitted (with a dab of threadlock on each bolt) and the battery reconnected (and radio codes and key fobs resynchronised) there is one final check that is to see that when the engine starts the SRS warning lamp goes out, as it should.
This was a job that went very much easier and quicker than anticipated, taking around an hour and ten minutes that included a good vacuuming inside the car whilst the seat was removed. The removal of the seat also uncovered 60p and a long lost chocolate sweet. The seat is not only more supportive but the support offered is now evenly distributed and noticeably more comfortable. All in all, a good value job and one that’s well within most MGF owner’s capabilities.