Midget Hood Fitting
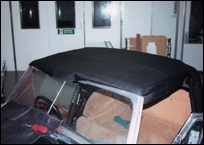
Midget 1275/1500 Hood Fitting
If your hood is looking shabby and in need of replacement, the first sunny days of spring can provide an ideal opportunity to fit a new one. Midget owners are able to choose from hoods manufactured in vinyl, double duck and mohair and your choice of material will determine the final appearance:
STANDARD VINYL
A high value, durable grade hooding material, popularly used for replacement hoods.
O/E QUALITY VINYL
Thick vinyl hooding material was used on all soft-top MGB, C, and Midget models as original equipment from the Abingdon factory.
DOUBLE DUCK
Double Duck is a cotton woven material, sandwiched either side of central rubber layer. The material is dyed and provides a rich, black and waterproof finish.
MOHAIR
Often used on luxury sports cars, mohair offers a tightly woven fabric external layer, a central waterproof membrane and an attractive contrasting inner lining.
Fitting a Midget hood takes around 2 to 21/2 hours and requires no special tools to achieve a first class fit. Some of the tools that will be required are: Stanley knife, a set of screwdrivers both Phillips and standard, electric drill and chalk.
Before attempting to fit your new hood, and before removing the old hood, place it carefully in position over the frame and check to ensure
a) that you have the correct hood for your car;
b) all seams, welds and materials used are undamaged and
c) preview the fitment in critical areas of the hood, namely around the side windows and the header rail is correct.
When fitting a vinyl hood ensure the job is carried out in a warm atmosphere such as a heated garage or in a sunny spot. It can also help to place an electric fan heater, set at one kilowatt, inside the car. Heat has the effect of allowing the vinyl to stretch, making it more workable and preventing undue stress.
 Stage One – REMOVE THE OLD HOOD
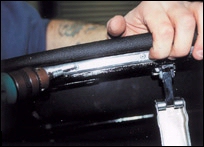
Unclip all fixing points and fold the hood back. Remove the rubber seal from the front header rail and then drill out all rivets fixing the aluminium seal-retaining strip. This strip can now be removed. Unscrew the seven fixing screws securing the rear stainless steel bar. The hood can now be removed from the frame.
Remove the header rail from the frame, by unscrewing the six Phillips head screws and shake out the rivet heads.
Check the condition of the hood frame to ensure that joints are not excessively worn and that the overall shape is retained. A worn frame will cause the new hood to fit poorly.
 Stage Two – FIXING REAR SKIRT
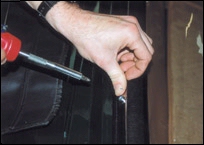
Place the new hood in position around the rear skirt and retain by fixing the six Tenax fasteners (three either side). Position the rear edge width over the existing screw holes to allow the lower edge of the hood binding. Refix the bar in position using self-taping screws, (stainless steel preferably) through the vinyl into the original holes.
 Stage Three – HEADER RAIL FITMENT
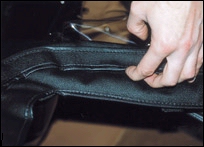
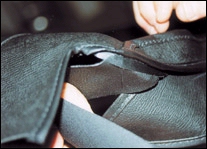
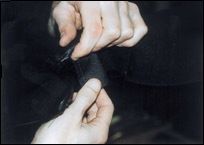
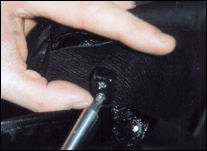
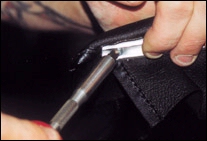
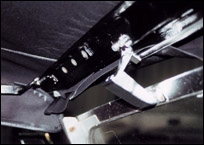
Open the hood frame approximately 18 inches from the windscreen. Either side of the front of the new hood will be a strip of vinyl measuring one inch by four. Position one side on the underside of the header rail as illustrated.
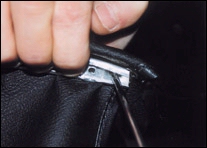
Fold the hood over the edge of the header rail. View the side gutter and adjust the position of the hood so that the stitched seam of the lower binding aligns with the lower edge of the header rail, as shown. The foremost position of the gutter, i.e. its point, should now be located where the bottom edge of the header rail meets the seal-retaining channel.
 Now position the seal retaining channel and fix using screws in the first two holes only. Repeat the fitment process at the other side of the header rail.
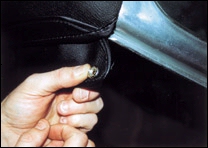 Stage Four – FIXING STUDS AND FINISHING OFF
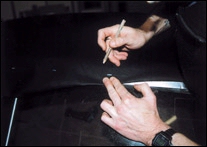
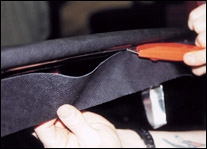
Taking each of the side window valances in turn, re-fix using the valance retaining screw on the underside of the header rail adjacent to the plastic block. Mark off, position and fit a durable dot press stud to connect to the posts at the top of the windscreen pillar. These can be easily fitted, either by using a centre punch or a maul tool, available from the Clubís Accessory Department.
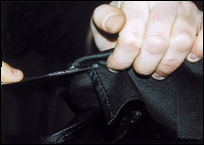
A worthwhile improvement to the appearance and draft proofing on a Midget hood, is to fit an additional tenax post to the velcro strips located at either side just behind the doors, using the existing holes. Tenax sockets can then be fitted to the existing hood.
 |
 |
 |
 |
 |
 |
 |
 |
General Care
Remember to leave your newly fitted hood in the upright closed position for at least twenty four hours after fitting, to allow it to stretch and assume the shape of the hood frame.
Before folding down the hood, refer to your Driversí Handbook and go over the sequence for carrying out this operation. This will help to prevent accidental damage and preserve the longevity of the hood.
Finally a few basic rules to keep your hood new, as good as the day it was fitted:
- Use only warm water and a sponge to clean your hood. This is particularly relevant to Double Duck and Mohair hoods, as detergents will cause fading.
- For stubborn stains, use a mild shampoo such as Decosol, well diluted and restrict its use only to the dirty area and rinse well afterwards.
- Sea-spray and the effects of strong sunlight may cause bleaching if the car is exposed excessively.
- A hooding dye, Maxol is available which is easily applied by brush to recolour a faded hood.
- Never fold the hood straight back without first releasing all the fastenings and then fold the rear of the hood neatly.
- Be particularly careful in cold and frosty weather, as the hoodís windows become inflexible and crack if folded or scraped clean.
- The full range of hoods and tonneau covers in vinyl, Double Duck and Mohair, together with hood frames, stainless fixings and additional fasteners are available to members at reduced membersí only prices from the Club Accessory Department on Swavesey (01954) 231318.
- Technical advice is always freely available.