SU Carburettor – Needle and Seat Fitting
SU carburettors are simple and very reliable in service but they can suffer from a few basic drawbacks. Fuel flow into the carburettor float chamber is controlled by a usually effective ball valve design, however over time this system can be a potential problem area. The float (brass or plastic) can become punctured and when weighted down by the fuel inside it can no longer cut off the supply to the float chamber which in turn will flood. If the needle valve becomes worn or clogged with very fine grit and fails to close off the fuel supply, again the float chamber will over flow. As a consequence each SU carburettor’s float chamber is fitted with an overflow pipe either on top of the float chamber (HS type) or as part of the main body (HIF type). This is designed to safely take petrol away from the float chamber if there is an over supply of fuel.
Often after a long period of lay-up or because of contamination in the fuel the needle valve can stick causing an oversupply. Similarly wear to the needle or its seat may also result with the needle sticking in the open position providing too much fuel flow. Fuel pouring from of the overflow pipes, or stains down the sides of the float chambers accompanied by a strong smell of petrol or even a pool of fuel on the floor is a sure sign of inoperative needle valve and seat, or even a punctured float.
In the case of the MGB featured in this report after examination it was clear that the needle valves and seats needed replacing. We started by disconnecting the battery because of the obvious risk of fire or explosion when fuel vapour is exposed to any stray spark.
HS 4
The MGB we are working on is an early car and therefore has HS4 carburettors with separate float chambers fitted. To gain access to the needle valve and seat you must remove the top of the float chamber. To save time we carried out this particular job without removing the air cleaner assemblies, which made certain tasks a little more awkward but not impossible.
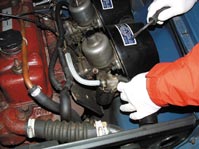
Disconnect fuel supply to first carburettor and breather pipe |
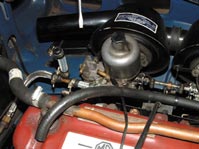 Remove the overflow pipe. Note the staining on the side of the float chamber |
First impressions
Earlier in the day at Longbridge the two cars, an XPower Grey saloon and a Le Mans Green Tourer, both to SE spec, stood out from all the other ZTs specifically because of their new 10 spoke ‘Apex’ wheels. There is little else apart from the rear V8 badge and twinned exhausts to differentiate the V8 from the other models, which in some respects is a shame as these are new cars and deserve to stand out in the crowd. This was also my first sight of the new wheels and they certainly add to the car’s status.
Inside the only thing that is obvious is the V8 badge below the centre air vents on the dash, and everything else will be quite familiar to the ZT owner. One change that immediately becomes obvious is the reduced footwell space because the new wider transmission tunnel has eaten into the area where you would normally rest your clutch foot. Now you have to move your foot under the pedal, not as awkward as it sounds, but I fancy that some owners may fall into a trap of leaving their foot resting on the clutch, a recipe for more rapid clutch wear. Nevertheless, comfort during our period of tenure was not impinged by this change to the floor pan.
Begin by sliding the breather pipe off the brass outlet and then release the screw clip for the petrol pipe. The petrol pipe can be removed from the inlet pipe and the engine breather pipe pulled off the main body to allow easier access to the three screws that hold the top of the float chamber to the base. Release these three screws and lift the top up and away from the chamber. Once removed from the carburettor you will need to turn the top over, letting the float sit on to the top. Using a pair of pliers, pull the pivot pin out of the lid and lift the float away. The needle itself can now be taken out of the seat body. The seat assembly is screwed in to the top lid and you will need to use a small socket to release this.
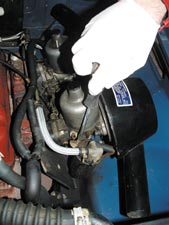
Undoing the screws on the top of the float chamber.
Be careful to retain the alloy tag and the split washers
Assembly with the new seat and needle valve is the reverse procedure, but make sure that everything is spotlessly clean because even a tiny speck of dirt can prevent the valve from shutting properly. You will need to screw the seat into the lid, pop in the needle part of the valve and then replace the float and pivot pin. The pin is a slight interference fit and once in place needs a gentle push to drive it fully home. Clean both mating surfaces of the lid and flat chamber body and using the new gasket supplied in the needle valve kit put the top assembly back on. Gently fix the three screws back in to place tightening them evenly. The engine breather, fuel supply pipe and carburettor overflow pipe can now be refitted and tightened. Carry out the same procedure on the other carburettor and you should have a leak free SU carburettor set-up.
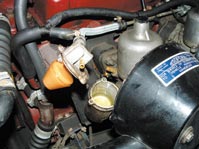 Lift off the top of the float chamber, examine the float for puncturing |
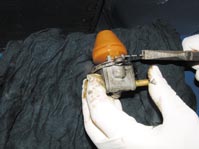 With the top of the float chamber removed begin to dismantle by pulling out the pivot pin |
|
|
|
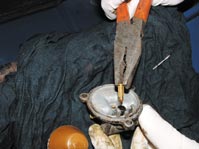 Lifting out the needle, note the signs of wear |
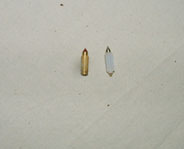 Compare the old and new needles |
|
|
|
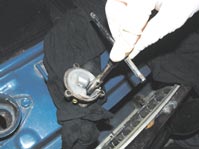 Undo needle seat assembly |
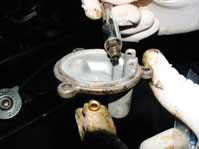 Remove worn needle seat |
|
|
|
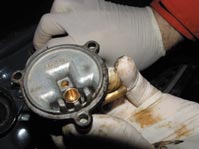 New seat installed |
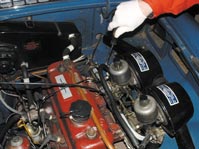 Check the tightness of all screws and unions |
HIF 4
The basic principle is the same for the later cars fitted with HIF4 carburettors but you must remove each carb to gain access to the float chamber. Once removed from the car you need to turn the whole assembly upside down and remove the four screws on the base of the carburettor. With the cover lifted out of the way you need to remove the pivot pin for the float which is via an external screw head in line with the pivot – release the screw head and withdraw the pivot. The float can now be removed and the needle and seat replaced in exactly the same way as with the HS4 carburettors. Replacement is exactly the reverse of removal but remember to replace the rubber O ring on the base and to evenly tighten the base to the body.
Finally
To check reconnect battery/batteries turn the ignition on and wait for the fuel pump to stop ticking. Carefully inspect in the engine bay for any fuel leaks at the pipe joins while also checking under the car for any signs of fuel coming out of the breathers. Hopefully if the job has gone well there will be no leaks at all. You can now enjoy the car back on the road without concern about leaking fuel.
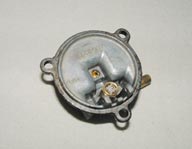 New seat with new needle inside |
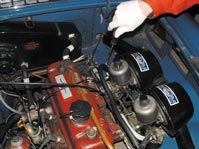 Check the tightness of all screws and unions |