A Twin Cam called Ratty Part 11
After several months during which progress on Ratty has been confined to work on the engine and gearbox, I am pleased to report that recently there has been a very welcome change of pace and I feel that the end is now in sight. When restoring a car the work seems to have a momentum of its own which gathers pace as more and more parts are refitted. As the saying goes, nothing succeeds like success.
The list below summarises what has been added to the car recently but I have written about some of the work in more detail later on the article.
- Fuel tank and associated pipe work between tank, pump and engine- all new
- Fuel pump- restored original
- Brake master- restored original with new associated pipe work
- Clutch master cylinder and associated pipe work- all new
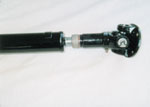
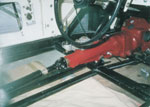
- Prop shaft- restored original
- Cooling system (except Radiator)- restored original
- Exhaust manifold- restored original
- Distributor- restored original and new spark plug leads
- Front half of exhaust pipe- Stainless second-hand
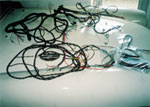
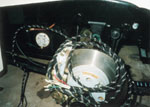
- Wiring loom from rear to engine bay- new
- Floor boards- new
- Front bumper and over riders- restored original
- Grille- second-hand restored
No I have not taken up residence in the workshop! As you may remember, a lot of the parts were restored in advance and were waiting to be fitted. Likewise the use of new parts has a big impact on the rate of progress. One casualty in all of this activity was the heater, I did not get round to rebuilding it as predicted in last month’s report.
|
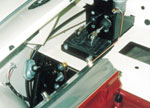 |
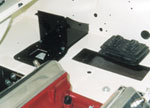
| Refitting the brake and clutch master cylinder bracket | Brake and clutch master cylinder. Note the clevis forks had to be remade by hand, the originals were too rusty to save. |
 |
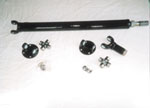 |
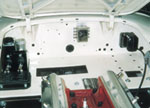
| Only the heater and wiring required to complete the bulkhead | Original prop shaft with new universal joints |
I took a weekend off in early September to attend the Beaulieu Autojumble. This wonderful event is known to most old car enthusiasts as the largest of its kind in the UK. For the uninitiated it’s the place to go to buy everything you need to rebuild your car be it a modern classic or a veteran. For many people it has become an institution, indeed a social event in its own right. With literally thousands of stalls spread over three enormous fields it is claimed you can buy just about anything for any car, that is if you have the energy to walk, seek, find and drag the parts home. It is also sited in the grounds of the famous Beaulieu Motor museum so if you tire of seeking elusive parts you can spend half a day gazing at the extraordinary range of exhibits on display.
This year I went with a long list of parts needed for Ratty. In some cases I was looking to buy a new item such as the petrol tank. The one from Ratty was suffering from terminal corrosion and with safety in mind it made no sense to think of making a repair by welding. A repaired tank can also be the source of endless misery when back in use. Dislodged particles mix with the fuel which in turn leads to blockages in the pipes and carburettors, and eventually unwelcome breakdowns. A number of new part suppliers have stalls at Beaulieu and it was very convenient to arrange for a bulky item like this to be brought to the event and picked up over the weekend.
 |
 |
| Prop shaft ready to fit | There is a lot of wiring in a complete loom! |
 |
 |
| Gearbox and prop shaft fitted | You have to start somewhere. Rear loom ready to connect to tank sender |
The same reasoning applies to the pipe work used in the brake and clutch feed lines. Like most sane people, I would not dream of reusing the original brake pipes or hoses in a total rebuild because the cost of replacement is relatively low compared with the consequences of a failure. Beaulieu was the obvious place to source new pipes and hoses.
I had also arranged to have a new wiring loom made by The Wiring Harness Company which would be available for collection at the show. The very helpful staff told me something quite important which I will share. They told me that an insurance company had recently refused to pay out on a claim after a restored car caught fire. The loss adjusters noted that the car had not been fitted with a new wiring loom during its restoration and they considered this to be a contributory factor in the subsequent fire. Bearing in mind my earlier comments about brake pipes the same it seems should apply to the wiring!
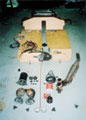
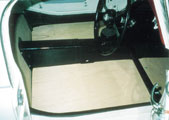
The floorboards were an item I had always intended to buy as new parts. The originals had been severely damaged by the rat infestation and were disposed of on the grounds of health and safety at the local tidy tip almost as soon as I got the car. I could have spent a lot of time making cardboard patterns of the seven boards required, buy a whole sheet of plywood and then make my own. Instead I elected to purchase a ready made set with all the correct clearances and chamfered edges and these I collected at Beaulieu, together with a set of stainless screws and special floorboard washers.
 |
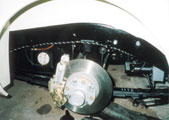 |
| The goodies from Beaulieu laid out for inspection | Rear loom connected and clipped into place |
 |
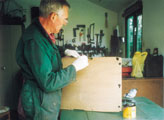 |
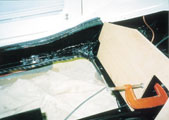
| Rear kick board being fitted. Note wiring loom has been fitted before the floor | It’s important to ensure the screw holes are painted |
Like most things on a twin cam MGA the exhaust system is special to the car and I looked for a new one at the Autojumble. If I am honest I did not really expect a result. Imagine my surprise when I found the front half of a stainless steel set (the expensive half) in very acceptable condition for £15. It had been removed from a car having a concours rebuild and had been brought to Beaulieu because it was too good to throw away. The weekend spent at Beaulieu was therefore very productive because with a bit of prior planning I was able to personally collect a lot of new parts and find some useful new-old-stock parts. Amongst the latter were a number of ignition and electrical parts and these all help to keep the total cost of the rebuild under control.
Talking about floorboards in a car must seem a bit strange if your MG was made after 1962 but the MGA was designed at a time when car manufacturing was in transition. Early cars were constructed with a chassis to which a body was attached, usually having a wooden frame and covered in sheet metal. This type of car always had a wooden floor. Later it became common practice to dispense with the chassis and use the body with a metal floor to carry the suspension and running gear in what we now call unitary construction. The MGA is in fact a hybrid of these two concepts and has a chassis clothed with a sheet metal body without a floor. In order to stop the driver and passenger from falling out from the bottom of the car the designers at MG decided to fit traditional wooden floorboards.
 |
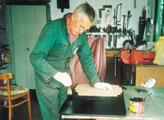 |
| The unpainted floorboards are fitted | First of two coats of Sadolin ebony wood stain and protector |
 |
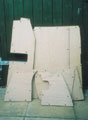 |
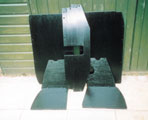
| The floorboards ready to fit after receiving two coats | Seven floor boards drilled and ready for painting |
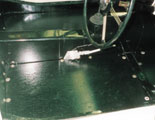
The process to fit the new boards was fairly straightforward once all the interface parts were in place. Obviously the gearbox and prop shaft tunnel had to be in position and then it was a case of marking where to drill the various clearance holes for the attachment screws. With all the holes drilled it was time to paint the boards to provide protection against the elements and I decided to use a product called Sadolin wood stain and protector. This is a micro-porous varnish and is particularly suitable for exterior use. Originally the boards were black and I found that two coats of ebony Sadolin with a semi gloss finish looked good and would hopefully provide excellent protection.
I was starting to get carried away by my apparent progress. Now that the floor was painted and the gearbox tunnel fitted the car looked ready for trimming. Disappointment awaits the overconfident! I woke up one night in a cold sweat at three o’clock in the morning unable to remember whether I had greased the small bearing in the flywheel that supports the front of the gearbox shaft. After a very restless night I decided that the only thing I could do was to take the gearbox out and check this point. The trouble was all my freshly painted boards and tunnel had to come out as well in order to remove it. It did not stop there either, the clutch slave cylinder also had to come off, as did the starter motor and a wretched piece of tin that sits behind the engine to form part of the front bulkhead. It was during this work that I began to appreciate what many people have told me about twin cams, they are a pain to work on!
 |
 |
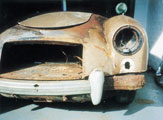 |
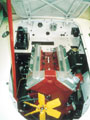
| Floorboards fitted with stainless steel screws and washers | The engine is a snug fit. Note space for distributor | Ratty’s nose March 2000 |
 |
 |
|
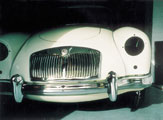
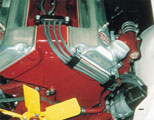
| Ratty’s nose September 2002 | Distributor fitted and the first ignition lead |
Eventually I got the gearbox out and I had been right to worry, the bearing was as dry as a bone and just waiting to cause a problem. This little diversion drew my attention to two more important issues. I noted for the first time that the starter motor was in a very confined area and if it failed it would be a problem to remove once the toe board was in place. I had checked the original starter whilst rebuilding the engine and I was therefore happy to fit it to the engine at that stage. However now I appreciated how difficult it was going to be to change it once the car was finished I thought it was a good policy to replace the starter with a fully rebuilt unit whilst I still had relatively easy access.
The other point concerned the fitting of the front part of the exhaust system. Access in this area was also very restricted so I decided to fit this part of the system before I replaced the floorboards. The exhaust system had already been in use on a twin cam as I explained earlier but it still needed a considerable amount of fettling before it could be attached to the manifold. I was very glad that I was not attempting to do this work from the underside of the car.
The pictures of the engine bay with this issue will give some impression I hope of how confined the whole area is for the engine and its ancilliary equipment. By contrast the engine bay of an MGB is positively spacious. This lack of space has meant that I have had to fit many parts in a set sequence to avoid one part obstructing the next. On the exhaust side for instance the manifold had to go on first followed by the cooling system header tank and the thermostat housing. This left room to refit the distributor and new spark plug leads. In future it looks as though it will be necessary to remove the radiator to service the points in the distributor!
I leave you this month with the radiator grille which I talked about last month. It came back from the chrome plating company looking better than I had dared to hope and I could not wait to see it in position on the front of Ratty. Comparing the before and after pictures of the front brings it home to me just how much Ratty has progressed and this provides the encouragement to continue. I could not resist putting the lovely MG badge on immediately and keep returning for another look.
In the next issue I hope to be able to write about restoring the dashboard and finishing the wiring. Not long now before Ratty shakes his tail again.