A Twin Cam called Ratty – (Part 14)
In the spring I bought a complete set of interior trim for Ratty from Bob West the Twin Cam specialist. When I got home I unloaded the car and photographed the large quantity of material required to trim an MGA coupe and these pictures were published in the July edition of Enjoying MG. Since then the various bits of carpet, vinyl panels and the new seats have been stored out of harms way around our house until I was ready to commence with the trimming.
|
 |
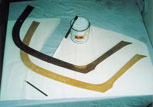 |
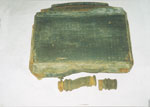
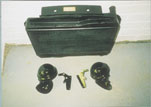
| Original radiator and hoses. The radiator was in excellent order and only required painting | Restored radiator and horns prior to fitting | Original roof cant rail and copy made in hardboard. Note the headlining material is marked out ready for cutting |
My wife Janet has been very tolerant about me keeping the inside of an MGA indoors especially as it has completely filled a small spare bedroom for the best part of nine months. I must say now that it has been transferred to Ratty I shall miss the whiff of new leather upstairs but it is even nicer to have that distinctive smell pervading the inside of the car.
 |
 |
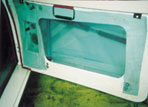 |
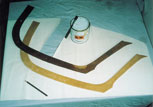
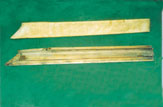
| The rear of one the new cant rail shows how the vinyl covering was fixed | Both door cappings. Note that the top one is still fitted with the original off white vinyl | Driver’s door with plastic damp proof membrane stuck in place prior to fitting the door trim |
One of the biggest disappointments for me when I purchased Ratty was that the interior had been contaminated by the rat infestation and because of the health hazard it had to be thrown away. I like older cars that have a nicely mellowed and slightly worn interior and believe that when the original trim is removed from a car something of its character is taken away as well. The glorious aroma of old leather is lost along with a whole variety of other smells which have been absorbed into the soft furnishing over many years. It is an aroma that certainly cannot be recreated during a full restoration no matter how much money one cares to put into the project. I am lucky enough to own a TD with all its original trim and whilst it is a little worn it is by far the most comfortable MG I have driven. I love how it smells inside and think this is an integral part of the driving experience of that particular car. I would therefore encourage any MG owner with the old trim still fitted to their car to think carefully before deciding to replace it with new.
 |
 |
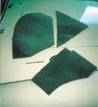 |
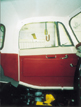
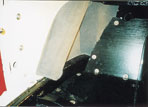
| Passenger’s door trim and handles fitted | Each section has to be fitted separately | Three pieces of the carpet jigsaw. These go around the chassis next to the footboard |
Getting back to Ratty, I obviously had no choice but to buy a complete new interior and a lot of the pictures with this month’s report illustrate what was involved in installing all the new trim. The headlining had of course already been fitted earlier in the restoration, along with the front and rear windscreens and this work was reported in Ratty part 8 in the July 2002 edition. At that time I decided to leave the cant rails around the top of the doors and across the top of the windscreen for attention at a later date. This was the start point in the installation of the trim and the first photographs show how the new rails were created. I used the originals as a pattern and cut new ones from hardboard which were then covered in the headlining material. I was pleasantly surprised to discover that when I fitted the cant rails to the roof the wrinkles I had found impossible to remove from the headlining disappeared like magic. These rails were obviously designed to be an integral part of the roof and apply the right tension to the headlining for a perfect finish.
 |
 |
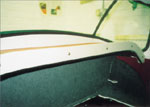 |
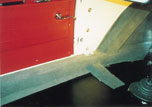
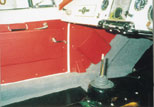
| Carpet is also fitted to the sill and part of the chassis cross member | Passenger side almost complete | The off white vinyl is also used to trim the rear parcel shelf cap |
When I reported on rebuilding the dashboard I mentioned the unusual colour scheme of some of Ratty’s original interior. The dashboard was covered in an off-white vinyl and this was clearly shown in the December issue. As can be seen in the photograph included with this month’s report, the door cappings were also covered in the same coloured material and so I continued the scheme in the rebuild. As I mentioned previously I was a bit sceptical about this but now the trimming is finished I can appreciate how the trim colour scheme works as a whole. My wife commented that the cream coloured vinyl is a close match to the Old English White paintwork and this helps to coordinate the outside and inside colours of the car.
 |
 |
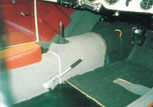 |
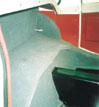
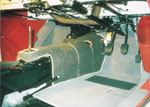
| A view of the shelf behind the seats. Note that the spare wheel intrudes into this space and is also covered with carpet. This has not been fitted at this stage | Fitting the under felt to the gearbox tunnel. The hole is to provide access to the gearbox filler plug | More under felt on the tunnel and a trial fit of the floor carpet |
Once the door cappings were completed and fitted, I prepared each door for trimming by lubricating the window winders and door locks and checking all the fixing bolts for tightness. In the photographs one picture shows that a plastic membrane was stuck to the inside face of the door before the vinyl door trims were attached with eight small self-tapping screws. The membrane is included to protect the door trim from dampness and I cut this from a roll of builder’s damp-proof plastic. However I am sure that any reasonably heavy-duty plastic sheeting would work just as well.
 |
 |
 |
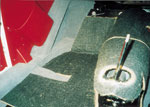
| Trial fit of the under felt on the passenger floor | By working from the back of the tunnel each of the three tunnel carpets overlaps the other to give a tight and crease free fit. | Fitting the padded armrest to the tunnel making sure it is not mounted off centre. The headlining cant rails can be seen quite clearly in the background |
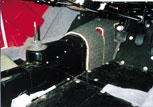
I could not believe how many bits of carpet were supplied with the kit and I needed to spread them out on the garage floor to solve the puzzle. On an MGA, parts of the chassis protrude into the car and I soon realised the smaller bits of carpet and vinyl were intended to cover these areas. I started by fitting the carpet to the chassis next to the toe boards and a word of caution at this point is appropriate. The contact adhesive I used, Dunlop S1352, gives off a strong vapour when applied and in the confined space of a small car like the MGA coupe there is a risk of asphyxiation and explosion. The effects can be minimised by leaving the doors open and extinguishing all naked flames but do be aware, the fumes are dangerous!
I stuck the carpet to the sills and the area behind the seats before fitting the side trim panels in front and behind the doors. This gave a nice overlap with the red vinyl trim over the grey carpet. Before trimming the tunnel with carpet I bought a felt kit and stuck this in place to provide the padding for a good fit. I am also hoping that it will provide both soundproofing and a reduction in heat build up in the cockpit, a problem for which the coupe is renowned. I remembered to fill the gearbox with oil before sticking the carpet in place as I am notorious in the family for having interesting accidents with oil and in this case a large stain might be noticed in the middle of my nice new light grey carpet.

Nearly finished, only the carpet fasteners left to fit
The floor carpets were more or less ready to fit but just required Lift-a-Dot fasteners to prevent them moving out of position and becoming a hazard to the driver. Each carpet is attached to eight pegs screwed into the wooden floor and it is essential that the fasteners are correctly aligned with these to give a good fit.
Finally the seats were ceremoniously carried from the spare bedroom and fitted into Ratty. Immediately the car looked so different and the view from the driver’s seat made me long for the moment when I could try the car. I hope I have only detail work to finish now before the engine runs for the first time so ………watch this space!