MGF & MGTF Heated Windscreen Washer Jets
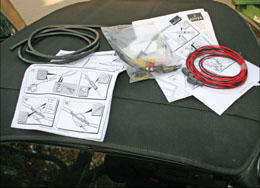
The MGF and TF range are a famed for their dynamic handling which is directly derived from their mid engine configuration. However, on a winter’s day there is a downside to having your engine just behind the cockpit and that is no heat gets transmitted from the front engine bay to the bonnet and therefore on a frosty morning no matter have far you travel the windscreen washer jets can stay resolutely frozen. This has much to do with a constant stream of cold air blowing over the bonnet and keeping the temperature of the jets low. A kit is available to remedy this problem and it consists of two replacement heated windscreen washer jets, plus all necessary wiring and connections. In addition you will need a craft knife, a 13mm spanner, a wire stripping/crimping tool and some electrical insulation tape.
1. The kit complete with simple illustrated instructions
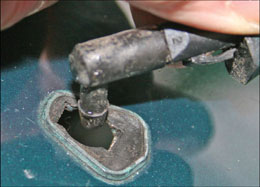
2. Removing the old washer jet assembly
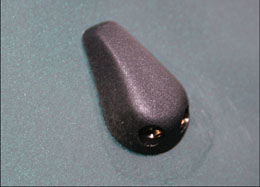
3. New heated jet clipped into place
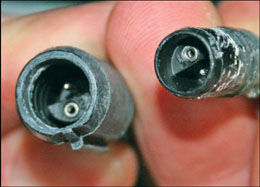
4. Wiring plug-together connection has a groove to guide assembly
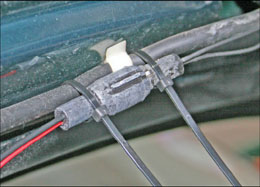
5. Tie-wrap the wiring connectors to the windscreen washer water supply pipes
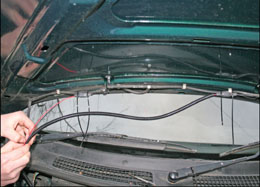
6. Placing the plastic trunking cover over the wiring
The kit arrives with universal instructions (it also fits ZR and ZS models) and fitting it is very straightforward. The original washer jets are clipped through the bonnet and only require the removal of the rubber water supply hose and compression of their locating lugs for them to be freed, on my MGF a plastic retaining plinth was left behind and this too had to be removed before the replacements could be seated. The replacement jets with their wiring and plugs pass easily through the bonnet and then it is just a simple matter of clicking them into place.
Before tampering with the wiring it is best to disconnect the battery (undoing the earth connection first) but be aware that on reconnection you will have to reset the car alarm by following the instructions in the driver’s handbook, also be aware that the radio will need recoding, so make sure you have the code and instructions to hand.
Once the jets are installed then they need to be connected into the wiring loom, each heated jet has a red wire and black wire to conduct power and provide an earth. The connecting plugs on both of the jets and for their respective wiring are a push fit and grooved to give precise location, this is because the contacts must be very carefully lined up when pressing them together.
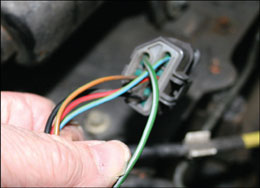
7. Disconnect power supply for the wiper motor
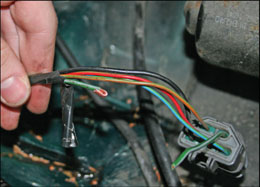
8. Open loom to expose and cut into the green/grey wire
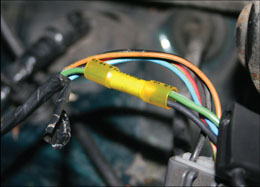
9. Connecting the fused (live supply) wire into loom via a crimp connector
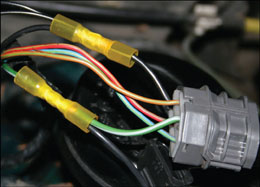
10. Connecting black earth wires to earth wire on wiper motor
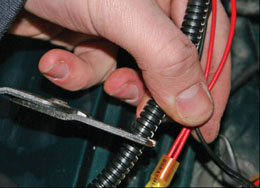
11. Cutting plastic cable trunking to correct length
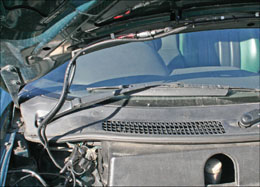
12. Wiring for heated washers installed and covered by plastic cable trunking then tie-wrapped into place
Once the washer jets are connected the wiring connectors can then be tie wrapped into position, also in the kit is a generous amount of plastic trunking and this can now be wrapped round the four wires to keep them tidy and out of harm’s way. Then this assembly can be wrapped to the rubber supply pipes for the washer nozzles.
Power and the earth connection is taken from the multi-plug and loom that is fitted to the wiper motor, which located on the scuttle of the front compartment on the driver’s side of a RHD MGF. It is necessary to strip back the plastic insulation wrap slightly to expose the wires for the wiper motor. In the kit is a fused black wire that first has to be crimped to both of the two live red wires from the heated jets and then connects via a second crimp connector into the green/grey wire from the wiper motor. To fit this first cut into the grey/green wire strip back the ends and prepare the wires to push into a crimped connector, reconnect adding the fused black wire. Fitting the crimped connectors requires care, as it is all too easy to crimp them together and miss clamping the exposed wire inside, which will then just drop out.
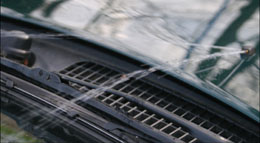
13. Washer jets back in operation
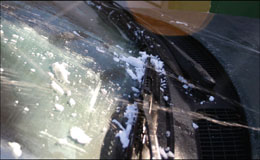
14. Jets still working even on a cold and frosty morning
It implies in the instructions that the crimp connectors will heat shrink to fit but the hairdryer I borrowed from my wife (I no longer need one of my own) failed to make any impression on them, although it was a very cold day and I was working outside. Perhaps an electric heated element type paint stripper would be more effective but great care must be taken; a few twists of electrical insulation tape around each connector would be safer.
Next cut into the black wire on the wiper motor and then re-join adding the two black earth wires with the third crimped connector. Essentially the wiring is now complete and all that remains is to check that the connections are secure before resealing the insulation wrap around the wiper motor loom. Once reconnected everything worked fine but I had to wait until a frosty morning before I could be sure that heated washers actually worked. On the first cold morning they proved to be effective but do remember that it is still necessary to fill the washer bottle with a suitable amount of anti-freeze mixture or the reservoir will freeze anyway.
Heated Washer Jets for the MGF, MGTF (also fits ZR & ZS) are available from MGOC Spares, part number VUB100220