MGA MOT Preparation part 1
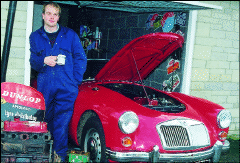
Time for an MoT for the MGA PDQ (Part One)
We all know that once a year our pride and joy must be taken down to Fred at the local garage for its annual MoT test. In my case the MGA had only covered four hundred and fifty miles (am I the only person still waiting for the summer of ’98?) since the test last year but there is still the butterfly in the stomach in case anything is found that the car may fail on.
Devoting perhaps a Saturday to check through the car, this can put one’s mind at rest and even, if a problem is found, save you time and money.
Working it through
There are two ways in which you can approach checking the car over. Start at the back and work your way through the car to the front or take each item on the test and check that system on the car.
For the MGA we will be going through each system individually as I find it easier to address one thing at a time rather than do a little bit on each, which may well increase the chance of missing an MoT failure point.
Lights
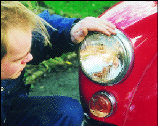 It is a great help when checking the lights if you have an assistant standing checking the lights if you have an assistant standing at the relevant end of the car to advise if all is well. Check that side lights, dipped beam and main beam work at the front of the car. It is also a requirement that the blue indicator for main beam on the dashboard works. With the lights still on check that the rear lights are working and that the brake lights work with the lights on as well as off – it has been known for this not to be the case.
On some cars you may find it necessary to turn the ignition on to try the brake lights. While at the rear make sure that the number plate lights are working. On some cars you will find more than one bulb in the lamp – all must work.
If you find that a light is not working there are a number of simple test to find the fault. Check there is power going to the bulb, check the bulb has not blown and finally check that you have a good earth.
Setting the aim of headlight beams is very difficult at home without specialist equipment and while the aim will be checked at the test, most stations will be prepared to adjust the headlights if necessary, while you are there and sometimes at no extra cost. The headlamp aim is only likely to be out of true if you have had reason to remove the headlamp during the year.
Once happy that all is well with the headlamps we can turn our attention to the indicators. Check that both the left turn indicators, front and back are working and that the right turn indicators, front and back, also work correctly. If indicators flash very slowly or not at all, then replacing the flasher unit will normally do the trick. Again, as with the main beam warning light, the warning lights for the indicators on the dashboard must be working. If your MG is fitted with hazard warning lights, check that the lights work, the will a separate flasher unit for most MG modesl. The dash or centre console warning light for the hazards must also work as well.
Windscreen/Horn
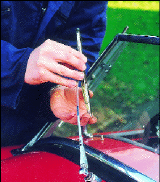 As a rule of thumb, when sitting in the car, you must have a clear field of vision through the swept area of the windscreen wipers. Any cracks or chips on the screen, especially in the area just mentioned, is a potential failure. If in any doubt have a expert give their opinion on the options of either a repair or replacement of the windscreen.
Operate the washers and check that jets are correctly adjusted to hit the screen in about the middle of both passenger and driver’s side. With water on the screen try the wipers and check that the blades sweep the screen without leaving any smearing or lines, replace if they do. If the washer does not work the first thing to check is the water level – this is the most common fault.
Whilst still in the car check that the horn works by giving a little toot. If it does not respond, an earthing problem is the most likely cause, due to the horns being in a vulnerable position right at the front of the engine bay. The MoT states that the horn must be loud enough to be heard by other road users, so it is at the discretion of the tester as to how loud is acceptable. Cars that were registered after 1st August 1973 must have a horn that has a constant note, continuous or uniform and must not be harsh or grating.
One outside of the car again, just lift the wiper blades off of the screen and run your finger along the edge to check that the rubber cannot fall off or that there are no bits of rubber missing off the blade, again replace if they either move or have pieces missing.
Seat Belts
The MGA that we took for the test did not have any belts (only cars registered from 1st January 1965 must have belts fitted).
However, if fitted the belts must be in excellent condition. The mounting points must be in good order. Give a good tug on the belts at all three mounting points. Then check the whole length of the belt for any cuts, fraying or any fault at all. Check that they buckle up correctly and with inertia reel belts that they reel in and out smoothly and lock when given a sharp tug on the reel side of the belt. Seat belts are a main safety item and I would therefore advise that if any doubt about the condition of your belts be safe and replace them – it could save your life.
While checking your seat belts it is a good idea to also check that both seats are securely attached to the floor by trying to rock them from side to side, any play or loose fixings should be investigated and remedied.
Batteries
Not all testing stations will check batteries on your MG on account of their inaccessibility, but for safety reasons,
batteries should be checked to ensure they are securely fastened in place, so that in the event of a accident they cannot move in any direction thus causing a possible short and fire.
Exhaust system
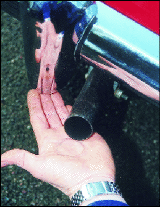 The exhaust system must be in good order with no holes or leaks.
An easy way to test for leaks is to put your hand over the rear tail put to form an air tight seal. After a few seconds, if there are no leaks, the engine will start to ‘choke’ and eventually stop. If however the car keeps running, further investigations for the leak must be made. N.B. The rear tail pipe can sometimes be very hot so please test this before sticking you hand over the pipe – it can hurt!
Glance underneath the car to check that all the exhaust mounting points are in good order and that none of the rubber has perished – replace mountings as necessary.
Steering
Sit in the car and firmly grip the steering wheel.
Try to move it up and down – there should be no play (top column bush needs replacing if it does). Now try to pull the wheel towards you; it may move a little but this should not be more than about half an inch max.
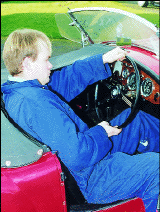 Testing the condition of the steering column top bush. |
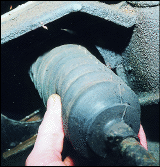 This steering rack gaitor is still in good condition. |
Have an assistant sit in the car and rock the steering wheel from side to side. In the engine bay look at the steering column universal joint and check for any play – renew as necessary. If the car seems very heavy on the steering check that it is not in the process of seizing by jacking the front of the car up. The steering should become much lighter without the weight of the car on it – if not, you may have a problem with the rack or your king pins. Finally check the rack rubber gaiters for any splits or cracks, replacing as required.
An MoT is No Guarantee
Always remember, when buying a car that an MoT certificate is not a foolproof guarantee the vehicle is in roadworthy or even sound condition. Many cars that are the subject of complaints about bodged repairs have brand new MoT certificates. Forged MoTs are not uncommon but even a genuine certificate is limited in the items it covers. If you bear in mind that an MoT costs around £30 and an RAC inspection costs around £300, there is no way that an MoT can be anything like as comprehensive or cover as many inspection points. All a genuine MoT can prove is that at the time of the test the car was roadworthy, but it is always possible that new problems could have developed since the test and these could be very serious.
MOT FAILURE POINTS
Items that make cars fail.
|
|
Next month we will cover the remaining areas for the MOT, the bodywork and structure, fuel system, wheels and tyres, suspension, brakes and bearings and emissions.