MGA Twin Cam Rebuild (part 6)
A Twin Cam called Ratty-Part 6
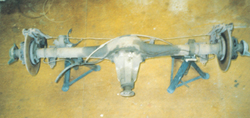
Axle before restoration
At the end of my last report, the MGA twin cam restoration project had reached the stage where all the bodywork and spraying was finished and I was contemplating the rebuild of the rear axle. Although the work on the body has been my main priority for several months, between times I have also looked to improve the many chrome parts. In this article, as well as describing work carried out on the axle I have added notes on the restoration of the bright work. During this period the steering rack has also been refurbished and fitted to the car.
| Rear Brakes
Rear brake disc before restoration Outside of rear brake disc before restoration |
As I manoeuvred the axle in the workshop into a position where I could start its restoration it occurred to me that I had not looked at it since it was removed from “Ratty” nearly a year ago. The appearance of the rusty axle, complete with the remains of rats’ nests, served as a reminder that the whole car had been in this state and memories of starting the rebuild came flooding back. I had been feeling euphoric about the lovely shiny bodywork but this brought me down with a bump. I still had a lot to do! A major point about the axle was that it would involve repairs to a part of the Dunlop disc brake system, a special area on a twin cam where parts are known to be rare and difficult to source. Obviously it was not going to be like a previous experience of rebuilding an MGB where just about every part is available either brand new or reconditioned from MGOC spares.
I had to start somewhere so I drained the oil from the differential and was pleasantly surprised to find that it was clean and without traces of metal. Although not fool proof this was an indication that the differential gears and bearings might be undamaged. As I stripped down the nearside disc and brake assembly I was amazed to find how easily it all came apart considering the state it was in. I removed the half-shaft which was in good condition and found no signs of rust or distortion. As a first impression the axle was turning out to be more promising than I had anticipated, even the differential assembly was in good condition when it was removed and checked. The good news, as far as the axle was concerned, finished here. |
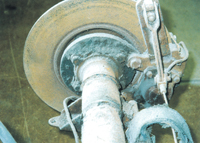
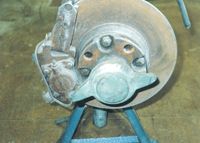
Once the axle was completely stripped I started to check the braking system components and it was here, as expected, that the real horrors were lurking. The discs on both sides were very rusty and could not be saved by skimming and looking at the four hydraulic brake cylinders on the rear axle, only one was found to be the correct specification. Someone had at some time replaced three of the four original brake cylinders with units from another car, 1.75 inch diameter instead of 1.50 which would of course be a dangerous configuration. It would give uneven braking power on one side of the car and the risk of skidding and it would also put excessive load on the disc with odd size cylinders.
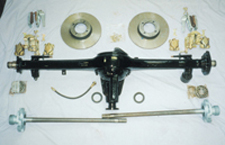
Painted axle with parts for re-assembly |
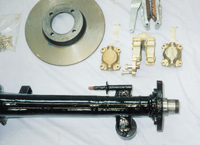
Detail of axle with new brake parts |
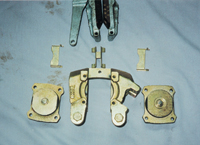
Close up of brake parts |
I now pumped the brake pistons out of each cylinder using a grease gun and an old bleed screw as a nipple. I found severe corrosion in all four cylinders but ironically the pistons could have been re- used with new seals if they had been the correct size. With so many incorrect and corroded parts to find I knew I needed the assistance of Peter Wood who is the expert on the very rare Dunlop braking systems for MGA’s so I phoned him to chat about my problems. A visit to his workshop with the brake parts confirmed my suspicions that three cylinders were incorrect and could not be re-used. I was very fortunate that he was able to replace these with original cylinders that had been relined with stainless steel sleeves. He also supplied everything else I needed to rebuild the rear axle brakes including new pistons, seals and discs. Knowing how scarce these Dunlop brake parts are, this was a great relief and I was grateful for his assistance. It will be a comfort to know that when the car is back on the road the brakes should give a lifetime’s service without further trouble when filled with silicon brake fluid.
Although the axle case was rusty in the extreme on the outside, the inside was like new with the original paint still intact. A few hours work on the rusty exterior however soon redressed this situation and with a coat of Bonda-Primer covered with Humbrol black the case was ready to be reassembled.
| STEERING RACK
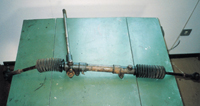
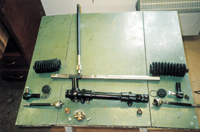
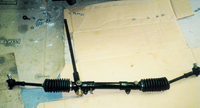
Steering rack before restoration Steering rack before re-assembly Restored steering rack |
Compared to the axle the steering rack presented no problems which was a relief because second hand units are very scarce. I understand that converting left hand drive MGA’s for the UK has created a shortage of right hand racks and those that are available command very high prices. I noticed one in Enjoying MG Spares recently for £800 so it was some relief to find that the unit removed from Ratty was in good condition. An interesting point was a very deep scar on the centre of the rack tube. If you have been following this rebuild story from the beginning you may recall the car had in the past been involved in some form of high-speed collision with a kerb. During this crash the engine must have carried forward far enough on the flexible mounts for the starting dog to touch the steering rack tube and gouge out the mark. The force involved was sufficient to break off the starting dog, another part that must be found at some point in the future. Incidentally I have left the mark on the tube as a reminder of the car’s chequered history.
For many enthusiasts the chrome and bright trim on their car is the desirable and distinguishing feature of classic sports car ownership. I am old enough to remember that the weekend chore of washing the family car for Dad also included polishing the chrome. On a cold and damp winter’s day this part of the job was often hurried and finished as quickly as I could get away with and still earn my “half a crown”. It was certainly not done with a fraction of the love and care one sees at any modern concours meeting! This probably accounts for why every classic car seems to have poor or terrible chrome before restoration. All those years of half hearted polishing and neglect finally catch up with the bright work. The problems with Ratty’s chrome was of course more to do with the fact that the car had been virtually abandoned for years and left in a damp barn with only the rats to worry about the shine |
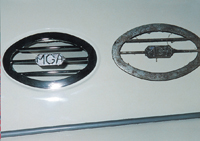
My approach when restoring the chrome was the same as the bodywork and I wanted to use as many of the original parts as possible. This decision reflected an emotional desire for originality but it was also affected by the practical consideration of availability. Major items like bumpers, over-riders and grilles are shared across the MGA range of models and are available from MG parts suppliers. It has to be said however that whilst they do the job, the shape of some of these parts can be quite different from those supplied when the car was new. On the other hand some items on the coupe for example are just not available new and the options are quite simple, save the original, buy a better second-hand piece or go without.
| WINDOW FRAME
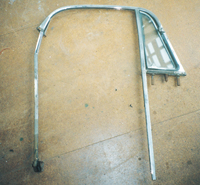
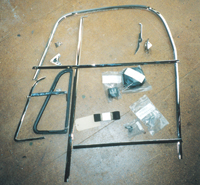
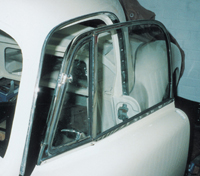
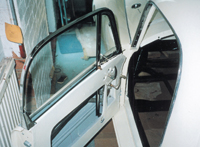
Window frame before restoration Window frame after restoration Fitting of window frame Fitting of window frame |
Plating is definitely not a cheap option compared with a good quality direct replacement. The bumpers for an MGB for example, are mass-produced at a fraction of the cost of plating an original and represent the best value in that situation. My decision to restore rather than replace the bright work was influenced by knowing Vehicle and General Plating at Arlesey in Bedfordshire. They have always done a superb job on any parts I have sent to be re-chromed. The method I have adopted is to send only a few parts at a time and I started this time with the front and rear window finishers. These are almost impossible to find now for the coupe and can change hands for £400 a set second hand. They are nicely made in brass and V&G did an excellent job on my four pieces for £100. I then dismantled the nearside window surround and quarter light frame and presented the plating shop with a box of parts. I took only one side to pieces at a time so the other side acted as a guide for reassembly. There were nine separate bits to be chromed for each window frame and the cost was £75.
The front bumper was beyond salvation and I thought I would have to accept a reproduction part in its place. On my regular visits to auto-jumbles I kept a look out for any original parts for Ratty and eventually I was lucky to find a restored original replacement front bumper for £150. This was about twice the price of a reproduction bumper and gives some idea of the premium that has to be paid for original parts. The over-riders are from Ratty and I have had to spend many hours reforming and filing them to remove all the rust spots and dents. The plating company will of course do this work for you but it obviously puts up the cost. It was only just possible to save the rear bumper because the rust had got under the plating between the over-riders and corroded the steel very deeply. I showed the bumper to V&G and explained that it was important for me to try and keep the original parts and they agreed to take on the job. I am delighted with the results they have achieved on these visually important parts of the car and the cost to plate the four over-riders and the rear bumper was £200. Well worth the money! Now that the axle is ready I feel that I am making headway with the restoration. The next step will be to fit it along with the petrol tank and then I can turn my attention to the front of the car and rebuild the front suspension. It is hoped that Ratty will then be back on four wheels once more. |
Rear of Ratty before restoration, note bumper and over-riders
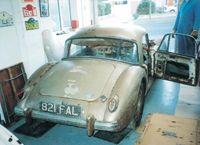 Rear of Ratty before restoration, |
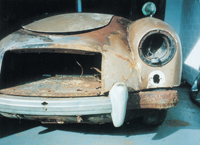 Front of Ratty before restoration, |
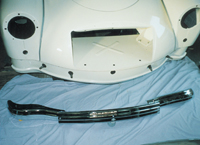 Re-chromed front bumper |
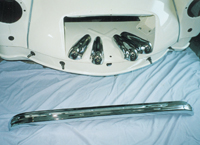 Re-chromed rear bumper shown along |