MGB Sill Replacement
MGB Sill Replacement
Monocoque structure
The MGB does not have separate chassis but is designed on the monocoque principle and the sill sections are a vital part of the bodyshell structure. Because of their importance for the safety and strength of your MG they must be in sound condition and are therefore subjected to particular scrutiny for the MoT test. Corroded sills are a frequent cause of test failure and it is essential to repair them properly. The combined arrangement of inner sill, outer sill and castle section on each side of the MGB is further complicated by the way the sills are enclosed within the front and rear wings which makes replacement of these components a difficult and expensive task. Exposure to road salt and internal corrosion make the sill panels very vulnerable and on average an MGB or Midget may well have been fitted with several sets of new sills during its lifetime, especially if it has been used daily and driven on salted winter roads or even just! stored away in a damp atmosphere.
Corrosion
| The sill sections serve as an excellent strengthening device but being an enclosed box makes them very vulnerable to corrosion. The worst aspect of this corrosion is that it usually starts inside and eats its way out, only becoming visible on the outside of the panel when serious internal damage has already been done. Never dismiss visible rust on the sill of an MGB or Midget as just surface damage, it is most likely to be far more serious. It is for this reason that a patch repair although it may be just adequate to get a car through an MoT will only serve as a temporary measure and is not really worth the time and trouble involved. You can patch up a sill or castle section but it will never be as strong as a complete replacement panel and if any remaining corrosion within the sill is left untreated, it will certainly rust through again quite quickly. When looking at an MGB or Midget as a prospective purchase remember that an MoT is not necessarily a guarantee that the sills are sound, it will require a more detailed and careful examination to determine the internal condition of the sills. If the sills are holed by corrosion in any part of their length the only course of action is to replace the complete sill assembly. |
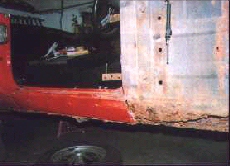
With the door and front wing removed the rust damage to the outer sill can be clearly seen on the driver’s side of this MGB roadster |
Bad news, good news
The bad news about sill repair is that it is complex, requires a high level welding skill and is time consuming. However, the good news is, that all the panels necessary to make a professional quality job are readily available and inexpensive. The most expensive part of any sill replacement project will be the labour involved, this is why the cost of sill replacement by a skilled professional workshop is so high.
However, if you can weld proficiently and have suitable equipment and an appropriate work place, then fitting a new sill is well within your capabilities. Be warned that sill replacement is not a good idea if it is the first welding project you decide to undertake on your MG, if you get it wrong you can do much more harm than good. MIG welders are not difficult to master but you must take the trouble to acquire some welding experience to discover how thin metals react under heat and how to prepare the surfaces thoroughly to ensure they fuse together. It is well worth the time and trouble of attending an evening class or a special course to acquire the necessary welding skills.
Minimum equipment
If you are satisfied that you have the appropriate welding skills then you will also need the following essential tools:
1. Quality jack and axle stands
2. Appropriate welding gear or quality MIG welder
3. Angle grinder, plus assortment of discs and wire brush attachment
4. Club hammer and cold chisel
5. Hack saw or jig saw (fitted with a metal cutting blade) and or a ‘nibbler’ (power drill cutting attachment)
7. Thick leather gloves
8. Eye protection for welding
9. Clear goggles for protection when grinding or chiselling
10. Quality socket set and screwdrivers (front wing removal)
11. Electric drill
12. Welding clamps, mole grips, self taping screws or pop-rivet gun
13. Metal files
14. Hand held wire brush
15. Impact screwdriver
16. Spot weld removing drill bit
17. Fire extinguisher
In addition you will also need a safe working environment. Sill replacement involves the removal of all the corroded panels, this can be done with hammer and a cold chisel or panels can be ground away with an angle grinder. A power drill is also very useful to remove spot welds. All this metal work is very noisy and is guaranteed to disturb the neighbours.
Safety
A job like this requires a systematic approach and your safety and the safety of others must be considered at all times. The car must be correctly supported on jacks and kept level. The correct protective clothing must be worn, particularly gloves and goggles when welding, grinding or chiselling the bodywork.
Welding generates considerable heat and an intense light so never allow anyone to gaze at the welding arc in progress without the correct protective dark goggles. Intense heat can create problems of distortion and it is also very common when welding to set underseal and paint alight. This can be potentially very dangerous as the flames are not visible when you are wearing a welding mask so check frequently so always keep a fire extinguisher handy. If possible have a friend standing by at the ready with the fire extinguisher. Remember Waxoyl contains paraffin and is therfore extremely combustible especially if recently applied. For this reason never use direct heat to warm up Waxoyl when applying it, stand the tin in a bucket of hot water.
The angle grinder sends off showers of hot molten steel which can burn you and will severely damage any surrounding paintwork, interior trim panels and even glass, such as windscreens or side windows. It is essential to protect yourself and the car when using an angle grinder. Remove all trim panels, carpet and seats, always mask up all areas of exposed paintwork and glass to prevent damage from flying sparks or molten particles from the angle grinder.
Electrical equipment
Before starting any welding on your car, you must remove the batteries and also the alternator. Other electrical components that may be damaged by the use of welding equipment must also be removed, such as stereos and CD players.
| Starting work Never cut off more than one sill at a time and remember that the fit of the door is a vital guide to the alignment of the sill panels, particularly the outer sill. To remove the door, always take the door panel from off the hinge, so that the hinge adjustment to the body is not lost. Remove the door trim and then you will have access to the screws that hold the door on the hinge. These screws are often difficult to budge and an impact screwdriver may be necessary to undo them. Having the door out of the way will considerably improve access to the sill. |
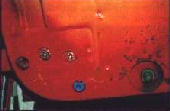 Remove the large Phillips screws that fix the door to its hinges, it may be necessary to use an impact screwdriver |
Removal of front wing
If the front wing is in good condition the most sensible approach is to remove the wing entirely. Although this does involve a considerable amount of extra work the wing is a bolt on panel so that no cutting or grinding is involved in its removal which is some compensation.
To remove the front wing it will be necessary to take off the windscreen frame assembly on an MGB roadster. On the GT the task is slightly simpler as the windscreen is not involved. Many of the bolts that attach the wing are clearly visible but there are quite a few which are out of sight. There are nine bolts along the top of the wing, three joining the wing to the front valance, two at the side of the grille, four inside the footwell two under the dash and also three large Phillips screws along the bottom of the wing. Removal of the wing assembly exposes the inner wing splash panel which has a rubber seal which is designed to prevent mud from being driven through onto the front part of the outer sill, however this seal grows brittle with age and often dirt builds up inside the wing which inevitably causes corrosion.
With the trim panels on the outside of the footwell removed the wing bolts are exposed. The most difficult fixings to reach are the bolts located high up behind the dash. It is better to remove the dashboard but the task is just possible with it in place.
Removing the outer panels
It is necessary to remove the lower part of the rear wings to gain access to the sill. If it is obvious that the lower front wing is badly corroded then you can also opt for cutting away the lower front wing section, this seems drastic but if corrosion is already present there is no advantage in removing the front wing entirely unless you need to make other repairs, on the inner wing panels for example.
The rear wing is welded into place and there is no alternative to cutting the panel away.
As these lower wing sections are removed the real condition of the sills will be revealed and it is invariably much worse than it appeared on the outside.
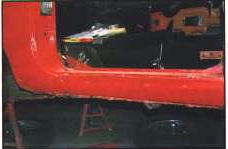 Corrosion is clearly visible along the bottom of the outer sill |
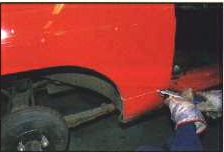 Using an air saw to start the removal process |
Cutting away panels
The more corroded the sill the easier it is to remove but you will still need a sharp chisel and club hammer to cut away the remains. A drill mounted metal cutter or compressor driven metal saw are a great help, however protective goggles and thick leather gloves are essential. Metal can be cut surprisingly easily providing the chisel is sharp enough and you guide it accurately. Avoid cutting too close to the sound panels to minimise the amount of rectification work. Think and plan carefully before you commence work to avoid taking out more sound metal than is necessary.
Before cutting the lower rear wing use a repair panel as template and mark the wing, remember to leave an overlap of at least an inch below the line. A power cutter or drill can be used to make the first incision and then the chisel employed to cut away the corroded wing.
Originally the sills would have been fitted using a spot welder. The spot weld having to penetrate a laminate of two or three overlapping metal panels. The most effective way to dismantle an assembly of spot welded panels is to drill out the spot welds and then prise the panels apart finally pulling away the unwanted panels. A purpose designed spot weld cutter can be bought for drilling out the welds cleanly. An angle grinder can also be employed to remove the old panels, again great care is needed not to remove more good steel than is necessary.
Sill repair kits
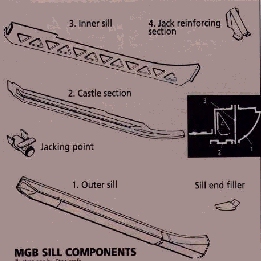
Use the best quality sill repair panels such as Steelcraft or Rover specification panels both types available from MGOC Spares. Sill kits are available in either three or six pieces, the three piece kit contains the sill inner diaphragm, the castle section and the outer sill, the six piece kit includes these but also contains the sill end filler, jacking point and jacking point reinforcer. You can also opt to buy any of these parts separately. When replacing the sill it is always sensible to renew as many parts as possible because this is a job you will not wish to repeat too often. In addition to the sill kit you will also need a rear wing quarter repair panel to replace the metal that must be cut away from the bottom of the rear wing to allow access to back end of the sill section.
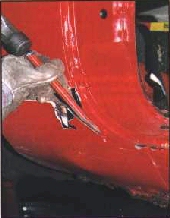 A hammer and chisel are ideal for precision cutting away the rusted lower wing |
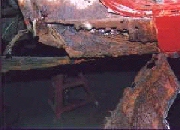 With the lower wing removed the full extent of the corrosion is revealed |
Preparation
| In order to weld steel panels together effectively the surfaces to be joined must be in direct contact and also be bright and clean. Therefore you must spend the majority of your time ensuring that panel fit is good and that you have removed all rust and paint from surfaces to be welded. A wire brush attachment fitted to the angle grinder is ideal to clean up rusty areas and painted panels, although a grinding disc may be necessary to flatten uneven surfaces or remove areas of excess weld. | 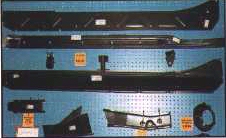 A selection of just some of the repair panels available |
Fit
The fit of the sill panels is crucial and all repair panels however good will still require adjustment and fettling to fit properly. Offer the panels into place and clamp them in position, welding grips are ideal but mole grips and G-clamps can be used. A major advantage of being able to use professional clamps is that they allow much quicker adjustment and therefore it is easier to arrive at a really good fit. Another successful technique is to drill fixing holes in the panels and use self tapping screws to hold them or even to pop rivet them into place for trial fitting.
Once the welding has been completed the screws can be removed or rivets drilled out and their fixing holes welded.
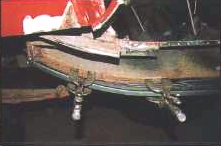 Clamps are ideal to trial fit panels and hold them securely during welding |
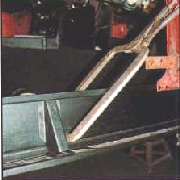 Clamping the jacking point reinforcer into place |
Welding
Correctly position the castle section, measure from the top of the inner sill and use a jacking support bracket to check the angle. Spot weld at spaced intervals along the whole length of the castle section. Heat distortion is a major problem when welding, so avoid making successive welds close to each other, start at either end and then progressively fill the gaps, alternating the position of each weld until you have a series of welds about an inch and a half apart. Keep the possibility of distortion in mind and constantly check and adjust the position of the panels as the work progresses.
Reinforcing points
Located in approximately the centre of the castle section is the jack reinforcing point. This is to provide extra support as the sill is under extreme load when the factory supplied jack is being used. The screw jack supplied with the MGB perversely exerts an intense downward force on the sill structure even as the car is being raised. Some people weld on an extra jacking support but the original specification was only one per side which is quite adequate when the panels are in good condition. However, it is useful to use an extra jacking
support bracket clamped in position to maintain the correct angle on the castle section during assembly.
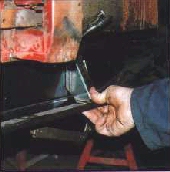 Using an extra jack reinforcing bracket to verify position and angle of castle section prior to welding |
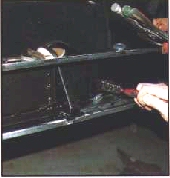 After welding apply rust proofing paint |
| Inner sill Once the castle section is in place and each end is firmly welded then the diaphragm inner sill can be fitted. Before fitting the next panel take the opportunity to paint all the exposed surfaces with a good quality rust preventative paint to avoid corrosion returning in the future. If this had been done at the factory no doubt the sills would have lasted longer. The inner diaphragm is pre drilled and then clamped into position. Take the time to check and adjust the panel fit, once everything lines up you can start welding. The MIG is used to spot weld through each of the pre drilled holes, this forms a join which is very like the original spot welds. As you set to work alternate your welds to keep successive welds as far apart as possible. |
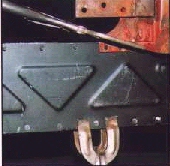 Inner sill located by welding clamps note how the welds around the bottom of the A post have been drilled out and the panels opened so that the inner sill can be slipped in between. Holes pre drilled to allow MIG to be used as a spot welder |
Outer sill
Before the outer sill is attached remember to position and weld into place on two sides of the end filler plate. Pre drill and then clamp the outer sill panel into place. Now is a good time to refit the door, having the door in place is the best guide to outer sill alignment. An even gap all around the door is desirable, so take the time and trouble to adjust the outer sill until everything lines up correctly. Also note the alignment of the raised edges of the exposed part of the outer sill, again the gaps where the front and rear wings overlap should be even.
 Outer sill pre drilled to be welded into place |
 Alternate the welds to avoid heat distortion |
Make the first welds along the top of the panel where it attaches in the door well. Once this is secure the lower welds can be made. It is essential to take the time necessary to adjust the clamps or fixings until the curve of the outer sill looks right. Then the final welds along the bottom of the outer sill can be made.
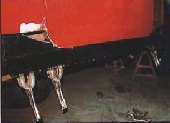 Bottom of outer sill clamped for welding |
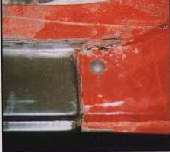 |
Always clean welds and remove excess splatter but be careful not grind away all the strength of the welds you have made. Once the work is tidy, apply a quality seam sealer and a decent rust proof paint.
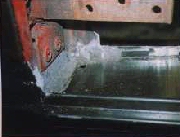 Separated joints turned back and rewelded with the seams sealed |
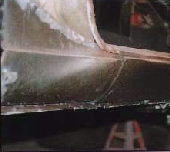 The completed sill before fitting the lower wing repair panel |
As the work progresses paint all surface areas of your new sill panels with a quality rust proofing paint such as Hammerite, excluding the outer sills which will require priming and painting to match the rest of the paintwork. On completion it is advisable to inject all the sections with a rust proofing compound such as Waxoyl to ensure that your hard work will be protected for many years to come. Although there is a quite a lot of work involved in replacing the sills, if you do the job yourself you have the satisfaction of knowing that everything is sound and you know exactly what has been done. You can also be confident that your car is as strong and safe as possible, in addition you can ensure that your restoration work is well protected with appropriate rust protection.
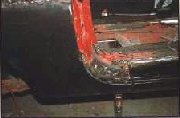 The lower wing repair section welded in to place |
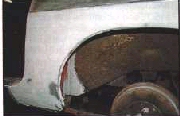 The near side wing after spraying with primer |
All parts available from the MG Owners Club Spares Department: mgspares@mgownersclub.co.uk
Richard Ladds