MGF and TF HRW Connection
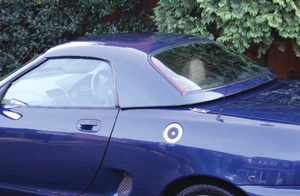
Every winter one question appears time and time again, ‘how do I wire up and connect the Heated Rear Window (HRW) of the MGF/TF hardtop?’ When the weather turns cold owners rapidly appreciate the advantages of buying and fitting a hardtop. The instructions that come with the universal switch and relay kit is in diagram form only and some find these generic images not the clearest to follow.
It is actually quite straight forward, but with some small variations depending on the age of the car. For example the pre 2000 model year (2000MY) MGF has a different switch panel to the later MGF and all TFs. These early cars also tend to have their relay block taped up out of sight whilst the later cars have a clearly visible relay block ready to simply plug the relay in. Finally, 2004 and newer cars have micro fuses and relays.
1 Hard top fitting is the common reason for needing HRW connection for the MGF and TF
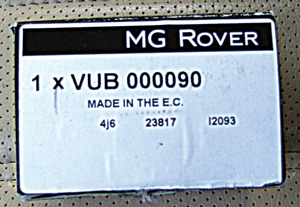
2 The economic way of getting a switch and relay for the up to 2004 onward models is this one which provides both types of switch and a relay cheaper than the single switch and relay bought separately
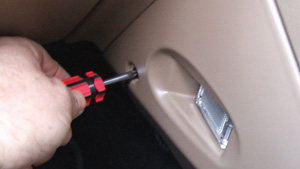
3 Start by removing the appropriate side panel
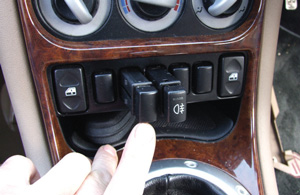
4 2000MY on switch panel sees this blank pushed out with HRE wiring. Note the rear fog lamp switch is out as the wiring behind for both is tight together
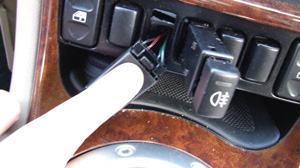
5 The wiring for the HRW switch is locked in the rear of the blank, press the unlock tab to release, then replace black with HRW switch and push switch(s) back into the panel
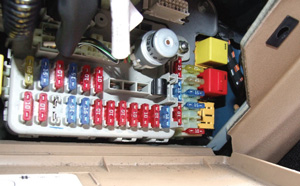
6 Find the relay block to the right of the passenger compartment fuse box 2000MY car shown, note comments in text re pre 2000 and post 2004 models…
The first point to clarify is that MGF/TFs are already equipped with the wiring in the car, so that when fitting the hardtop (or an alternative hood with heated glass rear screen) a HRW is available, it’s just a simple matter of adding a switch and relay, plugging these into the waiting wiring and connecting the HRW wire up to the car’s waiting plug.
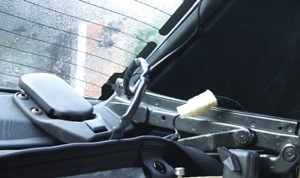
Firstly all hard tops and also the late model hoods with a glass rear window have a small pair of wires connecting the two electrical contacts on the glass to a two wire plug. This plug fits into a matching plug within the interior, that is always found under the carpet/insulation on top of the engine cover behind the passenger seat (right hand drive cars) right under the front corner area. There is nothing more to do than plug the two together, unless like my second hand hard top purchase there is a misplaced wire.
The next job is to fit the switch in the relative position shown in the images, lower right for pre 2000 Model Year cars and left of centre for the 2000MY on cars. The reason for mentioning these positions is that the wiring with the correct plug will be found engaged into the rear of the switch blanks in these positions, and whilst it is technically possible to fit the switch in another position, there is little point and wiring may be a little tight in length.
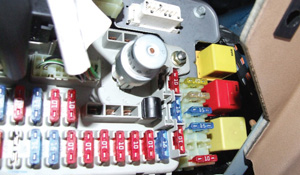
7 …and fit the relay into the holder
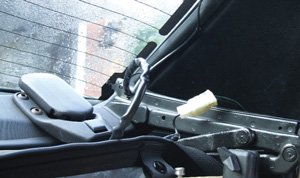
8 Prior to fitting the hardtop you need to have extracted the car’s wiring for the HRW from under the passenger side rear deck carpet
9 With engine running pressing the HRW switch should see the tell tale illuminate and then the HRW should start to work, unless…
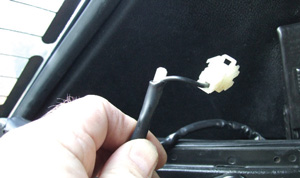
10 …you have a connection problem such as shown in the window harness!
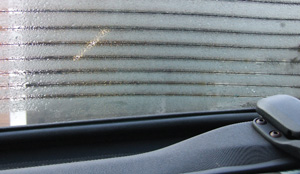
11 Once connection is made the effect is refreshingly different from all the problems with the plastic hood window
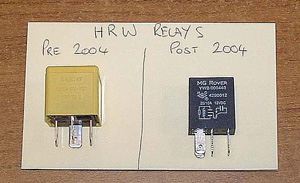
12 The yellow relay is common to all cars to 2004, the small black one is 2004 onwards
To remove the switch blank is a matter of removing the appropriate trim panel to the front lower side of the centre console, the one that carries the foot well illumination, to provide access to the rear of the switch panel. The pre 2000MY car’s need the right side removed whilst the 2000MY and later cars need the left side removed. When removed finger access is available to the rear of the switch panel and the blank, with wiring, can be simply pushed out from behind. It may be that the wiring is tight to an adjoining switch and that switch may need to be pushed out as well, so do this if need be.
The wiring plug will be locked into the rear of the blank, just as it would be in the back of the switch. Press the unlock tab to remove it. Then it is a matter of correctly aligning the keyed plug to the switch, clicking it into place before sliding the switch into place with another click.
The last part of the installation is to fit the HRW relay in to the spare relay block which on pre 2000MY cars is usually taped up to the wiring loom to the right and sometimes behind the passenger compartment fuse box. Later cars have a relay block in the same general position, but only until 2004 when the new style micro fuses and relays arrived. The difference between the two types of relay is quite obvious.
The final point to make here is that when testing the circuit the engine has to be running, not just ignition on. This is controlled via the multi function relay (also called body control unit) which allows the earth path for the relay only when the engine is running to avoid accidental draining of the battery because the HRW circuit takes up a lot of power.
Roger Parker