MGF Boot Wiring Failure
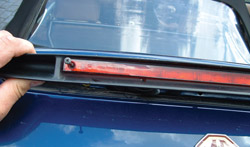
Wiring and bending do not mix, never have and never will. Be it the late MGB overdrive wiring from the switch on the top of the gear knob where it bends at the bottom of the lever, or the wiring between the tailgate and body of an MG ZR, both of which flex each time the main parts are operated. Booted cars are also vulnerable where there are electrical items within the boot, and the MGF/TF falls into this category with several electrical functions.
Remove High Level Brake Light and backing via two visible screws at each end of the light
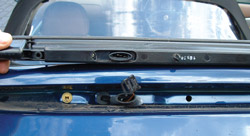
Plug removed from rear of High Level Brake Light Plug and weather cover correctly fitted to High Level Brake Light
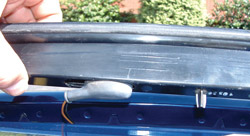
Hella wiring link to boot harness connection
Irrespective of the frequency of your light checking routine you know how sod’s law has the ability to strike at apparently the most inconvenient time. Recently for me it was the morning of the annual MOT test for the MGF when the High Level Brake Light (HLBL) was seen not to be working. Experience gave the probable cause before asking the question, as well as the location to examine first, which was subsequently correct, but before pulling the wiring apart I did some basic checks at the HLBL.
Firstly I checked that the simple two pin electrical plug into the rear of the HLBL was correctly seated. This is held with an integral plastic barb but unless the plug is firmly engaged it can ease out over time. It was secure, so I tested whether there was power on the brown wire by way of the simple expedient of a broom handle between seat and brake pedal to activate the brake lights. With ignition on there was nothing but before I moved further back towards the power source I also confirmed there was continuity between the black wire and a good earth.
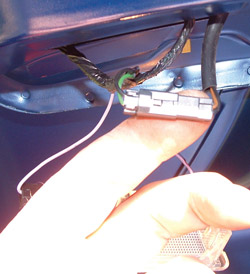
Wiring exposed and broken wires obvious
The wiring of MGF and TF is the same for this circuit, but there is an unlisted oddity with the Hella sourced HLBL used in MGF. This is a short interconnection harness from behind the boot internal illumination light and the HLBL with a different colour code for the power feed to that shown in wiring diagrams. Here the colour is brown and then in the main car loom the wiring colour is green/purple. To access the join between the additional and boot harness’s you first have to remove the boot lamp, push to the right and lower the left side, then negotiate the unit out, noting there is an offset wire connection that obstructs. Then behind you find the wiring with a small oblong connector. This connector was soundly engaged, as expected.
Attention then focussed on the wiring loom between the left hinge and the body and the plastic loom cover was carefully removed to reveal the expected problem of not one but several broken wires. Access is tight so the wiring has to be unclipped from the hinge by carefully using a probe to unclip the cable tie locking tooth and allow the tie to be undone. Doing this allows the clip to be reused, as removal of the clips from the hinge intact is virtually impossible. Another hint is to remove the locating bolt for the common earth block as the wiring to this was hooked over the boot loom, so reduced the free play in the loom. The tension within the main loom also added to the difficulties so I used a cable tie around the main loom and boot hinge which gave more free length to the boot loom and made repair much easier.
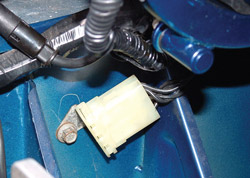
Earth block
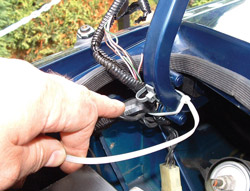
Main loom pulled tight to the hinge and held with cable tie, note the detached earth block hanging down
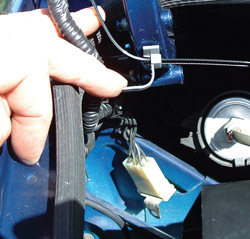
Making use of original cable tie anchor by passing a new one through it
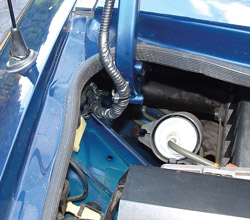
Job complete
Repair was nothing more than soldering the like colour coded, but broken wires together, and then covering them with heat shrink. Two wires were broken, but there was clear breaking to a third, which I cut and then repaired as for the other wires. The remaining wires displayed some visible signs of cracking in the insulation, which was simply wrapped with insulation tape before the repaired wiring was wrapped back up in the original sheathing, taped secure and refitted to the car.
The repair did add some bulk to the wiring and the carefully saved lower cable tie on the hinge was not now long enough, but finding a like size cable tie and passing it through the foot of the original tie provided an equally neat standard looking fixing. Finally the earthing block was bolted back to the body but now the run of this was not pulling on the boot loom so with some greater freedom of movement a repeat of this problem is hopefully delayed. The repair is not a cure for the fundamental problem, which is the flexing of the wiring between the hinge and the main loom when the boot is opened and closed. Eventually I expect there will probably be a repeat problem but hopefully it will take longer than the six years it took for the problem to first arise.
Finally a couple of additional guiding hints to associated conditions that broken wires in this area can cause. One is the boot light not working when the boot is opened. The switch is on the boot latch and puts the light on when the latch is open. Another is the activation of the alarm system when the boot is opened with the key while the alarm is set. The alarm system should receive a signal from the operation of the key in the lock so that it knows the boot opening is an authorised opening. This is shown in the alarm LED on the dash going out from the steady armed flash. Once the boot is shut then the LED rapidly flashes for a few seconds before returning to a normal slow-armed flash rate.