MGF TF Hood assembly change
If the hood has more wrong with it than the common cracked or clouded rear window then the simplest solution is often to buy a good second hand hood assembly that has been unbolted from the donor car. With many more recent cars being written off there is usually a good supply of these at breakers.
Changing the complete hood assembly is a very simple and quite quick job and saves the considerable hassle involved when fitting a new hood to an existing frame. The replacement hood assembly process involves a partial strip down of the rear trim, although this is not difficult, it requires a little care to avoid damaging the delicate trim studs.
Firstly the hood catches to the windscreen are released, so reducing the tension on the hood. Next the five spring clips holding the rear of the hood into the rear channel are released. The rear of the hood can then be lifted out of the body channel and the rear carpet lifted out also.
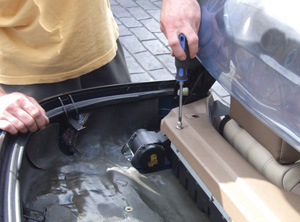
With the rear of the hood held up out of the channel the three screw fixings for the tonneau cover can be removed (image 1). If the car has a Rover design of windstop then this is also removed, first by removing the wing nuts and lifting the actual screen out, then removing the anchor blocks (image 2). The hood can now be rested in the open position. Some other design of wind stops and other aftermarket roll hoops will demand some additional work here.
With the hood and engine cover carpet lifted clear the Tee bar tonneau fixings are removed
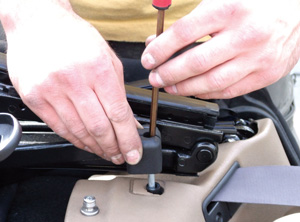
Cars with the MG Rover windstop now have to have the windstop and the anchor brackets removed
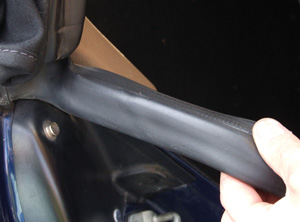
The door seal is lifted on both sides adjacent to the tee bar trim to release the trim extension tongue that slots under the seal
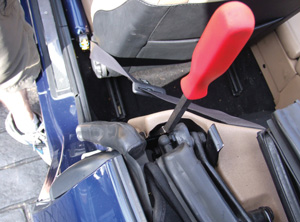
Ideally the use of a trim tool to release the trim studs make the job simpler and less prone to causing damage
The Tee bar top trim now has to be removed and first you move the seats forward for access, and then lift the door seal adjacent to the trim, (image 3) as it has a lip that sits under the seal. Next the Tee bar trim has two trim studs at both ends and a pair in the middle. Using a trim removal tool does make removal without damage easier, but careful use with a flat screwdriver will achieve the same with extra care (images 4 and 5). Now the trim can be eased up, gently extend the seat belts when lifting, and place the trim behind the seats (image 6).
With the Tee bar trim removed the two bolts holding each end of the hood to the body are accessible (image 7) noting that the top bolt also holds the hard top retaining bracket. The two bolts are removed from each side and this allows the hood and frame to be lifted from the car by two people (image 8).
If the replacement hood has a glass rear window then you need to ensure that the HRW wiring connector that is stored under the engine cover carpet on the left side near to the hood frame is accessible, as it will be connected to the new rear window.
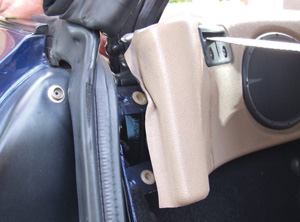
The trim when lifted shows the two plastic receiving cups for the trim clips and there are two more at the other end with a couple connecting to the vertical trim panel between the seats.
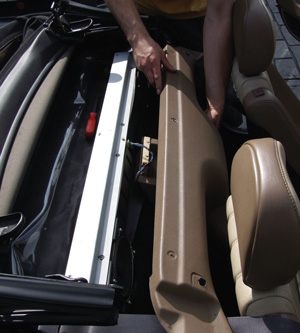
The Tee bar trim is now moved forward and rested behind the seats.
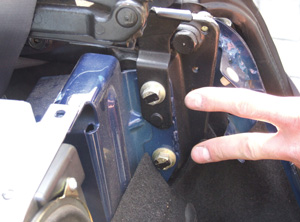
The hood assembly is now held to the car by two bolts either side. Note the upper bolt holds the hard top anchor bracket that is retained
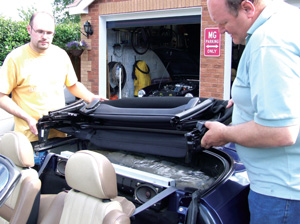
The hood assembly is a simple lift for two people and the replacement hood assembly fitted in place. It is not sensible to do this single-handed
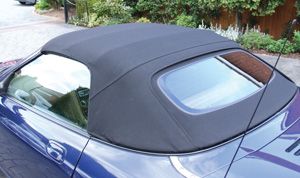
Fitted replacement hood assembly looking as good as a nearly new assembly should look.
The replacement hood assembly is now dropped onto the car and the above process reversed. The last item being to connect the HRW electrical plug from car to the window plug and if the car has already been fitted with the HRW switch and relay for a hardtop then nothing more need be done. If the car has never been fitted with a hardtop before then the additional switch and relay need to be fitted for the HRW to function. This was covered in the January 2008 issue of the magazine and this feature is available to members via the Club website once they have logged in. (Click on ‘Publications’, then click on the magazine front cover image, and scroll down the list of available features that then appears in date order).
When looking to change a complete hood assembly it matters not how old the car is or for that matter how old the hood and frame are, although generally the hoods will be from relatively recent cars going onto older cars. All hood assemblies will fit on any age of car, which includes glass rear windows, both the standard production 2005 model year on MG Rover hood, or the accessory “Sportster” hood formerly sold by MG Sport and Racing with a slightly squarer shaped glass rear window and a number of rather “extreme” material colours.
Roger Parker