MGF & TF Instrument Binnacle Replacement
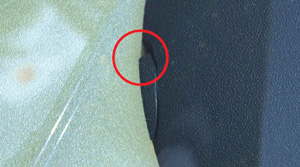
Having noticed a crack develop in the lower edge of my MGF instrument binnacle I did a straw poll check of all MGFs and TFs around the MGOC HQ and five out of eleven cars had similar types of cracks to varying degrees. The actual crack on my binnacle is shown in the image and it is where one of three internal screw fixings that hold the binnacle’s lower edge to the main fascia moulding. The same failure point was revealed on the other cars too.
Now I have seen removed binnacles being sold as spares from MGF breakers before and I was also aware that the binnacle was not available as a separate new part, only as part of a complete fascia, which is listed at anything between £825 to £1060 (inc vat) for a new assembly (depending on colour) so even if these were available it was uneconomic.
1. The visible end of the problem, not apparently bad
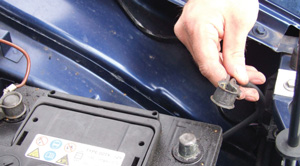
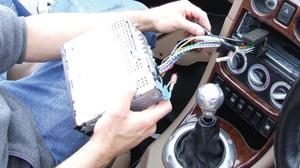
3. If you have a coded radio ensure you know the code before disconnecting the power
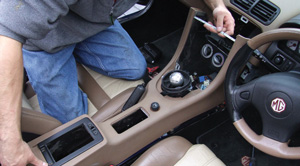
4. Centre console removal and then fascia removal follows the workshop manual instructions
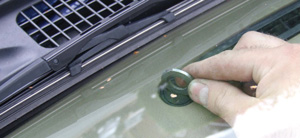
5. Four main fascia fixing bolts hide under the slotted covers at the ends of the demist vents. They break easily so note they unclip by simply turning an eighth of a turn to unlock them. Turn anticlockwise for the covers on the left side of each vent and clockwise for the covers on the right side of each vent
Clearly the binnacle is a separate part simply attached to the main fascia so the logic was that it could be removed and replaced. Logic however is simple but the actual process is somewhat more complex, but still viable. The main impediment to changing the binnacle in the same way it was originally fixed is the need to remove the fascia from the car. A daunting prospect for many owners, but it is not actually that difficult to achieve.
The binnacle has a total of six fixing screws, three around the base where it meets the fascia and three more around a supporting bracket that fits around the front edge. On the face of things that is a simple fit, but a problem arises in respect of the three lower edge to fascia fixings, as the heads of the fixing screws are hidden in the permanently glued and stapled air duct for the face level vents section of the fascia moulding.
A number of possible solutions may apply, depending on the condition of the moulded-in fixing tabs that carry spire clips that the original fixing screws attach into. If the problem is that the original screws have come loose and the binnacle is insecure then a solution would be to wind out the screws so they drop into the air duct and allow the binnacle to be removed. Then fit plastic nut inserts into the vacated holes so that you can then refit with screws from the top making removal in the future simple.
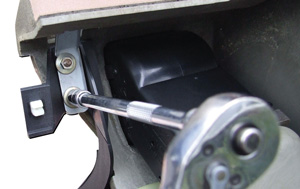
7. Binnacle removal sees removal three screws between the reinforcing ring and binnacle front face and four nuts holding the ring and two metal brackets on the lower edges
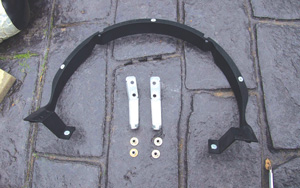
8. The removed reinforcing plastic ring and handed metal brackets
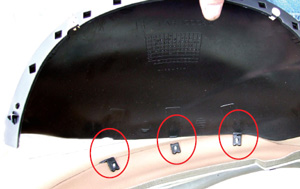
9. The three hidden screws now hold the binnacle in place, or in this example just half of one that hadn’t broken
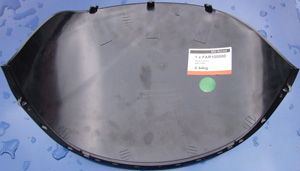
10. New binnacle clearly showing how the three tags should look
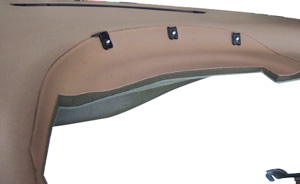
11. Fascia minus binnacle prior to removal of broken fixings. Note how sunlight has degraded the fascia by the brighter colour under the hidden area where the binnacle covers
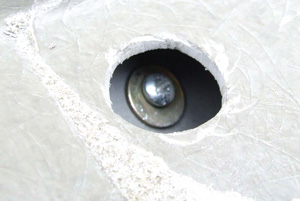
12. Drilled hole showing access to a binnacle fixing screw
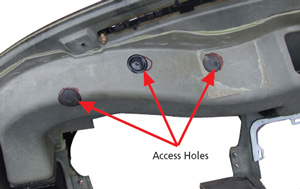
13. Access holes filled with rubber bungs
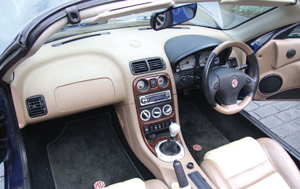
14. Finished job, looks little different but knowing the fault has been cured is satisfying
The problem is that in most cases the binnacle is cracked around one or more fixings, or the tabs are broken, so in these cases the binnacle has to be replaced. In the past replacement has had to be with a second hand unit, but Xpart have plans to introduce this as a new spare part, probably under the MG part number FAR 100080, but this has yet to be confirmed.
Whilst the use of nut inserts to allow the rear fixings to be top entry would avoid a fascia removal, if you have any indications of inefficiency with the face level vents, something that is more likely to apply to older cars, then removing the fascia allows problems with the air ducting to be covered later.
I am not going to cover fascia removal in detail as this is comprehensively covered in the workshop manual, and any owner undertaking this sort of work needs to have the workshop manual and refer to the procedures listed. Fascia removal requires the removal or disconnection of radio, centre console, heater controls, airbag(s), steering wheel, rotary coupler, steering column electrical switches and instruments.
Mention of air bag removal demands an immediate and clear warning to follow ALL instructions contained in the Workshop manual. This advice is so very obviously common sense when you read it but the main element is to disconnect the battery and not do anything for at least 20 minutes to allow time for any residual current to leak away to avoid inadvertent deployment of an airbag. Next common sense advice is not to mess with, poke, hit or drop an airbag. An airbag is rather like a wasp in that if you don’t annoy it, it won’t annoy you, but if you mistreat it then it stings, but in the case of an air bag the sting can be very dangerous.
The actual lifting out and refitting of the fascia is a two man job, so ensure a spare pair of hands are available for these operations, otherwise it is quite straight forward for the average owner to be able to complete. The images show only the main steps involved. Now that the fascia is removed you can start to address the problems, starting with any ducting deficiencies. The problem highlighted here was that the air ducts are made up with a channel section of moulding bonded and stapled against the main fascia moulding to provide a sealed duct. As can be seen on the dash in the images the duct panel is not completely bonded and stapled to the main fascia so the air loss was considerable. Surprisingly the rectification involved ‘fix anything’ silicone sealer squeezed into the gaps and then stapled, clearly something that should have been done during original manufacture, but wasn’t.
Next you can get down to the replacement of the binnacle, which is a task NOT listed in any manual. Firstly at the front you remove a supporting plastic frame that has three screws fixing it to the curved front of the binnacle. Then at the bottom of each side of the binnacle front are two small metal support brackets, each with two studs that sandwiches the support frame and so need to be removed. Note that these brackets are handed, so make a visual note or stick on a bit of masking tape to mark which side is which.
This in theory leaves just the three screws holding the base of the binnacle to the fascia, or as it turned out in my case actually just one and that was nearly cracked through too. Moving it helped it fully break and leave just the broken plastic stubs, and the binnacle in the recycle bin.
I now moved to the underside of the fascia and marked the approximate positions to cut access holes in the air duct in the approximate positions to the screws. I chose to use a 20mm hole cutter to create a comfortable access window, plus I had a selection of 20mm rubber and plastic bungs that I could use to fill the holes after the change. The resulting holes provided easy access to the screw heads, aside from a slight miscalculation for one hole! Removal of the screws, swapping over the spire clips to the new binnacle tabs, and reassembly of the binnacle to the fascia was as simple as it sounds, although I took the opportunity to clean the fascia properly whilst the binnacle was out of the way. The degree of sunlight fading on the exposed fascia was something that indicates one source of stress for the fascia and binnacle plastics. Finally once the binnacle was fitted the 20mm holes were plugged with the 20mm bungs.
Refitting is very much a reversal of the removal process, but whilst the fascia is out you have unrestricted access to the wiring and fittings normally hidden, such as the heater fan resistor, so it is an ideal time to replace known defective items or look for annoying rattles.
Fascia Air Ducting Fault Repair
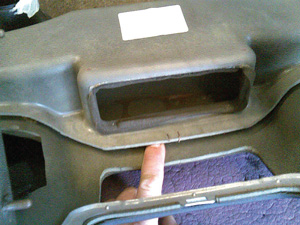
Some fascias have leaky air ducts as illustrated with a finger able to get between duct and fascia
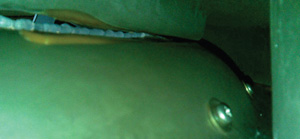
Looking up the air duct from heater connection showing two binnacle fixing screws and also a bead of silicone now sealing the leaky duct
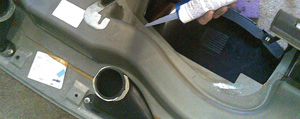
Applying a strong bead of silicone to the gaps in the air duct…
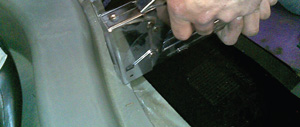
…followed by stapling the two together, as they should have been originally