Technical Tip – MGF/TF Door Mirror Glass Replacement
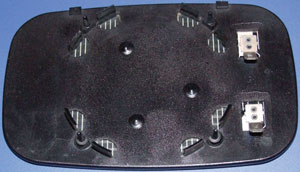
All MGFs have heated door mirrors, a fact that many older MGF owners do not realise. From the introduction of the 2000 model year cars (July 1999) most applications gained electric adjustment as well, the notable exception being the MGF 1.6i.
In 2002 when the TF replaced the MGF the same basic format applied with most models having electric adjustment and all having heated elements, the TF115 (1.6 litre again) being the main exception.
Heated mirrors are something that is not immediately obvious as there is no separate control switch. Nor is it something you usually look for, but as all cars had it originally, then why not have them work. On the rear of each mirror glass there is a simple heating element operating in the same way that heated rear windows work. Power is permanently supplied to the mirrors when the ignition is on, and so after a minute or so when the heating element is working it is easy to feel warmth on the face of the mirror glass. On frosty mornings any ice vanishes in double quick time.
1 Reverse of new mirror glass, note the heating element, four small guide pins and eight securing clips
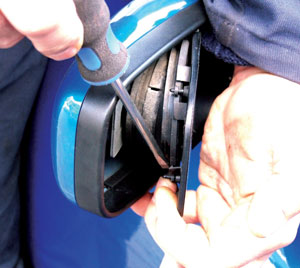
2 Edge of mirror glass levered out against spring pressure and held by hand whilst small screwdriver is used to disengage the eight retaining spring clips
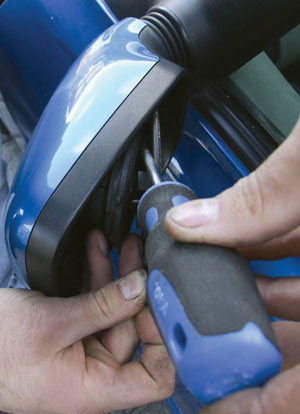
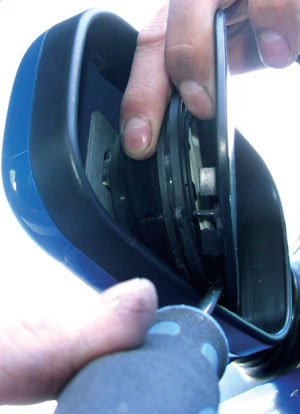
3 & 4 By the time four clips are released the mirror will be pulling away from its inner support and now the support and mirror need to be supported with different fingers whilst the remaining clips are disengaged
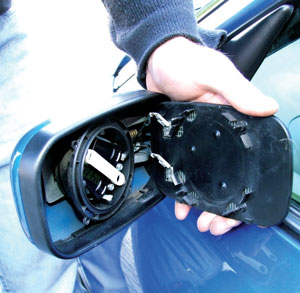
5 Mirror glass disengaged from the support and only the two electrical connections remain to be disconnected
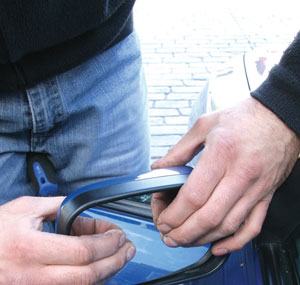
6 New mirror glass refitted and here being carefully pressed until the clips engage. Note the pressure is focussed where this acts directly through the mirror glass onto the clips
If one mirror is not being heated yet the other is, then commonly the issue will be a fault within the element on the back of the mirror glass. Wiring faults are rare and then usually triggered by ‘human’ interference rather than any weakness in the system. Simply exposing the electrical terminals on the back of the mirror and checking for 12v when the ignition is on with the one connection, and continuity to earth on the other wire will confirm whether this is an element issue or not.
Removal of the mirror glass is one of those simple jobs that doesn’t seem so simple when you come to do it. The need to ease the mirror glass out seems as if it will break it, but it is surprisingly robust as long as it is treated with care.
The images show the process of gently levering the mirror glass out, applicable to all mirrors, exposing the back of the glass where you can then see the fixings that hold the mirror glass to its support. Note on the rear of the new mirror glass four round thin plastic pins, which are locating guide pins. Either side of each pin are a pair of plastic spring clips, eight in all and their locking edge engages on the support.
Removal of the mirror glass requires all these clips being disengaged from the support by gently levering the mirror glass away from the support with a finger whilst gently pushing each clip in turn out of engagement. Once all eight clips are disengaged then you can slide the guide pins fully out of their engagement with their guide tubes leaving just the two electrical spade connections to unclip.
Fitting the new mirror glass is a matter of reversing the process, but noting that you need to carefully ensure that all four guide pins are correctly engaged, before pushing firmly on the mirror glass face with finger pressure as close as possible to the approximate positions where the locking clips are, to direct the pressure as directly as possible and so not lever through the mirror glass, which could break.