Servicing your MGF – Oil and Filter
Servicing the MGF
Step by Step
Oil and Filter Change
Safety First:
Any aspect of working on your car requires that you must take all the appropriate safety precautions. These always include working on the car on a level and solid surface, use of jacks, chocks, stands and ramps in accordance with all the normal safety procedures.
In respect of the MGF, there is the added consideration of the SRS system. The Supplementary Restraint System involves explosive devices that when used in their controlled way can save your life. However, uncontrolled activation can lead to injury or death. As such, any work involving the disconnection, removal or replacement must be left to a dealer or other person competent to deal with these devices.
Raising the MGF
Raising the car should be done by using the solid parts of the front and rear subframes. Do not have a saddle of a trolley jack at the rear corner of the rear subframe as these often impose a heavy load onto the small tube that connected between the two rear corners of the subframe and will bend easily. Move the saddle a few inches forward to ensure that the saddle is completely engaged on the main subframe. Stands should also be placed in similar secure places.
1 Accessing the Engine Bay
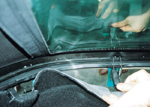
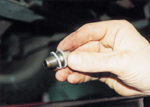
Not quite the simple pull the lever and lift the bonnet job of a front engined car! First unclip the two hood catches at the windscreen and just ease the hood back a few inches. Now move to the carpeted area above the engine bay behind the seats and identify the 5 spring clips that retain the rear of the hood to the rear deck. (photo 1) Unclip all and ensure that the hook is pulled out of engagement from the hood rail.
From outside pull the rear of the hood away from the body. There is an interference fit with seals here and it often sticks a little. You will also see the black plastic trim that clips to the outside of the body may become dislodged at either end. This should be carefully refitted, but don’t just hit it as the plastic clips slide within the trim and will probably be out of line with the hole in the body. They are easily broken so look at what you’re doing, line them to the hole and use gentle finger pressure to refit it.
Some may prefer to unzip the rear window to allow it to remain flat during the next operation. If not then ensure that the rear window doesn’t become folded or creased, especially in colder weather when the plastic becomes more brittle.
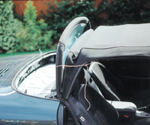
Raise the rear of the hood until its base is vertical. Then use a soft strap (a bungee luggage strap is ideal) to hold the rear of the hood up in this position. If the bungee strap is used then this is easily clipped to the front rail of the hood that provides secure but gentle retention. (photo 2)
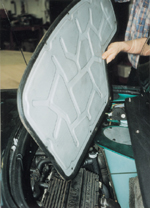
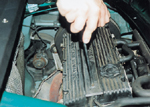
 Remove the carpet and sound insulation under it from the engine cover area. Note whether there is any wetness to the insulation as this may illustrate a water ingress problem that will have to be dealt with separately. Once removed you will see the odd shaped engine bay cover and a round fuel tank sender/pump access plate. (photo 3) Remove the eleven 10mm headed bolts from the engine cover and place to one side where you won’t kick them! Now ease out the cover, which will need a little jiggling to remove. Once this is out you can see the engine in all its dusty glory. Note that the extensive dust covering the engine is quite normal and clear reason why the air filter is needed.
Finally, open the boot and remove the grille that covers the aperture into the engine bay from the boot. This is simply eased up from the front and then the rear pins are lifted out of their locators. At this time ensure that the car’s keys are in the ignition or somewhere away from the boot as during the work it’s quite possible to inadvertently close the boot!
At this time I suggest you also use some sheets or specific body protectors over the rear body before you start to work in the engine bay.
 It seems quite hard to grasp that the first MGFs are now in excess of six years old. It also goes to show the advances since the MGB was in production as ‘B’s of that age were often showing new ventilation holes in various parts of the body. The body is something that lasts much longer today, plus there is often the misconception that servicing is beyond the capabilities of the average owner. Fortunately, this is far from the truth, although it is certainly not quite the same as servicing an MGB.
 Let’s raise a few eyebrows here and say that much of the normal servicing of the MGF is actually easier than servicing an MGB. Surprised? Well if you look at the degree of specialist settings that have to be adopted with the MGB, points, timing, tappets and carbs, immediately you have a degree of quite specialist work that you simply don’t have with the MGF, other than setting the plugs! This is the reason why many younger mechanics and fitters are simply incapable of dealing with an MGB or similar aged car and find the concept of so many adjustments so off putting. Over the next couple of pages I will cover the service areas as shown by the service schedule, and I will also add a few extra items that I suggest may be a good idea based on my experiences of problems encountered by owners. Highlighting what is and is not part of the service schedule will give owners a clear idea of what they should expect to be done. Please note that this guide is intended to assist the owners of older cars where there is no longer any form of Rover or other warranty. If a warranty exists then read the small print to ensure that you comply with the conditions.
 The standard service life of any MGF starts with a 3000 mile oil and filter change along with a check of the suspension ride height. It is useful for new owners to realise that dealers are ‘not allowed’ to adjust the suspension height before this service even though so many cars imitate a Freelander in the Savannah!
 For reference purposes the ride height is measured between the front wheel centre and the wheelarch lip directly above. Nominally, this should be 368mm at an ambient temp of 17 degrees C with a float of plus or minus 10mm which accounts for the accepted temp range above and below 17 degrees. Since the front and rear suspension on the same side is interconnected adjustment is done on a side to side basis, and settlement is a common feature with the MGF. If you car sits down on one corner then this indicates a problem within the suspension. Often this is a loss of the gas envelope in a displacer on the ‘low’ corner, but it can also indicate air within the system. It is always worth de-pressurising the system using the Hydrolastic pump, and then using the vacuum facility before re-pressurising. Owners of Hydrolastic and later Hydragas BL/Rover cars will be very familiar with this procedure!
 I must mention that in addition to the above, it is very important for the car to have a settling and cooling period of at least 2 hours before any measurements or adjustments are made. In addition, the car has to be on level ground and not been jacked up or unevenly loaded in this settling and cooling period.
3 Basic engine service
 We now come to the actual services that most owners will be interested in. Officially, these are split into a simple A or B service with A at 12months/12000 miles and the B service at 24month/24000 miles. (See Service Schedule) The A and B service then subsequently alternate from this point, with specific additional items at various stages. The reference to months/miles means simply whichever arrives first.
 This is best described using the common question surrounding the 60 month/60000 miles service when a cambelt change is shown. ‘My MGF is coming up to 5 years old but has only covered 20000 miles. Do I need the cambelt changed?’ The answer is simple and clear in that a 5 year old MGF DOES have to have the cambelt changed as it is regarded as time expired. Let me just add that it may only be 20000 miles but do you want to take out a lottery ticket on the aging process on your cambelt not having fatigued it to the point where it will break or lose a tooth or two which will comprehensively ‘munch’ your engine? (Have you a spare £3k to replace it?)
Look now at the Service Parts and Schedule list for the parts used and when and following are tips gleaned from experience of living and running MGFs.
 As the engine is far more inaccessible than front engined cars you have to make some adaption in the normal way of doing things unless you’re tall. This is because you have to reach over the rear bodywork and into the engine bay. Taking into account the need to raise the rear off the ground to access the sump and oil filter it may be easier to raise the car for this and then to put it back on the ground. Certainly it is better to have the car level when you’re refilling with oil to read the correct level.
4 Oil and filter
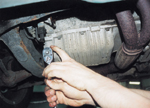
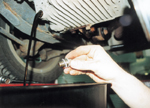
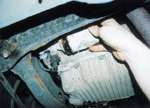
 Oil changes should be done with the oil up to working temperature. This aids the removal of sludge and other deposits in the sump. The oil will be very hot and you should take care when removing the sump plug as hot oil scalds! (photo 4) & (photo 5) Renew the sealing washer and as the sump is alloy only tighten the plug to 25Nm. The oil filter may require the use of a tool to start it turning, as it is not uncommon to find that Arnold Swarzeneger previously fitted it! Wipe the filter housing with a clean cloth to remove any dirt that could either damage the new seal or lift the seal sufficient to leak. (photo 6)
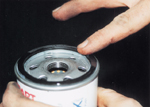
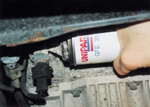
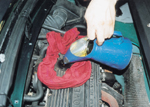
 When it comes to fitting the new filter do remember to smear fresh oil onto the sealing lip. (photo 7) This allows the seal to slide rather than drag on the housing as it tightens and so reduces the risk of leak. Once you are sure that the sump plug and the filter are secure then it’s time to refill. (photo 8) & (photo 9) The engine takes 4.5 litres of oil when refilling following oil change, although you may see quotes of 5 litres. (This incidentally refers to the engine’s first fill from dry). Always run the engine for thirty seconds or more after refilling with oil when it is on level ground. Leave for 5 minutes before dipping the sump to check the level before final topping up to the ‘max’ mark on the dipstick.
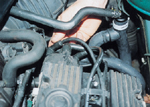
Don’t be fooled by the clever remote oil filling point accessed from the boot under the inspection flap. Pouring in 4.5 litres will take a couple of hours as this narrows right down at the base and slips into the normal dipstick tube hole through the block. A 3mm tube to pass the oil isn’t very efficient, although it’s fine for routine top ups between services. The usual K series access on the top of the engine cam cover should be used with a funnel or specific oil jug. (photo 10)
5 Disposal of waste oil
It is essential to dispose of waste oil correctly. Every local household waste recycling centre has free facilities for the safe disposal of waste oil. Once the old oil has been drained it can be put into a suitable container and taken to a recycling centre and emptied into a collection tank. Oil must never under any circumstances be emptied into drains, burnt, or buried in the garden. All these practices are illegal and it is quite unnecessary to risk prosecution in this way, because correct disposal is free at any recycling centre. In some parts of the country local garages are also offering waste oil collection points.
MGF SERVICING SPECIAL OFFER
Castrol GTX Magnatec 10w/40 is a synthetic technology engine oil. It contains ester molecules which are attracted to metal surfaces providing a continuous film of protection which stays in place even when the engine is switched off. This film provides up to four times as much protection during the critical start up phase than conventional oils.
GTX Magnatec API SJ/CF meets and indeed exceeds the protection and performance standard requirements of MG Rover.
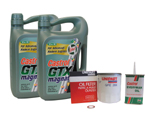
SERVICE KIT MGF 12month /12,000 miles
The MGF Service kit is available with either one or two GTX Magnatec to allow for a complete oil change, with the additional container of GTX Magnatec for topping-up throughout the next service interval.
One or Two 4.5 litres of Castrol GTX Magnatec 10w/40
One Oil Filter
One Sump plug Sealing Washer
One 125ml Castrol “Everyman”. A light oil for lubricating locks, hinges and hood pivots.
Service Kit One with one GTX Magnatec £29.99
Service Kit Two with two GTX Magnatec £44.99
Free delivery to UK mainland destinations. To order telephone MGOC Spares on 01954 230928 or 231318
Next issue covers spark plugs, distributor cap rotor arm and HT lead replacement within the engine bay, to be followed up by suspension, steering and brakes. There will also be additional hints and tips gleaned from living with the MGF that is not mentioned in any service schedule.
This suggested schedule caters for most enthusiastic owners facilities but some operations still require dealer facilities.
12month/12000 miles
1. Oil – to API/SG, SH or SG/CD or higher specification. Nominally to 10W/40 grade for Temperate (UK) climates. Refer to MG Rover current information for hotter or colder climates.
2. Oil Filter
3. Sump sealing washer
4. Grease suspension joints
5. Lubricate locks and hinges, including the hood pivots
6. Follow the extensive additional checklist detailed below.
24 month/24000 miles
1. Repeat items 1 to 6 as shown for the 12000-mile service.
2. Replace brake fluid at this age irrespective of mileage.
3. Renew air filter element.
4. Replace batteries in the alarm keyfob.
5. *Spark Plugs
36 month/36000 miles
1. Repeat items 1 to 6 as shown for the 12000-mile service.
2. Coolant – Replace at 36k miles and every 24k miles thereafter, 50/50 mix of ethylene glycol based antifreeze and water. 5.25 litres of antifreeze needed. (NOTE owners of 2000 model year and later cars should check their label on the coolant header tank to see if their system is filled with ‘OAT’ antifreeze. This MUST NOT be mixed with normal antifreeze.)
3. * Distributor cap (1.8i only) (change at 36 months)
4. * Rotor arm (1.8i only) (change at 36 months)
5. * HT Leads (all models) (change at 36 months)
48 month/48000 miles
1. Repeat items 1 to 6 as shown for the 12000-mile service.
2. Replace brake fluid at this age irrespective of mileage.
3. Replace batteries in the alarm keyfob.
4. *Spark Plugs
60 month/60000 miles
1. Repeat items 1 to 6 as shown for the 12000-mile service.
2. Coolant change.
3. Cambelt – 1.8i – Manual tensioner (up to approx. late 1998) then Automatic tensioner with a wider belt, Cambelt – VVC (two separate belts)
4. Renew fuel filter.
72 month/72000 miles
1. Repeat items 1 to 6 as shown for the 12000-mile service.
2. Replace brake fluid at this mileage irrespective of mileage.
3. Replace batteries in the alarm keyfob.
4. *Spark Plugs
5. * Distributor cap (1.8i only) (change at 72 months)
6. * Rotor arm (1.8i only) (change at 72 months)
7. * HT Leads (all models) (change at 72 months)
84 month/84000 miles
1. Repeat items 1 to 6 as shown for the 12000-mile service. 2. Coolant change.
96 month/96000 miles 1. Repeat items 1 to 6 as shown for the 12000-mile service.
2. Replace brake fluid at this age irrespective of mileage.
3. Replace batteries in the alarm keyfob.
4. *Spark Plugs.
108 month/108000 miles
1. Repeat items 1 to 6 as shown for the 12000-mile service.
2. Coolant change.
3. * Distributor cap (1.8i only) (change at 108 months)
4. * Rotor arm (1.8i only) (change at 108 months)
5. * HT Leads (all models) (change at 108 months)
120 month/120000 miles
1. Repeat items 1 to 6 as shown for the 12000-mile service.
2. Replace brake fluid at this age irrespective of mileage.
3. Cambelt change.
4. Renew fuel filter.
5. Replace batteries in the alarm keyfob.
6. Present your car to a dealer for the 10 year airbag replacement.
* = Items that are recommended additional items to the normal service schedule – see main text.
Additional Check List
The following items should also be examined at each service point for damage/wear and replaced/topped up/adjusted as needed…
- Brake, clutch, gearbox and screen washer levels
- Brake pads, discs, pipes, hoses and calipers
- Coolant pipes and hoses
- Fuel and clutch pipes and hoses
- Alternator drive belt
- Exhaust system
- Wheels, tyres, suspension and steering
- Wheel bearings, drive shafts and gaiters.
- Suspension height.
- Lights, horn, wipers and washers.