Wheel Bearing and Brake Disc Replacement
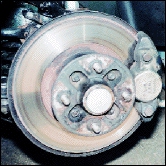
Wheel Bearing and Brake Disc Replacement
How many miles has your car covered? If you stop to think about the total mileage, bear in mind that for every mile travelled, the wheel and therefore the brake disc and wheel bearing will have revolved in the region of 880 times. While the pads will not have been in constant contact with the disc over that period of time, frequent contact will have been made, thus wearing the brake disc down. When brake discs become badly scored, warped or too thin (MGB minimum disc thickness 7.6mm) they will need replacing. It is always necessary to replace both discs at the same time, even if only one needs replacement, otherwise you may well experience balance problems, with the car pulling to one side.
Removal
The first job is to raise the front end of the car and make it secure on axle stands. Working on one side of the car turn the hub/disc assembly so that the caliper is positioned outwards from the wheel arch. Remove the pad pins, taking care not to lose the retaining clips, and slide out the pads. Drift back the caliper lock tabs and undo the bottom fixing bolt but only take the pinch off the top bolt. Before you take this bolt out make sure that you can tie up the caliper to avoid putting any strain on the brake line while it is off of the car. Now remove the bolt and tie up the caliper out of the way. 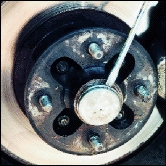 To remove the hub/brake disc assembly from the stub axle, use a lever to prize out the grease retaining cap, remove the split pin and undo the bearing retaining nut. Next remove is the washer that is placed between the retaining nut and the outer bearing race. The whole assembly can now be removed complete with inner and outer races, take care that the smaller outer race doesn’t fall out during the removal process as any dirt contamination will cause premature wear and damage. There is a spacer between the stub axle and hub that the oil seal runs on, so be careful not to lose this if it comes off with the hub assembly. However, nine times out of ten you will find that it stays put on the stub axle.
  Removing the bearings and discs
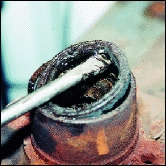
Place the whole assembly onto a workbench, facing upwards, remove the outer race and turn the assembly over. With a screwdriver, prize the oil seal out of the hub. Then remove the bearing race and the coned spacer that sits between the inner and outer bearings. You should also see that there are a number of shims stuck on this spacer if not check the rear of the smaller outer bearing as they are probably stuck on here. With all of the bearings and spacer removed from the hub use a cloth to remove as much grease as possible from the inside of the hub. Once the majority has been removed use a suitable degreasing agent to thoroughly clean the whole assembly inside and out. 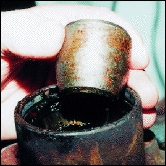 Once clean you will be able to look through the centre of the hub and see two cut outs opposite each other that reveal the rear of the bearing running surface. Using a punch, drift out the inner and outer running surfaces from the inside of the hub. Give the assembly another thorough clean.
Carefully drift the new running surfaces into the clean hub, being very careful not to mark it. With the new surfaces in place now is the time, if they need doing, to replace the discs. 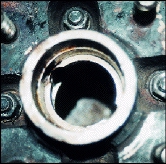 Disc replacement
Using a9/16th thin wall socket and ring spanner undo the four nuts and bolts that attach the disc to the hub. If you find that you cannot get a purchase on the bolt head on the inside of the hub/disc assembly it will be necessary to use a wedge, such as a large bladed screwdriver, to prevent the bolt from turning while the pinch is taken off. Once the four bolts have been removed the disc and hub can be separated.
Making sure that both the mating surfaces of the hub and disc are clean and free from any grit, assemble the new disc and hub assembly. Line up the bolt holes and tighten the bolts up to 40 /45 lb.ft. 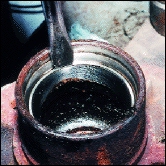 Replacing the bearings
Using the correct grade of grease (high melting point Castrol LM) and line the inside of the hub. Place the tapered spacer, from the rear of the hub, into the hub unit. Carefully pack the larger bearing race with grease and install into the rear of the hub. Using a small amount of force press the rear oil seal into the hub. It may need to be persuaded into place by gently tapping it with a hammer until flush with the back of the hub.
The front bearing can now be packed with grease and with three or four different sized shims placed onto the nose of the spacer (or onto the inside face of the bearing), installed into the front of the hub. Again taking care not to let the smaller race drop out of the front of the hub, slide the whole assembly onto the stub axle. 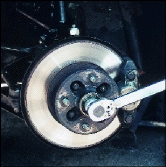 Adjustment of the bearing
Slide on the hub washer and then fit the hub nut. Tighten this nut up to a torque of 40/70 lb.ft. and then check the end float. The reading should be between 0.002 and 0.004 in. To adjust this figure you will need to add or remove a shim to increase or reduce the end float measured with a dial gauge. If you do not have a dial gauge then you can use the following as a guide for adjustment, although you will need to use your own judgement and, in time, your experience to assess when all is adjusted correctly. 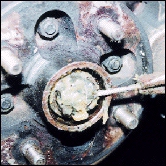 Tighten the hub nut up to the specified torque and check that the disc turns freely and that there is only a very small amount of play in the bearing. The easiest way of checking the play in the bearing, is to place the wheel onto the hub and tighten up the wheel nuts. Grasp the wheel at the top and bottom and then rock. You should feel a small amount of play. If the wheel does not spin and there is no play then the bearing needs another shim, if it is spinning freely and there is a lot of play then you will need to remove a shim. The shim that you add or remove depends on how much needs to be adjusted, as there are a number of options on the thickness of shims. When ordering your discs and bearings I would suggest buying two shim kits at the same time.
 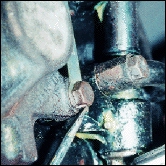 Once you are happy with the adjustment and the nut is torqued up, turn the nut to the next available position where a slit pin can be fitted through the end of the stub axle. The grease-retaining cap can now be fitted. Using a new lock tab attach the caliper using the two fixing bolts, torque up to 40/45 lb.ft. and bend the lock tab over to secure.
New brake pads must be fitted when new discs are installed to allow the new swept area to be fully utilized. Fit the new pads and then secure with new retaining clips and split pins gently splitting the ends when in place. 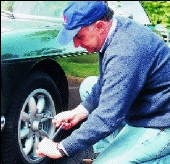 You can now change sides and repeat the same procedure on the other side. When the job has been completed, replace the road wheels and lower the car to the ground. Do a final check on the tightness of the wheel nuts and take the car up the road for a test drive. Before you venture out, just pump the brake pedal a couple of times to bring the pads into contact with the discs, you will get a nasty shock the first time you try to stop if you don’t!
Be gentle on the brakes for the first 100 miles or so, to let the brake pads bed in. You can now go out and enjoy the car and think how many times the wheels have got to go round before you need to replace the bearings again.
Shopping list for the car
1 pair of Discs
1 set of Pads
2 Caliper Lock Tabs
2 Front Wheel Bearings
Castrol LM Grease
2 Grease retaining caps (optional)
The cost of the parts will be in the region of £80 depending on the supplier used.
Tools required
1 Jack
1 Pair axle stands
Good quality socket set
Set of quality combination spanners
Large bladed screwdriver
Hammer
Set of punches
Torque wrench
Pair of pliers
Wheel brace