MGA Mk1 1600cc Service – (Part 2)
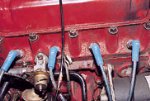
In the second part of this article the items listed below were examined, checked and adjusted as necessary for this 1960 MGA Mk1 1600cc:-
Spark Plug Replacement – Check every 6000 miles and replace every 12000 miles or annually.
Fitting New Points, Condenser,
Rotor Arm & Distributor Cap – Check every 6000 miles and replace annually.
Timing – Check after fitting new points or if distributor has been disturbed.
Tappet Adjustment – Every 6000 miles or 6 months.
Greasing – Every 3000 miles or 3 months.
Dash pots – Every 3000 miles or 3 months.
Air Filters – Every 3000 miles or 3 months.
(Safety note: Please be aware that when working on any car, that you have taken preventative measures to ensure the car is stable, especially when working underneath. It is recommended that the battery is disconnected at all times to avoid any accidental starting of the car. Also, please dispose of waste materials and oil in an eco-friendly and responsible fashion!)
Spark Plug Replacement
| To avoid confusion, it is recommended to number each plug lead with coloured tape or Tipp-Ex to correspond with appropriate cylinder. * Before removal of spark plugs, wipe around each one and make sure that there is no dirt that may fall into the cylinder hole when the plug is removed. * With a plug spanner remove each plug. * Before fitment of new plug, it is necessary to check the plug gap. Consult your manual for correct gap width – in this case 25 thou (0.025″). Do this by using a set of feeler gauges set to appropriate measurement. The blade of the feeler gauge should slide in between the electrodes snugly. * Once the gap is correctly set, the plugs can be replaced and tightened to 30lbft torque. * Now replace the numbered plug leads. * Once the gap is correctly set, the plugs can be replaced and tightened to 30lbft torque. * Now replace the numbered plug leads. |
Plug leads marked for quick re-fitting. 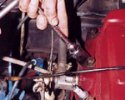 A quality plug spanner is essential.  A sliding fit is ideal. |
Fitting New Points, Condenser, Rotor Arm and Distributor Cap
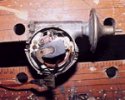
| This can be done with either the distributor in the car or removed as here detailed. * Before removal of distributor it is advisable to mark its position. This gives a reference point for the timing on its replacement. * To remove, slacken off the distributor clamp nut using a 7/16″ spanner. * Once loose, withdraw the distributor straight outwards and place on workbench. * Release the two clips which hold on the distributor cap and remove, then pull straight up on the rotor arm to remove from the centre spindle. * Using a cross-head screwdriver remove the condenser fixing screw and release the nut on the points where the wires attach. * Now remove points using a blade screwdriver to loosen the fixing screw. * Place new points onto the base plate in the same position as those just removed, fixing with its screw. The condenser can also now be screwed back with the wires being fastened back to their original positions. * To set points gap it is necessary to ensure that 1 of the 4 cams on the centre spindle is in contact with the points’ plastic casing which causes the points gap to open and close. The moment this happens (and is also at its highest position on the cam), set the points gap to the appropriate setting (in this case 15 thou/0.015″). * As with the plug gap the feeler blade should be a snug fit between the two contacts. Once adjusted correctly, fully tighten the fixing screw with a blade screwdriver. * The new rotor arm now pushes straight on the top of the centre spindle. Make sure that the cut out at the top lines up with dimple on the inside of the rotor arm to allow it to sit down fully. * Replace the distributor back into the engine, checking to see that it has gone ‘home’ firmly. Check this by attempting to turn rotor arm by hand; if resistance felt, then distributor is positioned correctly but if rotor arm turns then keep turning and within one revolution, the distributor should ‘click home’ another 1/8″ or so. * The distributor can now be lined up with the marks that were made earlier. * The 7/16″ clamp bolt can now be tightened slightly but not fully. * Place the new distributor cap alongside the old; either swop the ignition leads over or replace with new. Make sure that the new cap has the leads in exactly the same position as the old. * Replace distributor cap onto distributor and re-connect ignition leads. * Time the car as detailed in the next section. |
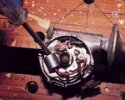
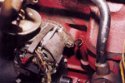 Slacken distributor clamp bolts.
|

Timing
* Locate and mark with Tipp-Ex the timing marks on the front pulley and front timing cover.
* Connect up the timing strobe.
* Disconnect the vacuum pipe to the distributor.
* Start engine and check the timing by pointing the strobe light at the bottom pulley. You will see that the timing mark on the front pulley appears to be stationary. This stationary mark will fall near to the timing marks on the front cover and indicates the timing figures.
* If adjustment is necessary then gently turn the distributor in the required direction (advancing = anticlockwise / retarding = clockwise) until the marks line up.
* Now stop the engine and tighten the 7/16″ clamp bolt.
* Start engine and do a final timing check.
* Stop engine and remove the timing strobe, returning the ignition leads back to standard fitting.
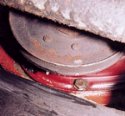 Timing marks need to be highlighted with white paint or Tipp-Ex. |
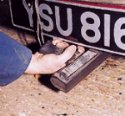 The strobe timing light will make the marks appear to stand still. |
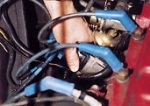 With distributor clamp bolt slackened off you can gradually rotate the body to advance or retard the timing. |
Tappet Adjustment
| * Using a 5/8″ ring spanner undo the 2 rocker box cover fixing bolts and remove cover. * Put car in gear (4th is usually easiest) and gently pull forward. * This will cause the valves to open and close. * Treat the engine as a mirror image of itself by mentally halving it at mid-point crossways i.e. there are 2 cylinders on either side of dissecting line. With this method when one valve is open, the other mirror image of that valve is the one to adjust i.e. when No.1 valve is fully open, No. 8 valve is rocking and therefore can be checked and adjusted if necessary. The same would applies throughout – when No.2 is open, No.7 is rocking and so on. * Check clearances by using feeler gauges. A snug fit is desirable. * If necessary to adjust the tappets, you will need a bladed screw driver and a 1/2″ ring spanner. Release the locking nut and with screw driver turn the screw to adjust the gap. Once the desired gap is obtained, still hold screw driver firmly and tighten the locking nut with your other hand. It is important that the adjusting screw remains in the same position whilst the locking nut is tightened. * Now re-check the tappet clearance and move on to the next one by pulling the car forwards. * Once completed, take car out of gear, replace rocker cover and tighten the nuts. |
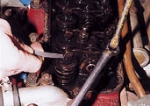 Take car not damage the cork gasket when removing the rocker cover. |
| Greasing * Jack up car onto axle stands and locate all greasing points. These are found on steering rack, prop shaft and front suspension. * Clean off grease nipples. * Using a grease gun pump 2/3 times, or until grease emerges from joint. |
 Ensure the grease nipples are clean before applying the grease gun. |
| Dash Pots * Check levels by removing the cap and damper. * Top up with oil as required. |
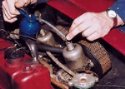 Topping up the dashpots with oil. |
Air Filters
* Remove each filter by undoing the 2 fixing bolts.
* Extract each element from the filter body and wash in petrol. (Note: If K&N air filters are fitted then do NOT wash in petrol but use the manufacturer’s cleaning fluid and oil).
* Tap the elements to remove any dirt still remaining; leave to dry.
* Cover element in engine oil (we used Castrol XL20/50) and allow to drain.
* Clean the rest of air filter body, check the gasket is in good condition or replace.
* Finally reassemble air filter and re-fit to car.